I’m just old enough that I remember the Christmas Wish Book, that fat, glossy, full-color catalog – was it from Sears? – loaded with toys and other stuff to fuel my suburban childhood whining. Pawing through the pages and imagining the epic GI Joe battles and Lego creations was intoxicating. I’m guessing when my dad used the pages to light the fire Chirstmas morning, it was even more intoxicating for him. I was a vocal child.
As adults, we’ve given up toy catalogs and our imaginations are fueled by paver catalogs. Now we dream of epic barbecues as we flip through the books, picturing all those thousands of square feet in our own yards. Every catalog is jammed with walls, and I’m here to tell you that if you want a freestanding or seat wall built from segmental/interlocking block, I’m gonna talk you out of it.
Interlocking wall block definitions
Segmental Retaining Wall block (aka SRW block): these are manufactured blocks, designed to fit together using pins, lips, or adhesives (or some combination of these three). They interlock together, speeding up installation.
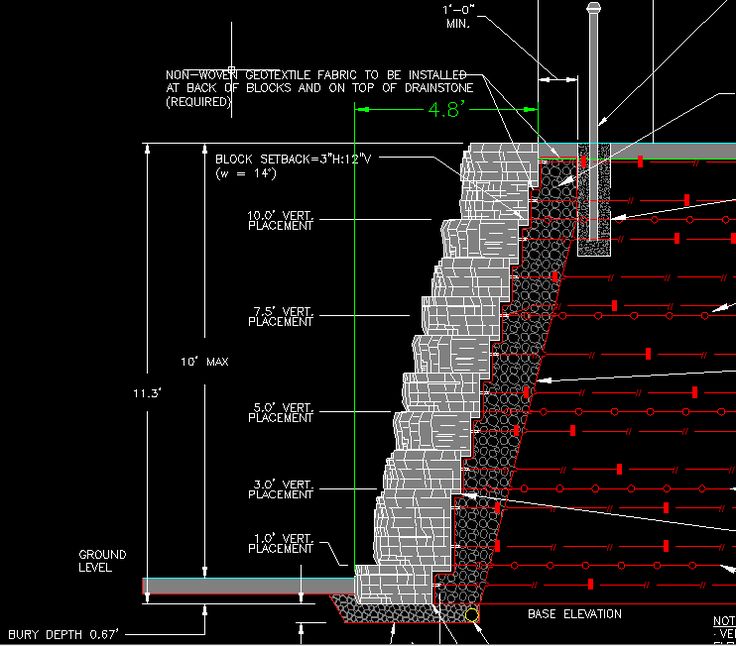
Retaining walls: these are walls built to retain soil behind them. One face is visible, the other face is buried under whatever the wall is holding back. With SRW block walls, we use geogrid – a plastic grid that comes in rolls – to tie the wall and the backfill together. Built properly, they’re structurally strong, even though the footers are relatively shallow compared to walls built of concrete block or poured concrete.
Freestanding walls (also seat walls): these walls are primarily decorative, although they can be used as seat walls if built to a height of approximately 18-22”. Block for freestanding walls has “good” faces on both sides. Generally the tops and bottoms are flat and smooth, and the walls are held together with adhesive.
The problems with interlocking block freestanding walls
Here’s why I don’t use SRW block for freestanding walls. I’m a firm believer that a good designer plans for the worst case scenario. There is just too much that can go wrong with a freestanding wall built from interlocking wall block. First, the whole point of these wall systems is that they can move a little with frost heaving and thawing. That’s why a seat height wall (18-22”) may only have one course of block buried. If the adhesive does its job and you have several people leaning against the wall – creating lateral pressure, a direction of force for which the wall isn’t designed – you have a big lever that wants to topple over.

Speaking of the adhesive, that’s the other reason I don’t like interlocking concrete block for seat walls. Yes, it’s a pretty hardcore adhesive that we use on SRW blocks. Yes, in perfect world situations, the adhesive is applied correctly to perfectly clean blocks that are perfectly sized. We don’t live in the real world. Maybe a couple of blocks are ⅛” out of true and we don’t get a good bond. Maybe the guys didn’t get all the dust off before squirting the glue. Heck, maybe we get a bad tube. Bottom line – the only thing holding that wall together, and keeping MY homeowners safe, is a generous squirt of adhesive. I’m not ok with that.
The best freestanding walls
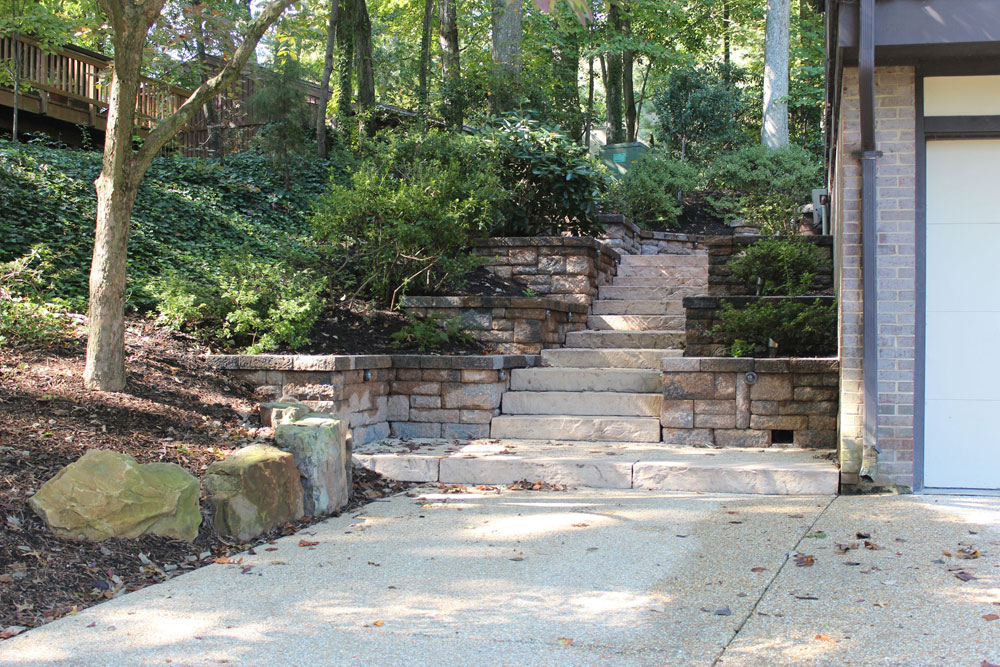
I think that if you want a freestanding masonry wall that will last for decades, old school is best. Here in Virginia that means digging down 24” and pouring an 8-10” thick concrete footer with rebar running horizontally through it. That means some of that rebar is bent vertically so we can slide concrete masonry units or CMUs (also called “cinderblocks” which – don’t, it’s wrong) over the rebar. We mortar the block together as we go, and then the cells are grouted (filled with a runny concrete mix). After that’s done, we apply whatever veneer is appropriate to the faces and mortar on a cap. The odds of failure are way, way lower with a properly constructed freestanding CMU wall than with a freestanding segmental wall.
Picking the wrong block for the job
The other danger with freestanding segmental walls is that if you hire the wrong contractor, things can go really badly. This job is around the corner from my house, and apparently their head rocket scientist took time off from working at NASA/JPL to put up this monstrosity on the property line as a fence:
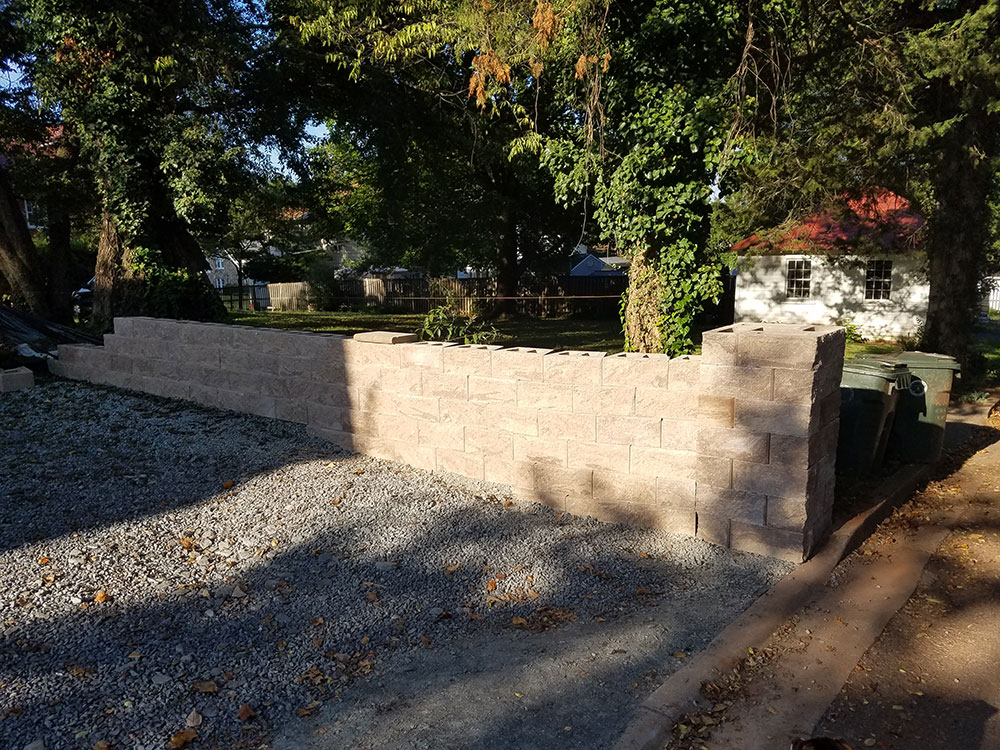
Now, this wall is hideously ugly. While that in itself is a mortal sin, they used the wrong type of block. Allow me to explain.
Remember when I said that freestanding wall block is flat and smooth, and retaining wall block sometimes uses lips? This block has lips. Lips are there to step each course of block back an inch behind the one under it. We call this “batter” and a wall with batter to it is typically stronger – as a retaining wall.
This is a freestanding wall, though. To keep that wall upright, everything should be in line with what’s above and below it. If each course steps back an inch, this wall is a good 5 inches out of plumb. If you’ve ever played Jenga you know what’s going to happen, and several thousand pounds of concrete wall block are going to hurt way more than Jenga slabs when gravity asserts itself.
Plus, retaining wall block usually only has one finished face. Look at what the neighbors get to look at, at least until the wall falls down:

I have to walk past this with the dog twice a day and it’s like nails on a chalkboard.
There is, however, one freestanding interlocking block kit I 100% support!

Do you want the security of knowing you’re getting the right wall for YOUR landscape project? That’s what we’re here for! Contact us today to learn more and schedule a consultation.
Our subdivision wants to build a freestanding perimiter wall. 12’000 ft, allan block, 12 ft sections, 6 ft high, 12 ft cast iron plate at the bottom, with concrete footings at each end, no mortar, with adhesive or no adhesive, no treatment, Cost 4 million dollars. Is this good or bad? Moisture problems? Any problems at all? This is under a GID adding another 4 million dollars to the project.
Without seeing drawings, the site, and understanding the goals of the project it’s hard for me to say good or bad.
This is a helpful article. Do you have any advice for inheriting a wall like the image you shared above? We have a freestanding wall that is made using incorrect blocks. Are we able to retrofit the wall and perhaps parge over it with cement to make it appear more aesthetically pleasing? We would like to not tear it down. Thanks for the help!
I definitely wouldn’t parge it. A segmental wall system is designed to move with freeze and thaw and other soil movement. A rigid material like a parge coat will crack pretty quickly. Beyond that, your options really depend on the wall block and how it was installed.