Are travertine paver patios slippery when wet?

Estimated reading time: 3 minutes

Virginia may not be that far south, but our summers do get crazy hot. It’s especially challenging for our clients building patios or pool decks with western exposure who want to be outside in the afternoon. Travertine is a great choice for a cool, light colored paving material, but our customers often worry: are travertine paver patios slippery when wet? 

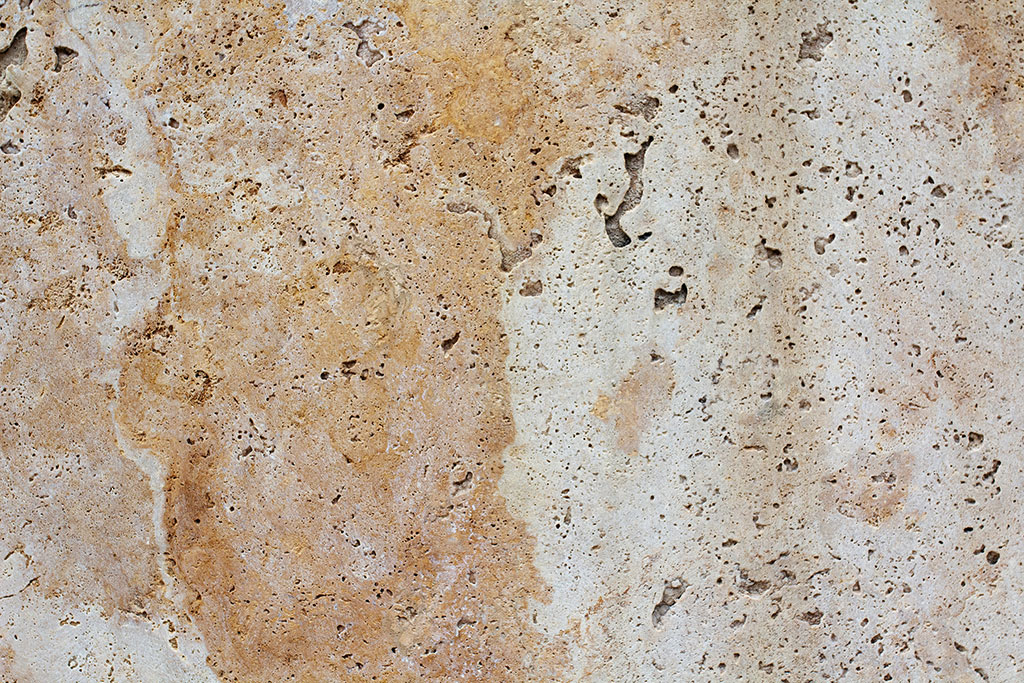
closeup of travertine

I like any question that can be answered using data and objective measures so I love this question! Many flooring or paving materials are tested to determine their coefficient of friction. The data we have for travertine pavers comes from the older ASTM-C1028 test, which gives us the static coefficient of friction (SCOF). 

According to the Tile Council of North America, “static friction (from which SCOF is determined) is the frictional resistance you push against when you start in motion. A slip occurs when you push off with more force than the surface can resist.” [source] The accepted standard for patio and pool deck surfacing material is a coefficient of friction of 0.60 or greater. 

walnut colored travertine paver patio in Culpeper VA

So does this mean travertine paver patios are slippery when wet or not? It depends. If you use honed or polished travertine, a little moisture is going to create an incredibly slippery surface. Antiqued and sandblasted travertine surfaces are safer. One of the travertine vendors we use is Marmiro Stone, in part because they make their testing data available. For example, we’re currently working on a patio using their antiqued Grano travertine. I can look in their catalog and see that it has a (dry) coefficient of friction of 0.76, which is definitely greater than the minimum recommendation of 0.60. 

Are travertine pavers slippery when wet? The bottom line

Antiqued travertine is a good choice for patios and pool decks. The color palette is much lighter than most flagstones and concrete pavers. There are colors that complement the rest of your home and landscape, whether you need warm or cool tones. And, most importantly, travertine pavers have a decent amount of “grip” so you can feel safe walking around. Just remember that I said walking. You’re still not allowed to run near the pool! 

Have you been trying to find a landscape company that researches their materials extensively and can talk nerdy to you? That’s us! Contact us today to set up a consultation and we’ll make your landscape the best on the block. 

2019’s Holiday Poem

‘Twas mere days before Christmas, but we hadn’t slowed down

We were digging and building, criss-crossing the town.

Not just us, oh no no, it’s everyone this year

For some reason it seems we’re all missing some cheer. 

Then into my inbox popped an unforeseen plea:

“It’s been quite a while but we’d like our new tree!” 

Oh please no, oh my gosh, was all I could think

I have not the time, nor the coffee to drink!


But I am that classical middle born child,

I just can’t say no (I’m so tender! So mild!)

So I said, with a sigh, let me get crackin’

And I’ll see what my magical elves can make happen. 

The actual tree! (Nursery elf not included)

The tree that they wanted was a large Norway spruce,

So big and so wide it could swallow a moose.

I got out my pad and made marks like a mystic

Until I had figured out all the delivery logistics. 


We got that tree there, and as I watched him review it

My client reminded me just why we all do it.

“I love it! It’s huge! So much more than I knew!

I need to go buy more lights, not just one strand or two!


We’re new in this house and our family will be here,

This tree all lit up will give them ALL holiday cheer!”

I’ve been sort of a humbug, I’m not proud to say

But my heart might have grown three sizes that day. 


As we rolled down the road, the smell of mulch in the air,

In my mirror was a tree that needed neither partridge, nor pear. 

Our happy homeowner, so full of delight

Was already starting to wrap it with lights. 

I crested the hill and of the tree I lost sight,

But I heard him call out “Happy Holidays to all, and to all a good night!”

From all of us here at Revolutionary Gardens, thanks for being part of our family. Have a wonderful holiday season and a Happy New Year!

Hidden landscape gems in Culpeper

There’s a lot to love about Culpeper. Our downtown has terrific shops and restaurants and a great little museum. Speaking of the museum, every year they organize a day where families can get up close and personal with preserved dinosaur tracks right here in the county. We have the Library of Congress film archives and a state of the art soapbox derby track. Most importantly, however (in my opinion), are some of our kinda-secret landscape and garden spots! 

Old House Vineyards

Now I’ll admit that I’m biased, because we are responsible for pretty much all of the landscape design that’s happened out at Old House Vineyards. That doesn’t change the fact that there’s a lot of cool stuff out there for plant lovers. If you visit, you can see several varieties of boxwood and hydrangeas, full shade gardens, full sun gardens, wet soil gardens, and more. MJ and I got married at a gorgeous farm in Vermont, and I’ve tried to capture some of that magic with the plantings. 

Looking at plants is fun, but what if you want to know what you’re looking at? We’re working on getting our catalogue of plants at Old House Vineyards updated and complete on Plantsmap. What’s Plantsmap? You can learn a little about it here, and you can see the collection here. Bring your phone or tablet and explore (but remember that it *is* a business, so do the right thing and buy something if you go!)

The sports complex at Eastern View High School

Since we don’t have kids I never knew what was out there at the sports complex. Then last year I learned about the Bright Spot Park, a fully accessible playground that the county was building out there. Through our work at Old House Vineyards I knew John Barrett, the director of the county parks and rec department, so I gave him a call and offered to donate the landscaping. Getting involved in that project led me to learn more about other projects at the sports complex. 

Bright Spot Park – Like I said, I designed and donated the landscaping. The county has made a big push to start integrating more native plants in their various sites, so I made natives a key part of the design. 

The five senses garden – A few hundred yards from the playground sits a five senses garden. Several years ago some volunteers got together to create this garden. Because this was a 100% volunteer garden it’s not managed by the county, so it fell into a little disrepair when the original volunteers moved on to other things. Last year a local Girl Scout troop decided to rehab the garden as their service project. I helped with plant selection and got them going, which was a blast. It could use a little help this year, so if you’re interested let me know and I’ll connect you with the right people. 

Labyrinth – Next door to the five senses garden is a labyrinth. For those who don’t know, a labyrinth is not a maze. Rather, it’s a path that one follows from the outside to the center, allowing the user to meditate and ponder as they make their way to the middle. Mike Skelton, a facilities manager with parks and rec, did a fabulous job (and showed how you can create something very cool without spending hardly any money). 

Turf trials – This one blew me away. I’m not a lawn/turfgrass person, so I suppose I just took that part of what the parks and rec crew does for granted. They’ve created test plots for [QUANTITY] different types of grass to see what varieties will do well. If you want some ideas for what to use at your property, check it out! 

Pollinator garden at Yowell Meadow Park

While I wasn’t involved in this garden, I get to enjoy it when we walk landscape dawg and landscape dawg deux through Yowell Meadow Park. The Star Exponent has a good writeup about it here. The garden is one more example of how our little community values nature, and it’s another wonderful resource for homeowners looking for inspiration. 

I feel like our adopted hometown is doing a lot of things right when it comes to plants and gardens. If you’re a fellow plant nerd, check out my suggestions above, and let me know about anything I should see!

Don’t make these 3 hardscape mistakes

Estimated reading time: 4 minutes

Some hardscape mistakes are minor. The summer picnic equivalent might be putting too little salt in your potato salad. Others are major. Those are the equivalent of using pureed Spam in your cherry pie. Whatever you do, avoid Spam in your pie and avoid these hardscape mistakes.

Built-in firepit seating

As it is, I’m not a fan of built-in firepits. They take up a lot of patio space, which means that part of the patio only has one function, and they suck up a lot of the budget for what they bring to the party. But fine, if you have to have a built-in firepit, DO NOT compound the problem with built-in seat walls/benches. 

Paver catalogs are filled with pics of built-in seating, because paver manufacturers want to sell product. The problem with these “features” is that they ignore the #1 rule of firepits: getting the perfect temperature for more than 10 minutes is all but impossible. Every time we use our firepit, MJ and I spend the evening scooting our chairs closer and farther away, over and over. What do you do with a built-in bench? Climb up the back and perch there like Christopher Walken in The Prophecy?

I don’t get the appeal. There are way cooler ways to use your budget. 

Cheap corners on stonework

We all have our pet peeves. My big one is poorly done corners on stonework, specifically walls, columns, firepits, etc. built with a thin veneer stone. If we’re using a veneer stone, we’re attempting to create the look of a solid stone feature without the expense or labor involved with dressing and laying full building stones. When using building stone, your corners look like this:

When using thin veneer stone, they’re all flat pieces. Inexperienced and/or discount masons will lay their corners like this, which kills the illusion of real masonry work:

How do we avoid this? If we’re using thin stone veneer on a project, we buy matching corners from the vendor. They make a pair of cuts in the stone at 90 degrees to one another, giving us this:

[veneer corner]

When used properly, the corners give the illusion that the stone we used was full thickness building stone, not some lick and stick flat thing. It costs a little more than just overlapping flats, but you can’t argue with the end result:

Thin flagstone as caps and treads

The least expensive flagstone squares and rectangles are around an inch thick and have sawn edges. They’re perfect for creating patios and walks. They’re not perfect for applications where you see the edge, like column caps or step treads. The scale is just all wrong:

Instead, we use 2” thick flagstone (or thicker) for these applications, with either a thermal edge or a chiseled edge. It looks better, and it also holds up significantly better over time. 

To some, these may seem like petty issues. To me, they’re the small details that can make or break a project. A few years ago I explained the issue of corners on stone veneer to a client who hired us for a retaining wall. Several weeks later she said to me, “now that I know that about the corners I see them everywhere and you’re right, they look CHEAP!” Once you know, there’s no going back. 

I built this! My Brickwood Ovens Mattone Barile Grande review

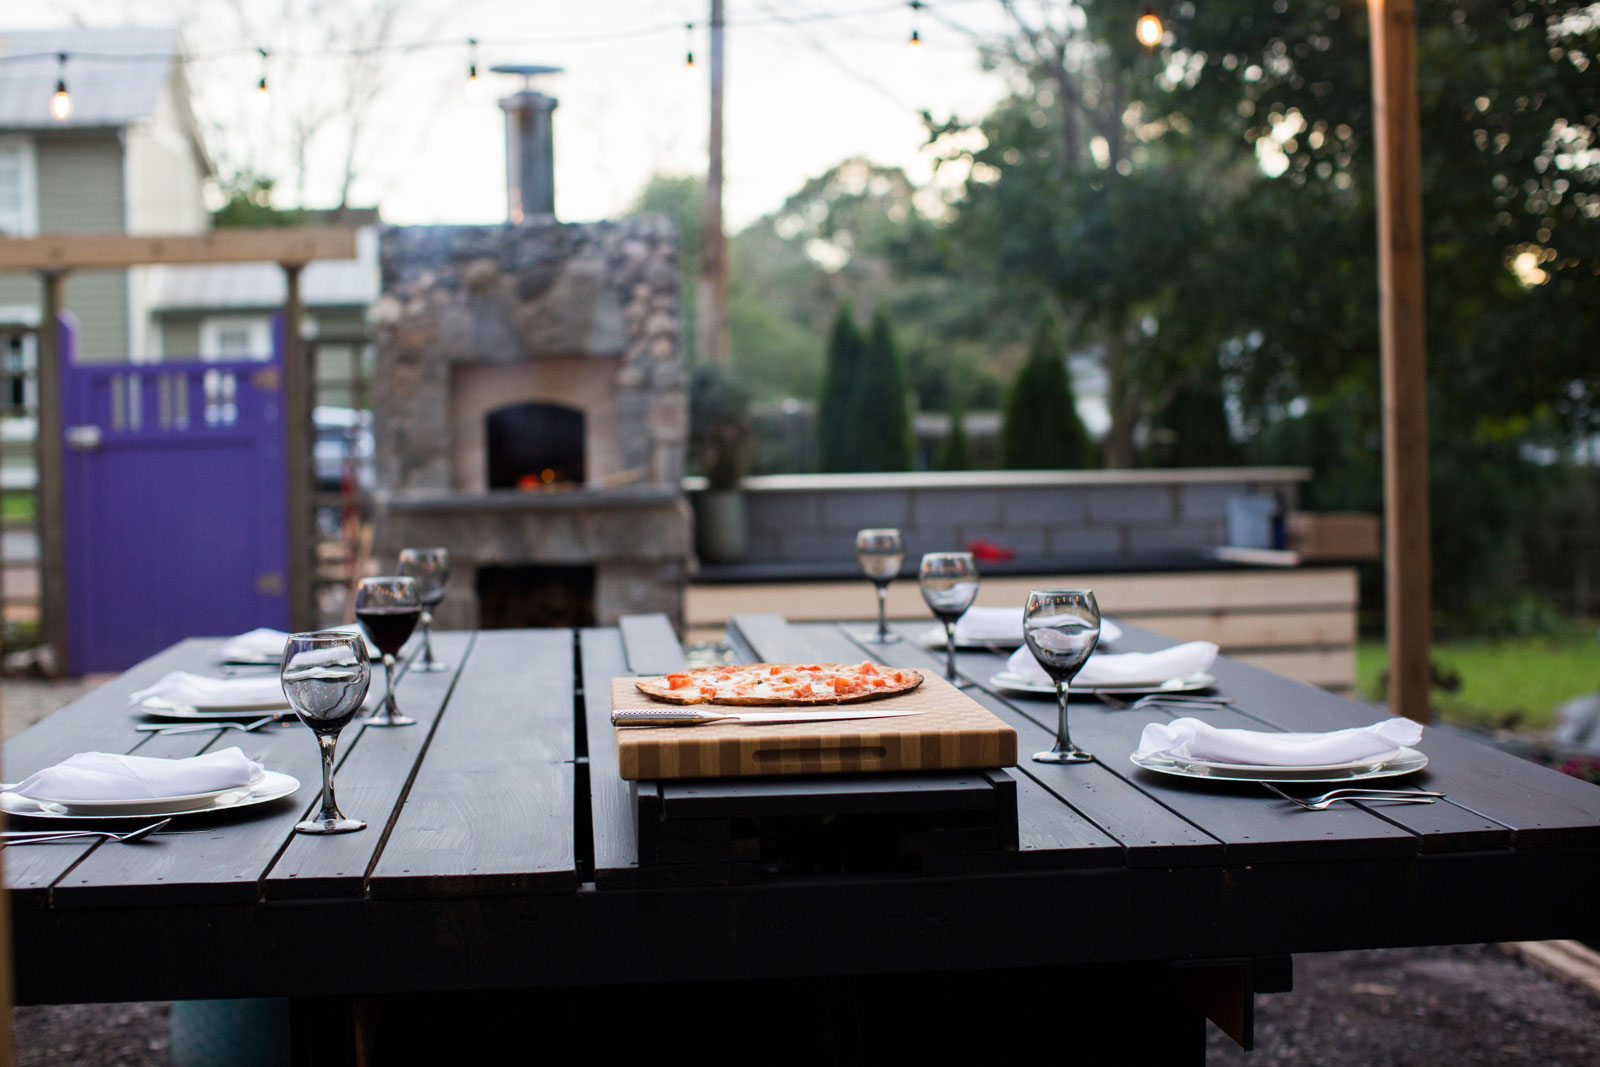
outdoor water feature dining table

For years, I’d been talking about building a pizza oven in my backyard. At one point I found plans online for how to build a dome-shaped oven the old-fashioned way, a brick at a time, and that was my plan. Many years later that still had not happened, because honestly? It was a little intimidating.

In the meantime, my brother had built a pizza oven using a kit from Brickwood Ovens. He sold that house, and built another Brickwood Oven at his new home.

I told you that I’d been dragging my feet for a long time!

So finally he said “Dave, why don’t you just order what you need from them, and get the damn thing built?” I looked at the available kits, and then did a bunch of research on which oven shape I’d actually want . Part of why I had wanted to build a dome was for the challenge, but that wasn’t necessarily the right shape for my needs. The eventual goal was to roast all the things, which made a rectangular vaulted oven a better choice.

Which Brickwood Oven was right for me?

I knew that I still wanted a brick oven, so one that was cast from refractory cement – even if I did it myself – wasn’t an option. That left me with a choice between the Mattone Barile, and the Mattone Barile Grande. Spinal Tap’s amplifiers are better because they go to 11, so naturally I went with the Mattone Barile Grande. I downloaded the PDF instructions and started designing.

The Mattone Barile Grande sits on a steel-reinforced concrete slab. The first thing I needed to do was work out how much bigger to make the slab. As designed, the oven’s legs are narrower than the oven. I wanted the sides of my oven to be straight up, in a single plane.

Built per the instructions, the Mattone Barile Grande’s shape is visible in the end product, clad in stucco or a stone or brick veneer. Again, I knew I wanted something with a little more visual heft, closing in all but the oven’s opening.

Shopping for my Brickwood Oven

One of the things I like about Brickwood Ovens is that they’ll sell you whatever you want, but they encourage you to source a lot of things locally to save money. From them, I ordered the foam form, the chimney, and the ceramic insulating blanket. All the masonry supplies were sourced locally.

The Brickwood Ovens website states that the average cost to build the base is $450, and the average cost to build the finished oven is $950. I certainly obliterated those targets, but I imagine that if you stuck close to a stock build you could come within 10-20% of those numbers. Even at that, you’re not getting a drop-in kit for anything close, so…. As long as exceeding $1400 by a bit doesn’t mean you’re eating ramen for six months, it’s still worth it.

Most of the items I needed for the base were easy to get. I run a landscape company in a farm town, after all. I got the 4 cubic foot bag of vermiculite at my local feed store. For the record, it did NOT take 4 cubic feet! I ended up using it as extra insulation on top of my oven, though, so that worked out.

Shopping for the actual oven components was a little trickier. They recommend mixing your own refractory mortar to save money, and they give you a shopping list. I had a huge problem with finding 50 lb bags of fire clay. I can only assume it’s a government thing, but no masonry suppliers within 100 miles carry it. They all said that they used to, but no longer can. I ended up ordering it through a pottery supply company 90 minutes away, and drove there so as not to pay to ship 100 lbs of dust.

Portland cement and hydrated lime were easy to get. Apparently silica sand isn’t sold at masonry supply yards here in VA (it was on the west coast), but the local pool supply had it.

I hate the look of yellow fire brick, so I was happy that my local supplier only carries red.

The build

The instructions call for building the oven’s base as a slab at grade. I somehow missed that, and dug a footer at frost depth (24 inches), and blocked up from there. Whoops.

Also, because I wanted a different shape to my oven, my first two courses were a double a row of 8x8x16 cmu, stepping in to 12” block. This was to create a base for my veneer to rest on. After that first course of 12” block, I switched to the 8” block laid per the instructions, surrounded by 4” block to get the width I wanted. I also deviated from the instructions by building a wall parallel with the back wall, 24” from the opening of the wood box. I know myself well enough to know that any wood farther back from there would live there forever. I sure wasn’t going to get it. It also gave me a handy repository for masonry scraps from other projects!

After the base went up I dragged my feet on forming and pouring the floor of the oven. To make it easier to set in place, the oven floor is formed and poured in three separate pieces. Because I didn’t have a hard, level surface like a driveway or concrete patio, I was worried about the forms not being level. That was definitely an issue, and caused some funkiness in the oven floor. It didn’t affect the oven’s functionality, but it led to a lot of cursing as I set and leveled the three slabs.

Using a mini skidsteer with pallet forks, I set the oven floor by myself. Even with a helper or six, I can’t imagine doing this without mechanized equipment. It only took me about an hour to pop the forms off and set the oven floor, which was way better than I expected.

Making the insulating layer of Portland cement and vermiculite was dead simple. Mortaring in the brick frame around the oven floor wasn’t hard, but it did make very clear that I had issues with the forms.

Because I didn’t want to get a load of sand dropped off, I bought Quikrete All-Purpose Sand from Lowes. All I can say about that is SCREW YOU LOWES. For every bag I bought that was actual, coarse, all purpose sand, I ended up with three that were the finest grains of silica sand I’ve ever seen. So while the instructions say to use 60 lb bags of all purpose sand, don’t. If you HAVE to get it from one of the big box hardware stores, get their paver sand from the garden center instead.

Laying in the herringbone brick floor was actually fun. Right up until I turned my head to look at the dog as I was swinging the mallet, nailed my thumb, and ended up at the ER. Don’t look at the dog, y’all.

Once I got the styrofoam form in place and started laying fire brick, it went surprisingly fast. It turns out I used way too much mortar, because some squished out and is visible inside my oven, but that’s ok. A word of advice: the instructions say to soak the firebrick before cutting it. Soak the fire brick. Soak it for HOURS. I rented a gas powered brick saw and it bogged down a little with dry fire brick, but ripped through the soaked brick like butter. Also, do wear a dust mask when cutting fire brick, or you’ll spend the evening coughing like a 6 pack a day smoker running a half marathon.

Once the brickwork was done and had dried, I applied the ceramic insulation and fixed it together with the chicken wire. The first coat of stucco was a little frustrating, and I used way more than planned. The following day, the masonry supply yard was closed so I had to buy finish stucco mix from Lowes. Holy crap, you guys. It was like frosting a cake, it was so easy! It buffed up to a nice, smooth finish, too.

You know what the worst part of this build was? Getting the styrofoam form out. Now like I said, I had a good bit of excess mortar squish through so I’m sure that helped lock the form in place. Even at that, though, you are more likely to lift Mjolnar when Thor isn’t looking than you are to get the form out in fewer than 1000 pieces. Removing the form was when I had my first worries that I had selected too large of an oven. At 6’4, 300 pounds, I am not a small guy, and I was able to crawl into the oven almost to my waist to get the last of the styrofoam.

With a photo shoot looming, I cheated on the next part and paid my guys to build the blockwork surrounding the oven itself, parge everything, install the granite front, and lay the flat stone veneer. So that part went pretty well! I laid in the river rock inlay, and we had the photo shoot.

culpeper landscape design pizza oven

Cooking with the Mattone Barile Grande from Brickwood Ovens

It’s essential to cure the oven slowly, over a period of about a week, to drive the moisture out of the oven. If you don’t, the oven will crack. This was a frustrating process because I’m not a patient person, but I did it. I should note that my oven hasn’t cracked, so… worth it!

outdoor water feature dining table

Knowing that there would be a learning curve to cooking with the Mattone Barile Grande, we opted to make a pretty basic pizza dough, and picked up passata and grocery store mozzerella. There was no sense getting fancy ingredients just to potentially destroy them.

MJ bought me an infra red thermometer gun for my birthday. I highly recommend getting one, as it was a great way to learn what parts of the oven heated up first, what held heat, and how quickly portions cooled as I moved the fire around.

I got impatient and threw the first pizza in at about the one hour mark. Way too soon.

The sweet spot seemed to hit at around 2.5 hours. I was getting consistent readings of 900 degrees and higher, and the pizza cooked up beautifully. My guess is things would’ve been amazing at the 3 hour mark, but at that point the outside temp had dropped into the 30s and this wasn’t as much fun any more. Six years in Phoenix made me soft, what do you want?

Final thoughts

Was it worth building a Brickwood Ovens pizza oven? I’d say, resoundingly, heck yeah! There were some pluses and minuses though.

I felt like the styrofoam form from Brickwood Ovens was fairly priced, and made the build pretty easy. Honestly, I wouldn’t have saved much money had I built a form myself out of plywood, and this was way simpler. The company was easy to deal with, and while I don’t love that they only offer email support, as the owner of a small company myself I totally get it. There are only so many hours in a day.

The plans for the oven were easy to follow. There were a couple of things that were ambiguous, but I either emailed Brickwood, figured it out on my own, or winged it and it all worked out ok.

As mentioned above, I think the cost estimates were optimistic. And you definitely rip through some firewood in the course of heating the oven for pizzas. Obviously a smaller oven will require less wood, so there’s a tradeoff. And I still need to get a door made.

Brickwood Ovens kits are great for DIYers, no question. If you’re even moderately handy you can build a pizza oven for a lot less than the cost of one of those drop-in kits. I think if you want to have one built for you, you’ll need to be smart to keep it cost effective. From a design-build company perspective, our challenge is the number of steps where you do something, then walk away for 3-5 days. For an independent mason working alone or with a helper, I think this would be a great project that they could execute at a very fair price for the homeowner, working in other small jobs during the waiting phases. Because it costs us a good bit of money every time we pull on and off a jobsite, we could really only build a Brickwood Oven cost effectively if it was part of a larger project, and we could bounce to other parts of the yard during the “let it wait” stages.

If you’re hardcore and you want to build a Brickwood Oven yourself? Go to their site and start shopping! Keep in mind that if you want to do the fun stuff (the oven), we can do the boring stuff like the footer, the blockwork for the base, etc. And if you want us to do the whole thing, contact us today! Great pizza starts at home.


Can I plant a tree where I had a tree stump ground out?

Especially after damaging storms, I have people asking me if they can plant a new tree right where the old one used to be. “What did they do with the stump?” I’ll ask, and invariably they’ll tell me “we had them grind it out so it’s all gone.”

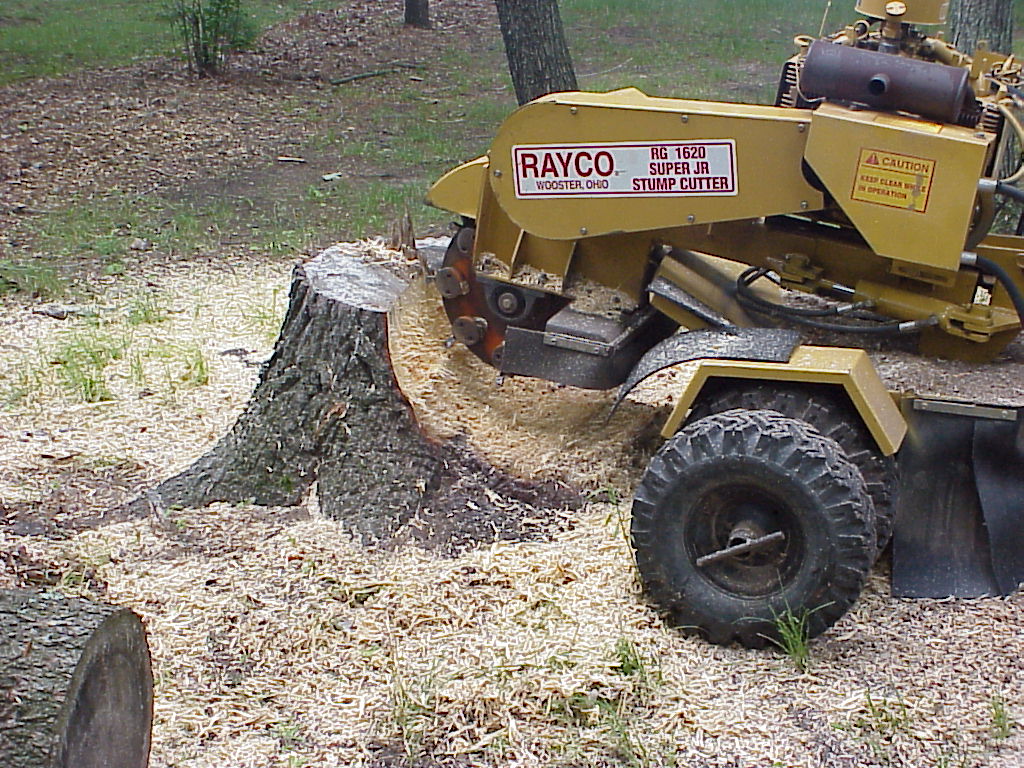
Generally speaking, when your tree service grinds a stump, they’re grinding down the large mass right at the base of the tree. More than likely, they’re going down about 12 inches. If it’s a smaller tree stump, that might be enough to get most of it. On bigger trees? You probably now have a polished wooden salad bowl a foot below the surface.

The problems with trees planted over ground stumps

Obviously, having that large mass of wood underneath your new tree is bad. It’s going to prevent your new roots from getting established. It’s also going to create a trap for water, potentially rotting out your new tree.

Stump grinding generally does not include removing all the roots that radiate out from the stump. Since roots can extend past the dripline of the tree, this leaves you with a lot of problem roots that can take years to decompose.

When a stump is ground, a lot of wood chips are created. Wood chips mixed into the soil create an environment that’s about as inhospitable for your new tree as you could get.

The right way to plant where a tree used to be

If budget is an issue, or if we can’t get mechanized equipment into the site, I’ll usually recommend planting your new tree far enough from the old one so it doesn’t conflict with the roots or any stump remnants. If it was a small stump and we’re pretty confident it was gone, we still recommend removing the mix of wood chips and soil from the hole and replacing with fresh, clean topsoil.

planting in this would be a bad idea!

In a perfect world, we bring in a machine that can pull what remains of the tree stump. A skid steer works really for removing the large surface roots, and then we can regrade the area and plant. Creating a good planting environment = healthy trees!

Looking for help with your landscape planting project? Contact us today!

“Why can’t you work in the rain?”

As someone with the double whammy of being a middle child AND a Libra, I’m the ultimate people pleaser. That becomes really tricky this time of year, when everyone wants their landscape project done yesterday and we’re booking several weeks out. Spring weather in Virginia tends to not cooperate with us, with April showers (and March showers, and May showers) pushing our schedules farther and farther back. Inevitably, one of our clients asks us why we can’t just push through and work in the rain.

not an example of landscape peeps in the rain!

Well, as sweet as we are, we don’t melt. That’s not the issue. And it’s not that we don’t like making money, either. There are practical reasons why working in the rain isn’t usually a great idea.

1. Have you SEEN what our soil looks like?

Virginia clay is great for a lot of things. It’s no accident that Colonial Williamsburg has a ton of clay brick buildings. Those same properties that make our soil hold together well enough to make bricks, also make it a huge problem to work with when wet. You can’t grade wet clay mud. If you dig a hole in heavy rains it’s just going to fill with water and take forever to drain.

If we’re planting and we backfill the planting holes with big clumps, we’ll get a lot of gaps which can be bad for the plants (a light rain, though, is awesome for planting. Just FYI). And every step we take on bare soil will leave a crater that we can’t get rid of till everything dries out. Which leads us to…

2. Cleanup and repair

Several years ago, we had a planting job scheduled. The nursery I was working with had a policy of no rain days, ever. They always showed up when scheduled and did the work. Aaaaand then a hurricane showed up. Since we were far enough inland that winds weren’t a safety issue, they sent the crew. That job is why I keep a pair of dry socks in my car.

Just from wheelbarrowing material back and forth from the driveway to the rear of the property, we obliterated a whole section of the lawn and had to resod it. The mulch was too wet to get it smooth, so we had to go back and fix it. We also had to go back with a pressure washer to clean off the driveway and the street. Was it worth not having to push everything back a day? I’m going to say no.

3. Working in the rain sucks

There’s a Ray Bradbury story called “The Long Rain,” about a group of soldiers who crash on Venus, a planet where it’s always raining. Bradbury does an excellent job of describing the bleak misery that is constantly getting rained on. While our crew doesn’t have it quite that bad, it’s no picnic. Everything takes longer, rain gear is awkward and uncomfortable to work in, and Virginia seems to offer two options of rainy working conditions: hot steamy gross rain, and cold rain. Happy, productive workers build better landscapes. That’s a FACT.

“what do you mean, 90% chance of showers?”

So if you’re all excited about seeing your new patio take shape, but we’re not there because it’s pouring down buckets, just remember this:


The sun will come out tomorrow

Bet your bottom dollar that

Tomorrow

There’ll be sun!*


* = this does not constitute a binding guarantee of sun tomorrow. Or the next day. Sometimes Virginia just kinda hates us

Fixing rootbound plants

A couple of years ago, one of my clients asked me to plant a couple of Japanese maples in containers for their pool area. We did, the trees grew well, and everyone was happy.

Last year, my client mentioned that while one Japanese maple looked great, the other one was looking pretty sad. I checked it out and it was definitely stressed for some reason. It didn’t take long to notice the problem. Girdling roots were starting to strangle the tree.

fixing rootbound plants before

When we plant trees and shrubs, we want their roots to spread out horizontally through the soil. It’s how plants want to grow, so when the roots don’t (or can’t) spread laterally, we have problems. In this case, part of the problem was due to the fact that we have a tree in a medium-sized pot. Girdling/circling roots are going to happen, unless we periodically pull the plant and do some root pruning.

The real problem, however, is how this plant came from the nursery. Looking at that photo it’s clear that the tree was purchased with root problems already starting. Because these Japanese maples came from a well regarded, higher end nursery, we didn’t look too closely at them.

Fixing rootbound plants

So what did we do? Did we toss this tree and replace it? Heck no! I pulled the tree out of the pot and dropped it into a muck tub full of water (the cashier at the co-op was horrified that I, a large male in a southern town, bought a neon pink tub, but that’s a story for another day). After a few hours I set to work. Fibrous roots had made a full lap around the circumference of the pot so they had to go first. Grabbing the hose, I then alternated between rinsing soil away from the roots, and cutting roots so I could reach deeper into the rootball.

I’m kicking myself for not taking pics of what I found, because there were roots as big around as my finger that had looped back towards the plant. All in all it was a long, drawn out process that’s going to result in a much happier tree. I rootwashed and pruned the other tree while i was at it, but it was much easier to deal with. I didn’t have time to document the whole process, but I did document the process of rootwashing and pruning a hydrangea. Here’s that video.

The takeaway here is that this problem could have been avoided by more closely inspecting the plant material. Honestly, that tree should have been rejected and a different one used. Container grown plants are a little more susceptible to circling/girdling roots so look very closely at those. Also, for whatever reason, Japanese maples also seem to be a little more problematic than other plants. I bought an end of season, scratch and dent Japanese maple for my yard in November and that little 7 gallon tree took a LOT of root correcting.

Look carefully at your plants. The life you save will be green and so, so pretty.

Spring’s almost here. Let’s plant something cool.

What we’re working on now

It’s official: spring is coming, and everyone wants cool stuff now. Here are a few current Revolutionary Gardens projects:

1. A flagstone front walk in Herndon, VA

I’m super proud of this one. Before:

And, after:

2. New pergola and landscape in Warrenton, VA

The clients wanted some shade for a patio that was part of an absolutely gorgeous kitchen remodel.

3. Brewery landscape design in Culpeper, VA

The interior is going to be gorgeous, so we need to have a landscape design to match.

It looks like I’ll get to do my first labyrinth, which is AWESOME!

2018 is shaping up to be a lot of fun, with some amazing projects in the works. Contact us soon to get on the schedule!

Early spring plants to banish winter

In February 2018 I have grilled out while wearing shorts and flip flops, and I’ve chiseled ice off the cars at 5:30 am. I’m more than a little bit done with winter. The good news is that spring is right around the corner (though it may be just the other side of a snowstorm), and there are some early blooming plants that can make your winter blahs go away.

Winter Jasmine

Probably the first shrub to start blooming in our area is Winter Jasmine (Jasminum nudiflorum). If you’re seeing a low-growing shrub with pale yellow flowers this early, it’s probably Winter Jasmine.

Considered a groundcover shrub, it can still grow to 3-4 feet tall and wide. They’re pretty durable, and I like them as a harbinger of spring. If you’ve waxed poetic over the forsythia blooms in northern Virginia in February, odds are you got goopy over Winter Jasmine instead.

Forsythia

If someone asked me to describe forsythia’s growth habit I’d have to go with “exuberant”. It’s a fast grower that flops all over and spreads out easily to anywhere from 6 ft x 6 ft to 9 ft x 9 ft.

The thing with forsythia is that it really does look best when allowed to look natural and wild. One of my neighbors hacks his into rectangles every year. What’s amazing about that is the fact that when the bloom, they look like someone who lives in a pineapple under the sea…

Lenten Rose

When clients tell me something along the lines of “I want an early blooming flower that looks best right next to a path” I steer them towards Lenten Rose (Helleborus spp.). They come in some absolutely stunning colors, and they’re actually sort of subtle.

Subtle’s not generally my thing, but early spring subtle is the calm before the storm of my perennial selections.

Creeping phlox

My old boss didn’t like creeping phlox (Phlox subulata). He felt that it had such a short bloom window, and brought so little to the party when it wasn’t blooming, that it wasn’t worth having. In its defense, I give you Exhibit A:

Is creeping phlox dull as dirt when not in bloom? Yep. Does a carpet of luscious blooms put a smile on your face and pep in your step? So long as your heart isn’t two sizes too small, heck yeah!

If you’re ready to shake off the winter doldrums, you should contact us today and get your landscape planning started, Spring is SO CLOSE!!!