For years, I’d been talking about building a pizza oven in my backyard. At one point I found plans online for how to build a dome-shaped oven the old-fashioned way, a brick at a time, and that was my plan. Many years later that still had not happened, because honestly? It was a little intimidating.
In the meantime, my brother had built a pizza oven using a kit from Brickwood Ovens. He sold that house, and built another Brickwood Oven at his new home.
I told you that I’d been dragging my feet for a long time!

So finally he said “Dave, why don’t you just order what you need from them, and get the damn thing built?” I looked at the available kits, and then did a bunch of research on which oven shape I’d actually want . Part of why I had wanted to build a dome was for the challenge, but that wasn’t necessarily the right shape for my needs. The eventual goal was to roast all the things, which made a rectangular vaulted oven a better choice.
Which Brickwood Oven was right for me?
I knew that I still wanted a brick oven, so one that was cast from refractory cement – even if I did it myself – wasn’t an option. That left me with a choice between the Mattone Barile, and the Mattone Barile Grande. Spinal Tap’s amplifiers are better because they go to 11, so naturally I went with the Mattone Barile Grande. I downloaded the PDF instructions and started designing.
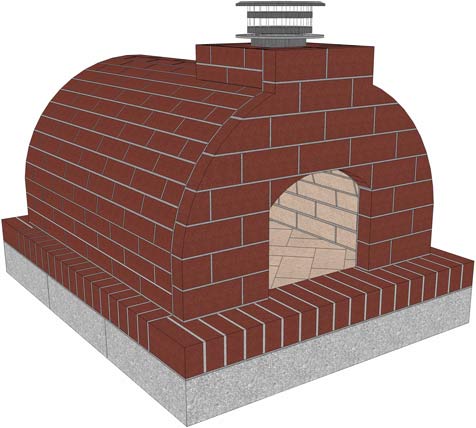
The Mattone Barile Grande sits on a steel-reinforced concrete slab. The first thing I needed to do was work out how much bigger to make the slab. As designed, the oven’s legs are narrower than the oven. I wanted the sides of my oven to be straight up, in a single plane.
Built per the instructions, the Mattone Barile Grande’s shape is visible in the end product, clad in stucco or a stone or brick veneer. Again, I knew I wanted something with a little more visual heft, closing in all but the oven’s opening.
Shopping for my Brickwood Oven
One of the things I like about Brickwood Ovens is that they’ll sell you whatever you want, but they encourage you to source a lot of things locally to save money. From them, I ordered the foam form, the chimney, and the ceramic insulating blanket. All the masonry supplies were sourced locally.
The Brickwood Ovens website states that the average cost to build the base is $450, and the average cost to build the finished oven is $950. I certainly obliterated those targets, but I imagine that if you stuck close to a stock build you could come within 10-20% of those numbers. Even at that, you’re not getting a drop-in kit for anything close, so…. As long as exceeding $1400 by a bit doesn’t mean you’re eating ramen for six months, it’s still worth it.
Most of the items I needed for the base were easy to get. I run a landscape company in a farm town, after all. I got the 4 cubic foot bag of vermiculite at my local feed store. For the record, it did NOT take 4 cubic feet! I ended up using it as extra insulation on top of my oven, though, so that worked out.
Shopping for the actual oven components was a little trickier. They recommend mixing your own refractory mortar to save money, and they give you a shopping list. I had a huge problem with finding 50 lb bags of fire clay. I can only assume it’s a government thing, but no masonry suppliers within 100 miles carry it. They all said that they used to, but no longer can. I ended up ordering it through a pottery supply company 90 minutes away, and drove there so as not to pay to ship 100 lbs of dust.
Portland cement and hydrated lime were easy to get. Apparently silica sand isn’t sold at masonry supply yards here in VA (it was on the west coast), but the local pool supply had it.
I hate the look of yellow fire brick, so I was happy that my local supplier only carries red.
The build
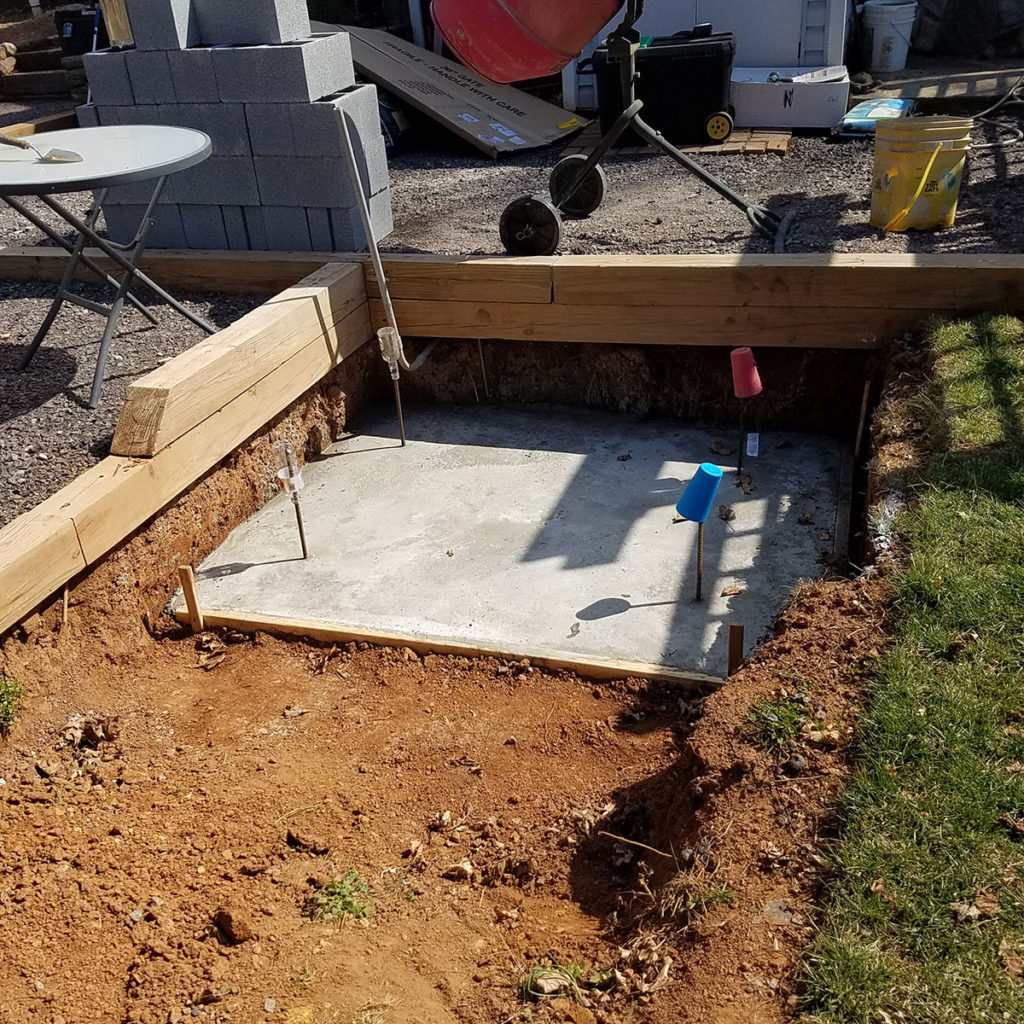
The instructions call for building the oven’s base as a slab at grade. I somehow missed that, and dug a footer at frost depth (24 inches), and blocked up from there. Whoops.
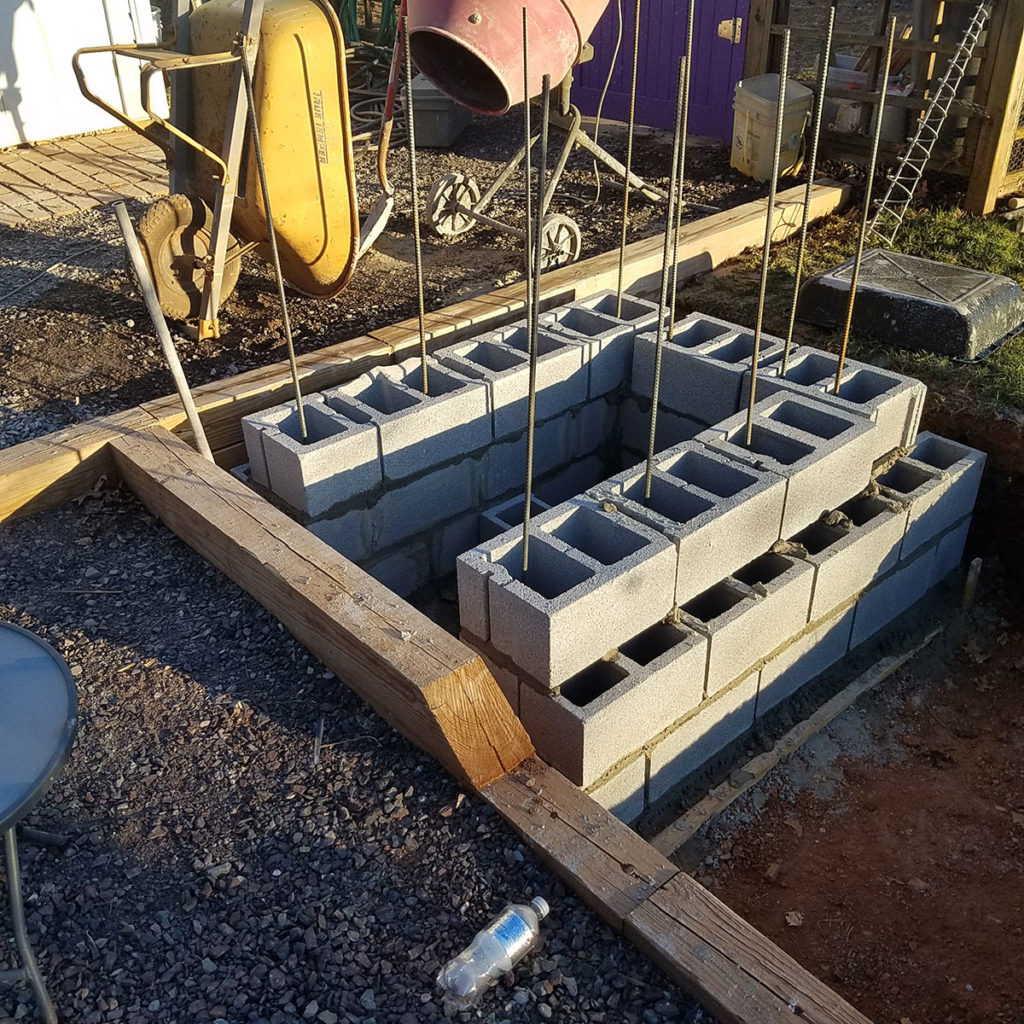
Also, because I wanted a different shape to my oven, my first two courses were a double a row of 8x8x16 cmu, stepping in to 12” block. This was to create a base for my veneer to rest on. After that first course of 12” block, I switched to the 8” block laid per the instructions, surrounded by 4” block to get the width I wanted. I also deviated from the instructions by building a wall parallel with the back wall, 24” from the opening of the wood box. I know myself well enough to know that any wood farther back from there would live there forever. I sure wasn’t going to get it. It also gave me a handy repository for masonry scraps from other projects!
After the base went up I dragged my feet on forming and pouring the floor of the oven. To make it easier to set in place, the oven floor is formed and poured in three separate pieces. Because I didn’t have a hard, level surface like a driveway or concrete patio, I was worried about the forms not being level. That was definitely an issue, and caused some funkiness in the oven floor. It didn’t affect the oven’s functionality, but it led to a lot of cursing as I set and leveled the three slabs.
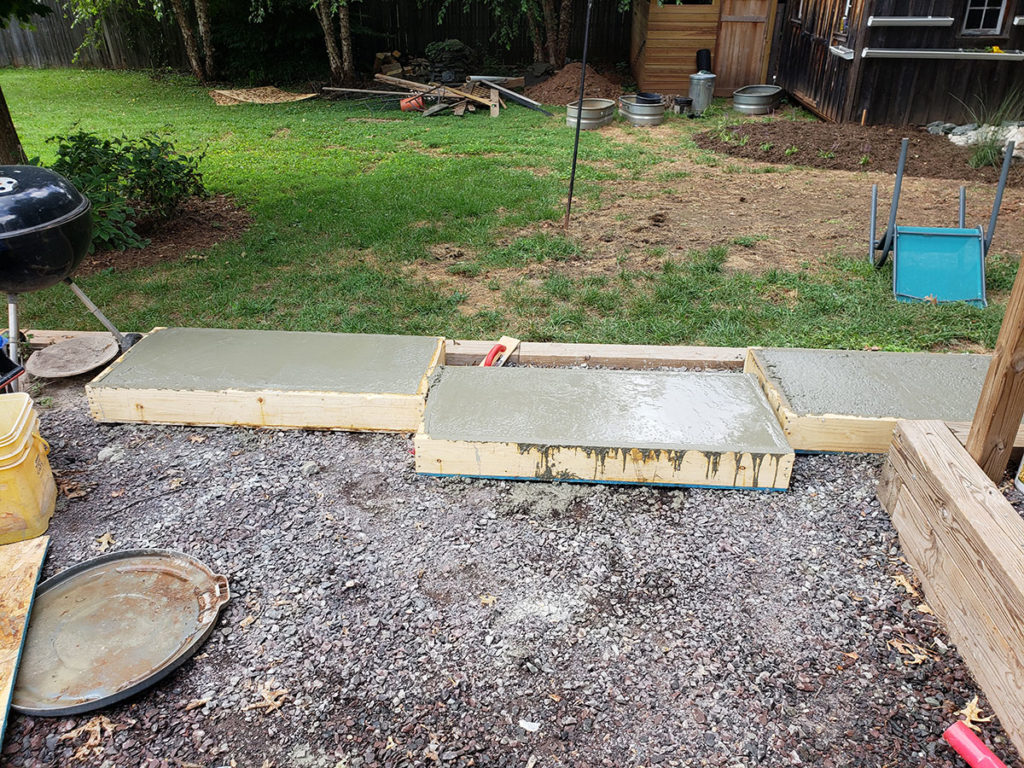
Using a mini skidsteer with pallet forks, I set the oven floor by myself. Even with a helper or six, I can’t imagine doing this without mechanized equipment. It only took me about an hour to pop the forms off and set the oven floor, which was way better than I expected.
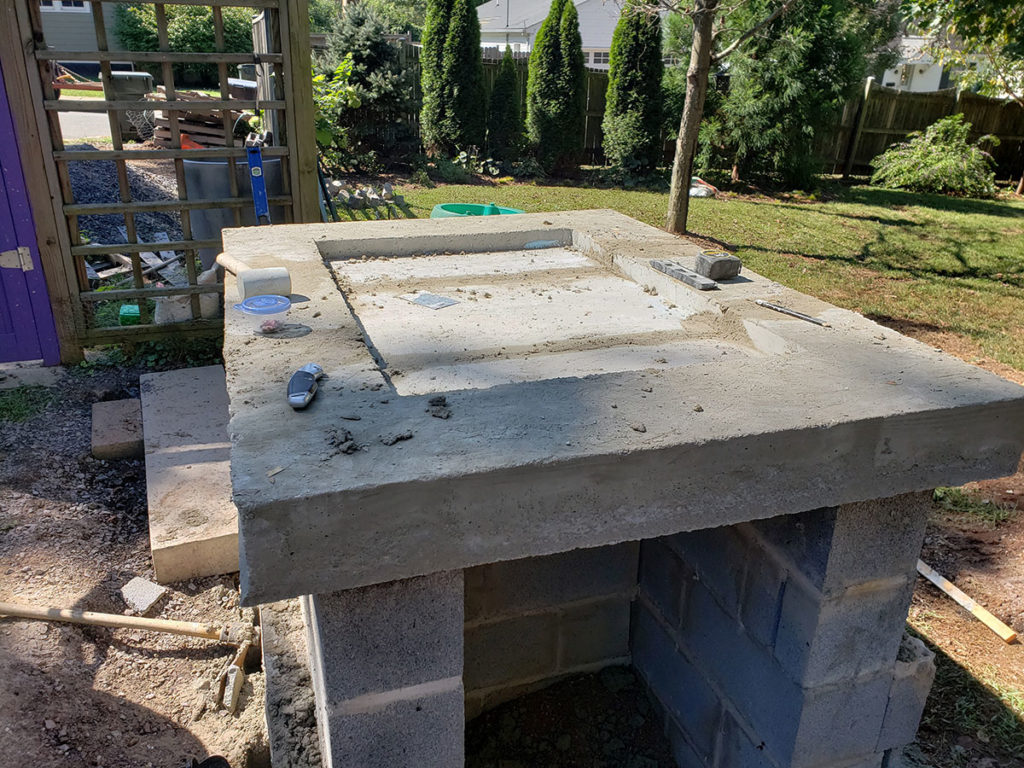
Making the insulating layer of Portland cement and vermiculite was dead simple. Mortaring in the brick frame around the oven floor wasn’t hard, but it did make very clear that I had issues with the forms.
Because I didn’t want to get a load of sand dropped off, I bought Quikrete All-Purpose Sand from Lowes. All I can say about that is SCREW YOU LOWES. For every bag I bought that was actual, coarse, all purpose sand, I ended up with three that were the finest grains of silica sand I’ve ever seen. So while the instructions say to use 60 lb bags of all purpose sand, don’t. If you HAVE to get it from one of the big box hardware stores, get their paver sand from the garden center instead.
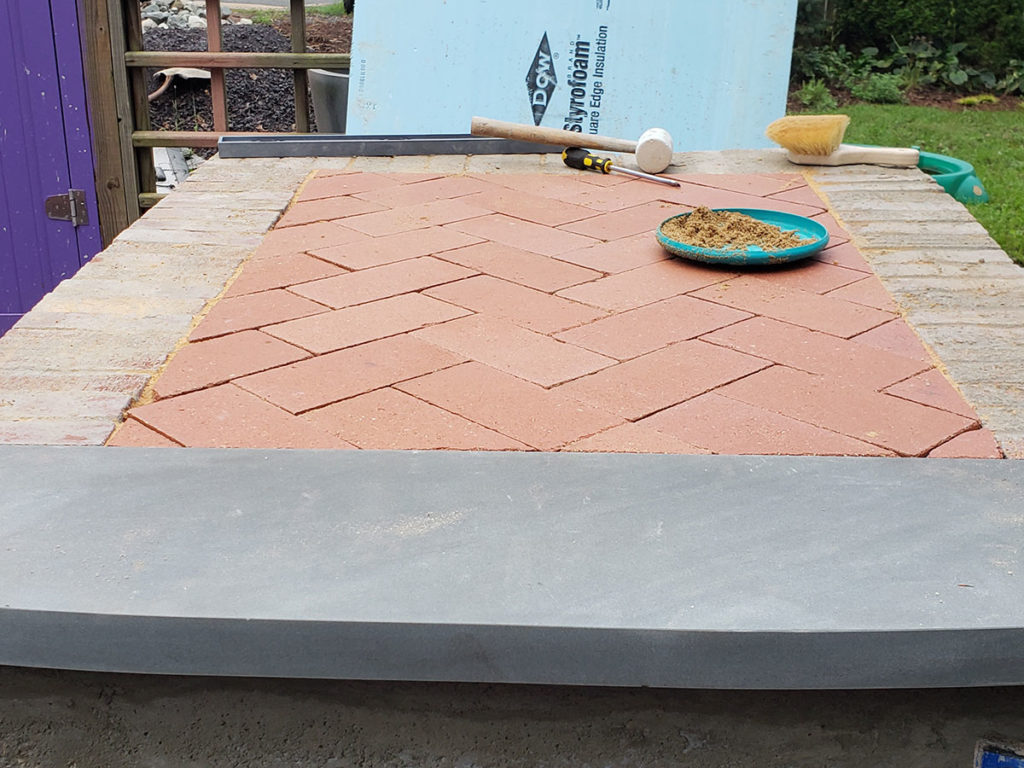
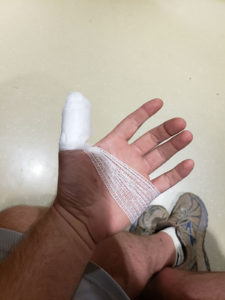
Laying in the herringbone brick floor was actually fun. Right up until I turned my head to look at the dog as I was swinging the mallet, nailed my thumb, and ended up at the ER. Don’t look at the dog, y’all.
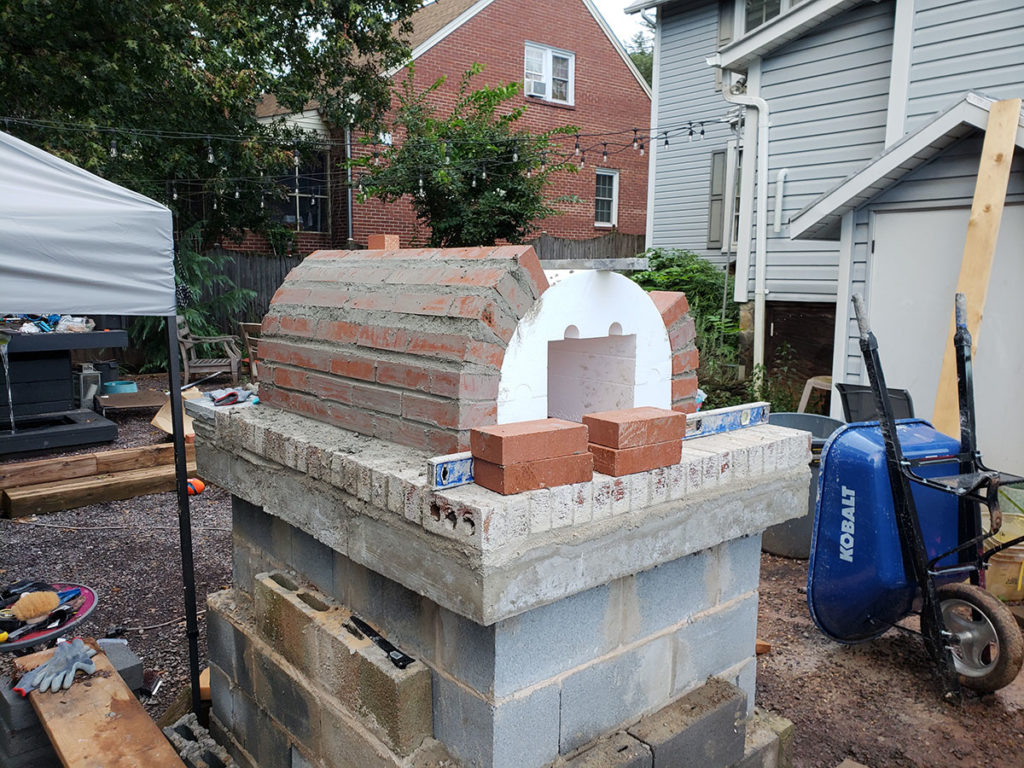
Once I got the styrofoam form in place and started laying fire brick, it went surprisingly fast. It turns out I used way too much mortar, because some squished out and is visible inside my oven, but that’s ok. A word of advice: the instructions say to soak the firebrick before cutting it. Soak the fire brick. Soak it for HOURS. I rented a gas powered brick saw and it bogged down a little with dry fire brick, but ripped through the soaked brick like butter. Also, do wear a dust mask when cutting fire brick, or you’ll spend the evening coughing like a 6 pack a day smoker running a half marathon.
Once the brickwork was done and had dried, I applied the ceramic insulation and fixed it together with the chicken wire. The first coat of stucco was a little frustrating, and I used way more than planned. The following day, the masonry supply yard was closed so I had to buy finish stucco mix from Lowes. Holy crap, you guys. It was like frosting a cake, it was so easy! It buffed up to a nice, smooth finish, too.
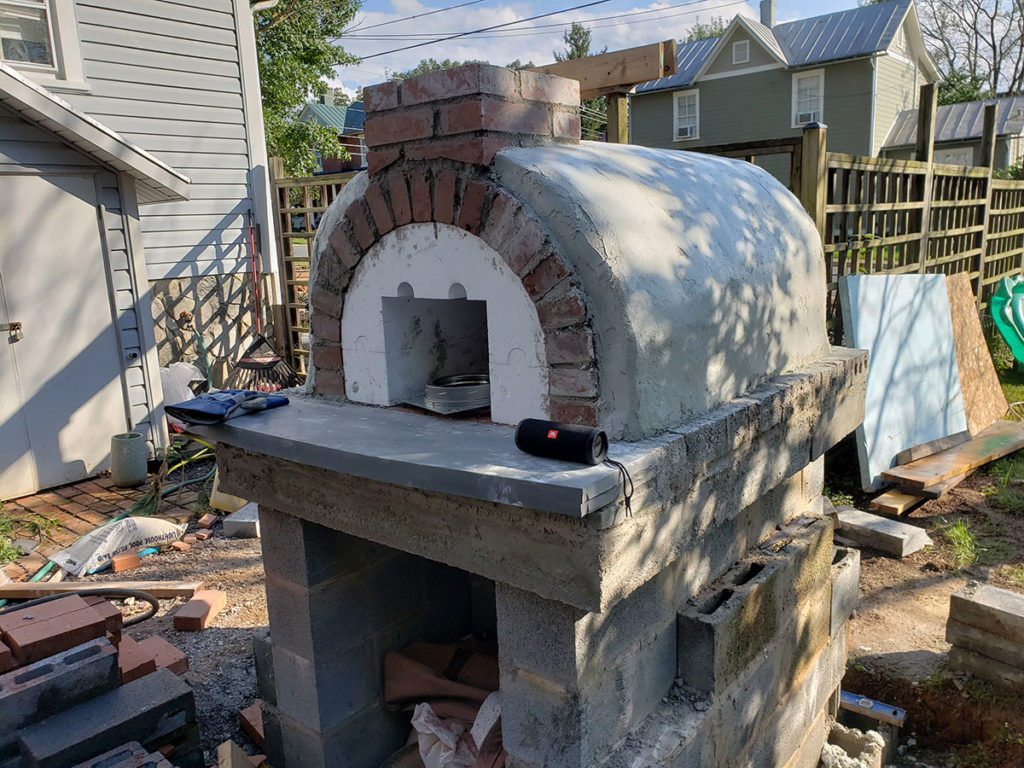
You know what the worst part of this build was? Getting the styrofoam form out. Now like I said, I had a good bit of excess mortar squish through so I’m sure that helped lock the form in place. Even at that, though, you are more likely to lift Mjolnar when Thor isn’t looking than you are to get the form out in fewer than 1000 pieces. Removing the form was when I had my first worries that I had selected too large of an oven. At 6’4, 300 pounds, I am not a small guy, and I was able to crawl into the oven almost to my waist to get the last of the styrofoam.
With a photo shoot looming, I cheated on the next part and paid my guys to build the blockwork surrounding the oven itself, parge everything, install the granite front, and lay the flat stone veneer. So that part went pretty well! I laid in the river rock inlay, and we had the photo shoot.

Cooking with the Mattone Barile Grande from Brickwood Ovens
It’s essential to cure the oven slowly, over a period of about a week, to drive the moisture out of the oven. If you don’t, the oven will crack. This was a frustrating process because I’m not a patient person, but I did it. I should note that my oven hasn’t cracked, so… worth it!
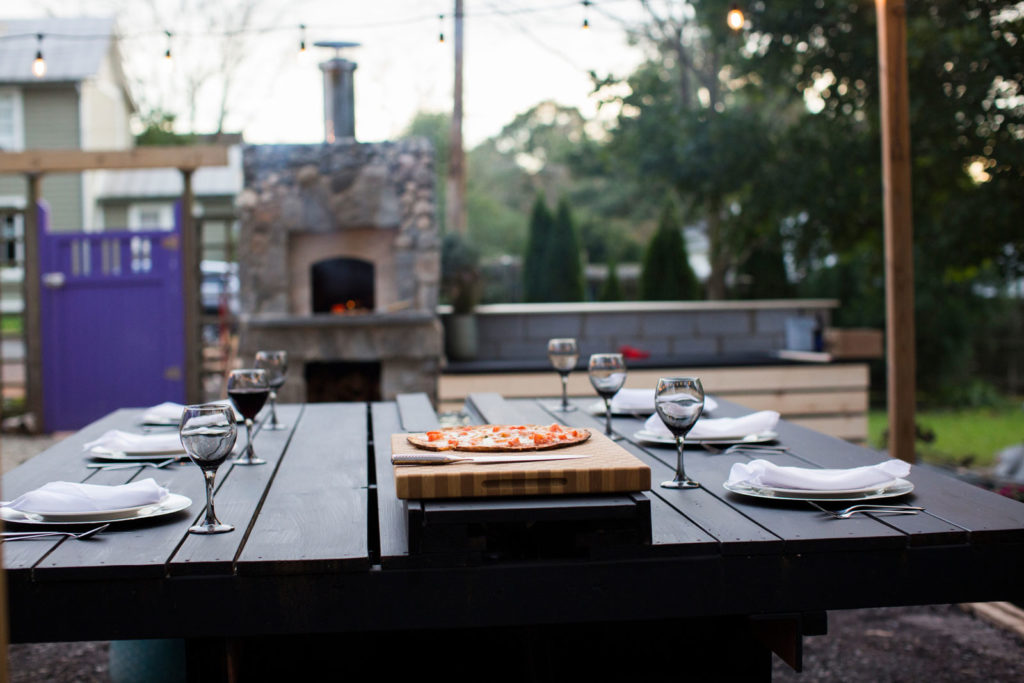
Knowing that there would be a learning curve to cooking with the Mattone Barile Grande, we opted to make a pretty basic pizza dough, and picked up passata and grocery store mozzerella. There was no sense getting fancy ingredients just to potentially destroy them.
MJ bought me an infra red thermometer gun for my birthday. I highly recommend getting one, as it was a great way to learn what parts of the oven heated up first, what held heat, and how quickly portions cooled as I moved the fire around.
I got impatient and threw the first pizza in at about the one hour mark. Way too soon.
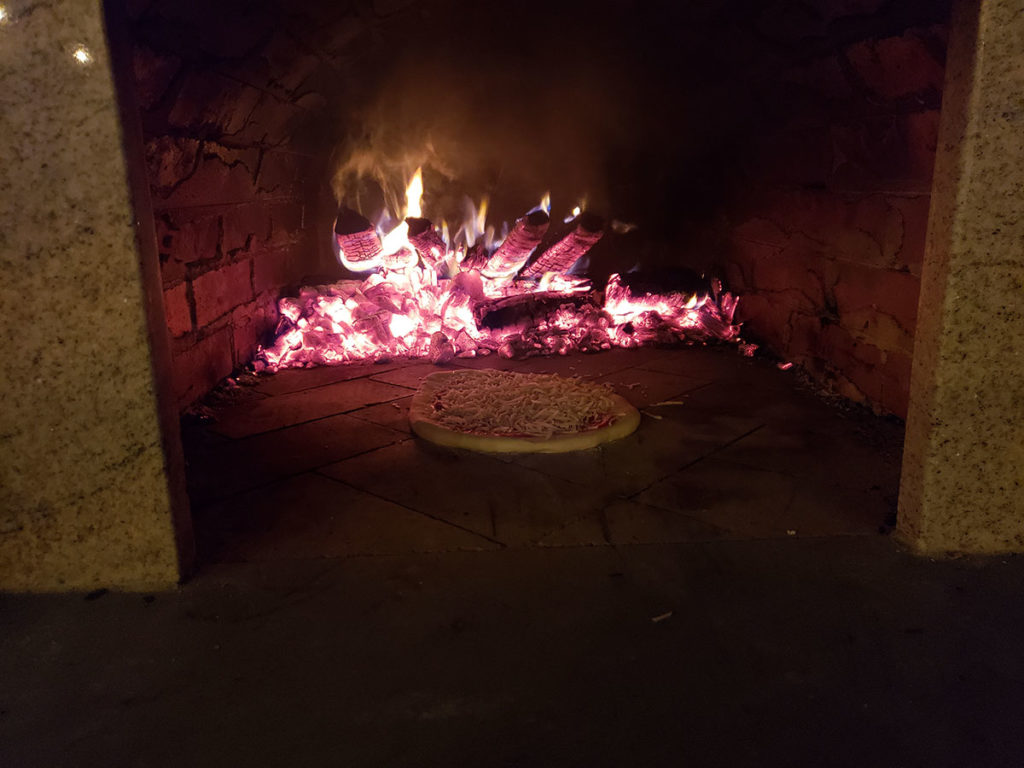
The sweet spot seemed to hit at around 2.5 hours. I was getting consistent readings of 900 degrees and higher, and the pizza cooked up beautifully. My guess is things would’ve been amazing at the 3 hour mark, but at that point the outside temp had dropped into the 30s and this wasn’t as much fun any more. Six years in Phoenix made me soft, what do you want?
Final thoughts
Was it worth building a Brickwood Ovens pizza oven? I’d say, resoundingly, heck yeah! There were some pluses and minuses though.
I felt like the styrofoam form from Brickwood Ovens was fairly priced, and made the build pretty easy. Honestly, I wouldn’t have saved much money had I built a form myself out of plywood, and this was way simpler. The company was easy to deal with, and while I don’t love that they only offer email support, as the owner of a small company myself I totally get it. There are only so many hours in a day.
The plans for the oven were easy to follow. There were a couple of things that were ambiguous, but I either emailed Brickwood, figured it out on my own, or winged it and it all worked out ok.
As mentioned above, I think the cost estimates were optimistic. And you definitely rip through some firewood in the course of heating the oven for pizzas. Obviously a smaller oven will require less wood, so there’s a tradeoff. And I still need to get a door made.
Brickwood Ovens kits are great for DIYers, no question. If you’re even moderately handy you can build a pizza oven for a lot less than the cost of one of those drop-in kits. I think if you want to have one built for you, you’ll need to be smart to keep it cost effective. From a design-build company perspective, our challenge is the number of steps where you do something, then walk away for 3-5 days. For an independent mason working alone or with a helper, I think this would be a great project that they could execute at a very fair price for the homeowner, working in other small jobs during the waiting phases. Because it costs us a good bit of money every time we pull on and off a jobsite, we could really only build a Brickwood Oven cost effectively if it was part of a larger project, and we could bounce to other parts of the yard during the “let it wait” stages.
If you’re hardcore and you want to build a Brickwood Oven yourself? Go to their site and start shopping! Keep in mind that if you want to do the fun stuff (the oven), we can do the boring stuff like the footer, the blockwork for the base, etc. And if you want us to do the whole thing, contact us today! Great pizza starts at home.
So it took 2 1/2 hours to heat up? Do you think the location of the chimney let’s heat out fast? Do you think door would help speed Up the heating process? I’m planning on building a pizza oven not sure if I want to this or a dorm , any tips?
I imagine a damper on the chimney could help a little (that was in the original plan but wouldn’t work with how I ended up building the oven), but a brick oven is still a lot of mass to heat up. My brother has the dome from Brickwood and I think he lets his heat 3-4 hours, but he also likes cooking at crazy high temps. I went back and forth on dome vs vault for years. From what I found it seems that domes are great for pizzas, but if you want more baking and roasting options, the rectangular vault is a better choice. It also helps that this was way easier to build!
First of all, thank you for writing this article!! I am a few months away from starting this oven build in our backyard and am looking for all the inspiration, advice, and experiences I can find until then. I too went back and forth between barrel vault and dome but just can’t justify the amount of labor that goes into the dome. So many cuts and much harder to create a dome than using a foam form.
One of the things I’m concerned about is how long it takes to heat up and cool down. I bake bread, cook pizza, and want to roast. I want an oven that is a happy medium between the massive commercial brick ovens and the portable steel ovens so that I could heat it up, cook pizza, then take the fire/coals out and bake bread. Can you share any data for how it cools down once you take the fire out? Also thinking that once it’s “bread temperature” (~460F), I could close off the damper and shut the door. If there’s no fire in there, it’s just holding heat.
Hey Erik, good luck with your oven! I still need to get a door fabricated, and because I was scrambling to finish my oven for a photoshoot I forgot to plan for a damper. So to be honest I haven’t tried the bread thing and I definitely don’t have good data.
It takes a good 3 hours for it to cross 1000 degrees in the oven. If I let it die down and shove the coals all the way to the back, when I let the dogs out the next morning it’s still got some heat but I can hold my arm in there, so definitely 200 degrees or less.
Couple resources – I don’t know if you emailed the guy from Brickwood but he’s awesome and really geeks out about it. There’s also a really helpful facebook group, I think it’s called brick oven builders and users? Brick oven builders should get you there.
Hello Thanks for the info, i am designing mine now. I was thinking how to speed up the heat process. So this is my plan add a small air pipe that is Connected to air pump that blows a low level of air to stoke the fire . It works on my fire pit with that stubborn not so seasoned wood.
The dome is a better design they heat faster and hotter I bought one of these and it works
It struggles with floor temp. I blocked off the front some and installed a damper . The only air flow is now in the front. Meaning the chimney part of the main oven is completly blocked. the air flows out of the oven and catches the chimeny on the other side of the restircted entrance ( this is the way dome ovens are designed. The advantage of the dome ovens is that the good ones are made of cordolite A refractory material which is lighter in thermal mass more continious in structure ( meaning you don’t have to apply direct fire to every brick to get it hot. The heat tranfer on the floor is much better. try a pizza stone on the floor it heats faster and works pretty well
All that being said i just added about 2 inches more of mortar and brick to the base stucco shell lets see if that helps
Check out the wood fired oven chef on you tube and watch his oven heat. It is 750 in an hour and a half . That is the right tempature for cooking a pizza 900 is extreme. I felt like I made a mistake in buy this barrel oven’I an stuck with it now.
One final comment this oven is great for all other types of wood cooking steaks Prime rib fish, chicken work well and our unbelivable in this oven. really great for bread. It stuggles I think for Pizza
if you want to chat via phone let me know by email
The dome is a better design they heat faster and hotter I bought one of these barile mattones
It struggles with floor temp. I blocked off the front some and installed a damper . The only air flow is now in the front. Meaning the chimney part of the main oven is completly blocked. the air flows out of the oven and catches the chimeny on the other side of the restircted entrance ( this is the way dome ovens are designed. The advantage of the dome ovens is that the good ones are made of cordolite A refractory material which is lighter in thermal mass more continious in structure ( meaning you don’t have to apply direct fire to every brick to get it hot. The heat tranfer on the floor is much better. try a pizza stone on the floor it heats faster and works pretty well
All that being said i just added about 2 inches more of mortar and brick to the base stucco shell lets see if that helps
Check out the wood fired oven chef on you tube and watch his oven heat. It is 750 in an hour and a half . That is the right tempature for cooking a pizza 900 is extreme. I felt like I made a mistake in buy this barrel oven’I an stuck with it now.
One final comment this oven is great for all other types of wood cooking steaks Prime rib fish, chicken work well and our unbelivable in this oven. really great for bread. It stuggles I think for Pizza
if you want to chat via phone let me know by email