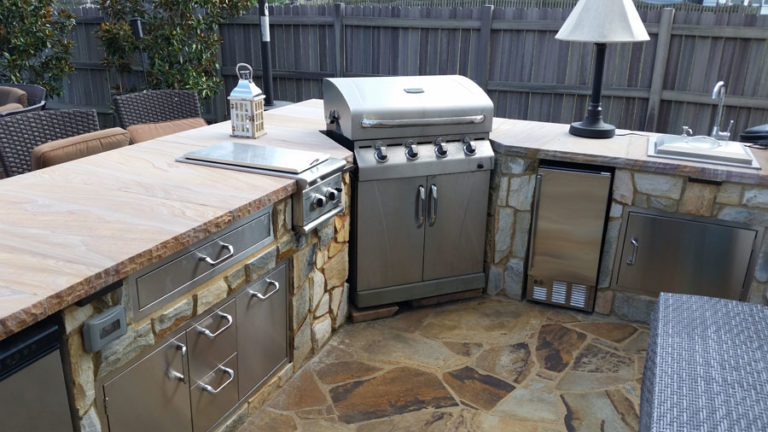
Cook outside AND stay warm with a wood fired pizza oven!

Pizza is good. Pizza done on the grill is better. The absolute best pizza you could hope to have is made in a wood-fired pizza oven. We all know that. But why?

Wood-Fired-Pizza-Oven-Stock

The main reason a wood oven does so much better of a job than your kitchen hotbox is heat. Your home oven maxes out at around 500 degrees. Depending on fuel source and oven construction, a wood oven can exceed 800 degrees. That means a faster cooking time and a crispier crust, more browning on the cheese, and a flavor that can’t be duplicated. A wood fired oven is surprisingly simple to get in your Virginia outdoor kitchen.

Oven kits

The "igloo," insulation board, and the blanket inside are part of this kit from Wildwood Ovens
The “igloo,” insulation board, and the blanket inside are part of this kit from Wildwood Ovens

Oven kits are typically the most cost effective way to get a wood fired pizza oven in your backyard. There are several manufacturers out there, but with all of them you get similar components:

  • an insulating base, on which you set the oven
  • a masonry (often concrete) dome or vault, either shipped in one piece or in pieces you assemble on site
  • an insulating blanket
  • a chimney or flue pipe (these may be less costly to source locally)

You still need to have the base of the oven and all the masonry buildout constructed on site, but this makes for a much simpler installation. When dealing with specialized trades, less time means less cost to you.

From scratch

Of course, if you really want that Old World look and feel of a brick dome or vault, you’re typically looking at having a mason build your oven completely from scratch, one brick at a time. The materials cost will be much less than buying a kit, but unless you’re building it yourself it will likely cost more to have it built this way.

Accessories you’ll want

Pizza-Sign

You’re dealing with high temperatures with a wood-fired pizza oven, so you’ll want accessories that can stand up. You’ll also want items that will make your life easier. Look for:

  • a temperature gauge that can be built into the oven
  • a great pizza peel
  • brush and scraper for cleaning the floor of the oven
  • high heat gloves
  • a door or something to block the opening and keep heat in

What you need to know about your wood-fired pizza oven

If you haven’t gotten to play with one of these ovens there are a few things you may not know. Here goes:

  • they can take several hours to heat up, since they’re a lot of thermal mass. You can’t just come home from work at 6 and be cooking at 7.
  • they’ll hold heat for a long time, especially if they’re well insulated. Think of ways to use that residual heat – baking, roasting veggies, etc. Sounds like a baba ganoush opportunity to me!
  • the wood you use is important, so be sure you have a good source for hardwoods.
  • wood storage is a good thing to factor into the design
  • it’s not a fireplace. Your wood-fired pizza oven sits much higher than a fireplace to allow for easy access while cooking. There are some combo units, with a fireplace below and a pizza oven above, but they’re much more complex to build. They also tend to be less efficient.

What does a wood-fired pizza oven cost?

You’re going to love the answer: it depends. For a starting point, a kit will probably set you back anywhere from $2,000 to $5,000 just for the oven itself (the “igloo” in the picture from the kit section). Add in either a metal frame or a masonry surround, and for a kit oven with a built-in surround you’re probably in the $10-15k range, done nicely with stone veneer and some accessories. Built from scratch, it depends on your mason.

tuscan chef oven

If your budget doesn’t allow for that, you can always get a unit like the Tuscan Chef. They can be fully or partially built in, or totally freestanding on a cart. Shipped to your door, you can get the smallest one for well under two grand.

Admit it, you want one. Shoot me an email and we can start designing your outdoor kitchen.


Can I use my freestanding grill as a built-in grill?

GasGrill

Outdoor kitchens are popular right now and it’s not hard to see why. We’ve embraced food culture more than probably any other time in America’s history, we have unprecedented technology to make our outdoor spaces as welcoming and comfortable as our indoor spaces, and most importantly, food cooked outdoors just tastes better. Mark my words, 400 years hence scientists will discover that cooking al fresco causes changes at the molecular level. A built-in grill can make it easier, buuuuut….

That doesn’t change one important problem with outdoor kitchens: the cost. Every drawer and every appliance you add increases the size of your outdoor kitchen, which can then mean more structure, stone or tile veneer, and countertop material. Here are just a few of the items you may want as part of an outdoor kitchen and their cost.

FireMagicCosts

Given that, one area where people try to save money is the grill. After all, they’re perfectly happy with their Weber or Char-Broil or whatever. Can’t they just use that?

Can I take the legs off my existing grill and use it like a built-in grill?

The answer, in almost all cases, is no. With your higher-end grills the manufacturer may offer a cart that also fits your grill head, but most box store/consumer models aren’t built that way. Even if you could remove the legs without sacrificing the strength and integrity of your grill it may not be built appropriately for actually inserting it into an enclosure. You’re talking about a gas appliance. Unless the manufacturer recommends that kind of conversion, I wouldn’t do it.

Can I build an alcove in my outdoor kitchen to fit my grill?

Yes, you can, and I have done this for clients. You’ll want to make sure of a few things first:

  • if your built-in grill has folding sides to act as a work surface you’ll probably want to remove them. Leaving them on, even folded down, causes some big unsightly gaps between the grill and the surround.
  • that said, check your manual to see what the recommended clearances are around the built-in grill. Even if you’re building it into a non-combustible structure like stone and block, you may have airflow requirements so the grill works efficiently.
  • If you’re doing stone veneer, wheel the grill in AFTER the veneer is up. I’ve known people who veneered around the grill and ended up sealing it in.

You should also think ahead to the next grill you think you’ll want and design the cutout accordingly. Most consumer grills in that sub-$1,000 price range only last so long. You won’t want to have to redo a bunch of masonry when it comes time to upgrade!

Can building around my grill look good?

What do you think?

Outdoor Kitchen Haymarket VA

The client just wasn’t interested in spending $2-3,000 on a new grill but he wanted a fun, functional, and gorgeous outdoor kitchen. I think we delivered and kept him on budget.

Looking for an outdoor kitchen that looks great AND works with your budget? Give me a call and let’s start the process. And in the meantime, don’t forget Hank Hill’s advice!

Firepits and more: 7 ways to bring fire to your backyard

When I took B out for her morning walk today there was actually almost a hint of a chill in the air. Fall is coming, which always triggers conflicting emotions in this seasonally-dependent line of work, but fall brings with it the prospect of evening fires. We don’t have an outdoor fireplace (yet) but we do have a couple of nice big firepits. With the heat of summer I’ve missed evenings spent around the firepit, Bonnie on her bed gnawing on a stick while MJ and I talk and watch the flames dance. Fire can be a wonderful focal point AND gathering point for your backyard. Here are some ideas to knock it out of the park this year.

1. Make sure your firepit is big enough

cast iron firepits

Some of the box store firepits are between 25 and 30 inches in diameter. That’s adorable, what are you going to burn? Candles? Unless you love cutting everything into itty bitty little chunks, get a nice big firepit. I think the cast iron one in the picture is one of the best I’ve found. It’s from a company called Fire Kettles in South Carolina, and you can get them up to 5 feet in diameter. You can also purchase a standard base or the deluxe footrest base shown. They’re not cheap – the 60 incher and a deluxe stand will set you back $1600 plus freight – but this could well be the last firepit you ever need to buy. They’re beautiful and tough as, well, iron.

2. Close to the neighbors? Keep the smoke down

A while back I wrote about the smokeless Zentro firepit. Then, a few months ago, I got to see one in action at Shenandoah Stone in Harpers Ferry, WV. This thing really does work! The secret is in the design, as it encourages better combustion of the wood. They say good fences make good neighbors, but a fence won’t stop billowing smoke from smoking your neighbors out of their kitchen. If your firepit will be close enough to you neighbors that smoke could be a problem, check out a Zentro firepit.

3. Go all out and cook some pizzas!

Wood Fired Pizza Oven

A wood-fired pizza oven is the perfect weekend relaxation engine. You need to fire it several hours in advance to get it up to temperature so there’s no replying to work emails right up till cooking time. And let’s face it, it’s a fun communal experience for you and your friends. It’s worth noting, however, that a full-on professionally built pizza oven isn’t an inexpensive proposition. Still interested? I design outdoor kitchens and wood pizza ovens. You should contact me.

4. Go cheap and cook some pizzas!

A few weeks ago I discovered this guy Eric’s YouTube channel, gardenfork.tv. In the video above he talks about how to build a dry-fit, pretty much portable, brick oven. Does it work? I haven’t tried it, because MJ’s concern (rightly) is that if I build a temporary oven I’ll be satisfied and won’t get around to building the real one. But if you want brick oven pizzas and you don’t have $5k+ to spend on a wood oven, this could be a good solution.

5. Keep it low profile

in ground firepit

There’s something incredibly appealing about a firepit that’s sunk into the ground. I think it’s a primal instinct sort of thing. Just remember a) your sunken firepit needs to drain somewhere lest you create an ashy swamp, and b) be sure to come up with a way to keep people from falling in. We don’t like to set friends and family on fire.

6. Go with gas

rawUrth

Don’t get me wrong, I love a wood fire. But wouldn’t it be nice to flip a switch and have the fire pop into view, and not smell like a campfire all night? The best part is that when it comes to gas firepits and fire features you’re not limited to the tacky crap they sell at the box stores. For example, the folks at Raw Urth Designs in Colorado not only make firepits, they make these amazing gas-fired fire features that you can virtually guarantee your neighbors have never seen before. Go on, live on the edge. Be the trendsetter in your crew.

7. Find local artists who do crazy stuff

Imagine'

Imagine Metal Art is based in Ontario, Canada and they certainly qualify as doing crazy stuff. How amazing is that firepit? If your goal is to be just like everyone else on the street, that’s easy. If you want people to remember the BBQ at your house, let your freak flag fly!

Do you have a really cool fire feature in your yard? I’d love to see it! Go ahead and share it on the Revolutionary Gardens Facebook Page so we can all oooh and ahhhh!


How to Design and Build a Pergola: The Basics

how to design and build a pergola

You’ve seen the pictures online or in magazines: beautiful people relaxing under the shade of a beautiful pergola, perhaps a rustic chandelier dangling from the cross members as a wisp of vine snakes its way up the corner. And you want it. Have to have it. But you have NO idea where to start. That’s why I’m here. Let’s talk about how to design and build a pergola.

In this super short video I’ll walk you through the basics of pergola construction. I cover what the primary pieces are, why they’re important, and considerations to keep in mind as you think through your future structure. Didn’t answer all your questions? I have three possible solutions for you:

  1. Be patient. More videos on this topic are in the pipeline.
  2. Hire me. I’m a great value if I do say so, and my online landscape design service means you don’t even have to be in Virginia!
  3. If you have a specific question in mind, drop into my open office hours every Wednesday at 7 pm Eastern. I’d love to answer your question!

How much does a water feature cost?

slipandslide
image source: www.pleated-jeans.com (seriously I love the internet)

Who doesn’t love running water in the landscape? From a delicately bubbling fountain to an impressive waterfall crashing several feet down to a pond there’s a water feature that’s right for just about everyone. But what does a water feature cost? That’s the big question. How much do you need to budget for a great backyard water feature?

Fountain kits

water feature cost

Fountain kits are a great way to get the sound of water into your yard at a reasonable entry price. When I talk about kits I’m expecting to see certain things included:

  • the focal point piece (vase, rock column, little kid peeing, whatever)
  • a plastic basin and grate for the reservoir
  • a pump
  • whatever plumbing is needed
  • and it’s optional, but lighting is a nice add-on

There is some installation and setup involved in these kits. I like the plastic basins because there’s no folding and tucking a liner and hoping you didn’t snag it. These things are easy, BUT you need to make sure your prep is spot on. You need a level hole and proper backfill, and then your river stone on top. Some googling shows that you can get a kit starting at around $2,000 and it goes up from there depending on how fancy your centerpiece is. That price doesn’t include a GFI outlet, your stone, or installation of course, but this gives you a good starting point for this type of water feature cost.

Campania fountains are available at most retail garden centers, but you can skip waiting in line and shop for fountains here. Note: this is an affiliate link, so I get a commission if you purchase through them.

Pondless waterfalls

pondless waterfall kit

Want the visual appeal of a waterfall without having to buy fish and worry about water quality? Maybe a pondless waterfall is the right choice for you. You’ll need a pump, a waterfall weir, and plumbing; after that it comes down to how technically detailed you want to get. I turn to my brother to specify my water feature components online and he recommends the latest and greatest pumps and technology.

pondless-waterfall-virginia

What does a pondless waterfall cost? It depends on a lot of factors: the size, the type and quality of components, your site, the availability of stone, and so on. Figure that your equipment and plumbing alone will run $2,000-4,000 depending on on the above factors. All told, as a DIY project you might squeak in at $3,000-5,000, a good bit more than that as a turnkey install. Streambeds, special boulders, all sorts of things add to the cost too. The above pondless waterfall, which we completed in 2008, would cost around $5,000-6,000 today.

Ponds

How much does a beautiful hole in the ground cost? Again, it depends on a LOT of factors. Asking how much a pond costs is like asking how much a car costs. Are we talking about a Tata or a Mercedes? Your variables may include size, depth, streambeds, existing site conditions, whether you want fish or not, and so on and so on.

virginia-pond

There’s really no way to say exact costs for sure but here in the DC area, you’re most likely starting at $5,000-10,000 for a smaller backyard pond and going up from there. One like the pond above – where we brought in literally dozens of truckloads of soil and stone – would be well north of $30,000-40,000.

What’s the best way to know the real water feature cost of the pond YOU want? Get a quote from a top quality, reputable contractor. How do you know if you’re comparing apples to apples? Hire a landscape designer to create a master plan so you have a biddable, buildable set of documents to work from. We’re here to help you get the backyard of your dreams. Contact us today to schedule a consultation.

The best landscape patio & paving choices – what’s new?

Cobblestones

Walking and standing in mud is kind of a bummer, so centuries ago people got the idea to lay stones on the ground and stand on those. Brilliant! Over the years since then we’ve had a lot of advances in technology. That means not only new manmade products, but the ability to quarry and ship natural stone products from all over the world. Here’s what you should check out for 2015.

Porcelain Pavers

porcelain pavers

Let’s not bury the lede, I was super excited when I first saw these at Sislers Stone in Falls Church. I think these will be a game changer, and here’s why:

  • as a manufactured product they have a consistent 1″ thickness
  • they can be dry set, they can be laid in mortar, or they can clip into a grid for rooftop deck applications
  • they’re manufactured to look like natural stone or even wood
  • they’re less slick underfoot than many stones so they’re good for poolside and wet areas

The cost is higher than stone or concrete pavers but not by all that much. I expect the cost to go down as more and more suppliers bring them in. Currently they’re manufactured in Europe and the folks I’ve talked to have said the availability isn’t great yet, but it’s coming. Porcelain pavers already have a demonstrated history of durability in Europe so while you may be the first person on your street to have them, you’re not running the risks that come with a new product. So if you were the second person to install Windows Vista and have been forever scarred, don’t worry. You’re with friends now.

Wood-look Concrete Pavers

These are actually a couple years old but I’m still not seeing much of them in anything but flower show displays. I think it’s because a lot of designers, installers, and homeowners haven’t yet figured out how to use them.

Borealis Pavers

This is Techo-Bloc’s Borealis paver. We’re into the second generation which means that they’ve added a second size. The original size was 5″x30″, and now to add some variety they offer a 10″x30″. The obvious advantage to this over just using wood is that concrete doesn’t rot or warp or twist. The down side is that you get a busier look than you wood with wood planks, because they only come 30″ long. The projects I’ve specified these on should be installed in a few months and I’ll share pics. I use them mostly as an accent, but it’s a very cool look.

Borealis Steps

Techo-Bloc also offers a big step in the Borealis style. They’re 6″ high, 16″ deep, and 48″ wide. Why not just use 6×6 pressure-treated timbers? For one thing, rot. For another, you get actual color choices that work with your patio or walk. Also, it can be hard to secure timbers and keep them from moving unless they’re spiked to each other or pinned to the ground with 3-4′ of rebar. If I’m mathing it out right Borealis steps weigh 384 pounds each. They’re not budging.

Natural Stone

Back in the dark ages of the industry, when someone asked their flagstone options it was like that clip. “We offer Pennsylvania flagstone AND PA flag!” Now that it’s gotten strangely affordable to carve into a vein of rock in Brazil or China, load it in a container on a massive ship, and bring it here you have a crazy amount of options.

Canyon-View-Flagstone

The border stone is Canyon View, a stone with multi-colored veining running though it. It’s been around the DC metro area for several years but I’m finding more and more people who want something besides the old standby of PA flagstone. While I think it would be a little intense as a full-field patio stone, It’s a cool little accent.

flagstone walk Alexandria VA

Sometimes if it’s an older home you want a flagstone that looks like it’s had plenty of years to weather and darken. That’s why we used Westmoreland stone on the lead walk for this gorgeous Craftsman home’s Alexandria landscape design project.

Flagstone options
image source: Sislers Stone (click to visit their site)

There are also loads of other flagstone options now. Photos don’t do them justice so if you’re looking for ideas I’d suggest seeing them in person. In the DC area two great locations are Sislers Stone and Luck Stone Center. Down here if you’re working on a Culpeper landscape design project, A.B. Kearns is our go-to stoneyard.

Choosing the right paver or stone for your patio

Given all these choices, how do you even begin to narrow it down? The way I do it is I work from style, to color, to budget. Get a sense of the look I want, pick the color palette, and then determine what solutions work within my budget. Your local stoneyard’s sales staff will be happy to help you, or you could hire your very own Virginia landscape designer! However you choose to get your patio project done, the choices for materials are amazingly varied. Explore your options and create something that’s uniquely YOU.

Bagged mulch vs bulk mulch: which is better?

Growing up working for my brother, we always bought bulk mulch for landscape jobs. That meant driving to the supplier, waiting for the tractor to dump in as much mulch as the truck could hold, and then driving to the jobsite and wheelbarrowing it into place. That’s the way mulch was done. Bagged mulch wasn’t even considered.

Mulch-Truck

After college I went to work for Lodder’s Nursery in Ohio as a foreman and they did the majority of their jobs with bagged mulch I thought they were nuts and I’m sure I voiced that opinion more than once. I was eventually fired from that job and honestly? Good call, Dennis. I was an idiot at 21. The thing is, looking back on it they made a brilliant choice. Using bags made loading the trucks in the morning as easy as sliding pallets on with a forklift. We always had a dead-on accurate accounting of how much mulch we used. Clean up was easier, with no piles of mulch in the street or in the grass where wheelbarrows spilled. And most importantly, mulching around tender annuals is way easier with bagged mulch than it is with wheelbarrows full of mulch. That’s changed how I look at how I buy mulch for my house.

One issue I have with getting bulk mulch is space. There’s currently one spot on my property where I want mulch dumped and that’s at the back of my driveway. Most guys don’t want to dump it there because of the overhead wires (good call). The other big issue I have is time. I’ve had piles of mulch decompose before I get them moved and spread, because I’m cheap and if the delivery fee is $75 but free with 8 cubic yards or more… well, duh. Yes, I’m also that idiot leaving Costco with 1,000 rolls of toilet paper strapped to the roof.

bagged mulch

I’ve really come around to bagged mulch for my house. I can get a pallet in the truck or 2-3 bags in the Subaru, exactly what I need. It’s easier on my back. And it’s easier to use with all my liriope and annuals. Is it more expensive per cubic yard to buy bagged? Heck yeah. But it’s the exact same stuff you buy loose in bulk and it’s a convenience that’s worth it for me.

But never dyed mulch. No, no, never. That crap’s the devil’s handiwork.

3 appliances your outdoor kitchen HAS to have this year

We all love game shows, right? I think we’re mere years away from the future predicted in the movie The Running Man, where every major decision in society is made before a live audience. And for the record, I watched Joe Millionaire so I have no stones to throw. But I am culturally aware.

Running-Man

So here’s the premise: your boss heard you just put in a pool and redid your backyard and volunteered your house for the next company get-together. You’re going to need to provide food and beverages for the masses and everything needs to be top quality. Let’s assume you have a grill, because otherwise this would be a stupidly obvious blog post. What are three appliances you’ll have to have in your Virginia outdoor kitchen? Go!

Fire Magic Echelon Diamond Style Power Burner

Do you know what 60,000 BTUs looks like? Remember that scene at the end of Terminator 2 where Ah-nold lowered himself into the molten steel? It’s kind of like that.

accessory-echelon-power-burner

The power burner’s intense heat is perfect for crab boils or any other boil (corn, shrimp, haggis) where you want to get huge amounts of water to 212 degrees as fast as possible. That sort of intense heat is also perfect for stir frying. You can’t get that sort of heat on a residential indoor range, but you’ll be able to live out your wok and roll fantasies (like that?) with this appliance. MSRP is $1616 but contact me for current specials.

Alturi Beverage Center with Sink

Uh-oh, chief, the corner office crew is headed your way and they look thirsty! Better whip up some margaritas for them, and maybe a Shirley Temple for the intern. He’ll laugh about it later, just hope he doesn’t become your boss. Who’s he related to again?

ALTBC-1

The beverage center has the ice bin, condiment tray, and speed rail to keep all your components close at hand, with a sink to wash fresh glasses in and a bottle opener for those who prefer beer (or grape Nehi) to spirits. The LED lights will keep the party going well after the sun drops below the trees. MSRP is $1799 but contact me, we can do better than that.

Tuscan Chef Deluxe Family Oven

This is your chance to strut your stuff. After this shindig do your co-workers refer to the epic picnic at your place, or do they speak in hushed tones about the employee who threw a mediocre bash the week before security helped box up the whole cubicle? Grills are awesome (and I am the best Virginia outdoor kitchen and grill source, don’t forget!) but you know what’s memorable? Crisp, delicate, delicious pizzas from a wood fired oven. Rather that mess with all the masonry and effort of building one from scratch you should get a Tuscan Chef Deluxe Family Oven.

Tuscan-Chef-Pizza-Oven

This model takes up a pretty small footprint, 27.5″ wide x 19″ deep, but you’ll be knocking out pizzas every 2-4 minutes. At the end of the evening you’ll be the hero, and who doesn’t want that? If you buy a Tuscan Chef oven as part of a larger kitchen, list starts at $2199. Contact me for details.

Those are my top three appliance choices. You’ll still want a fridge (I recommend a Summit two-drawer unit) and an ice maker (Fire Magic makes a great one!) but those are your workhorses. These three appliances… these are what get you noticed!

Enjoy your corner office on Monday. You earned it.


The Best Pruning Saw I’ve Ever Bought – It’s Amazing!

Every once in a while I tackle pruning and shaping jobs for clients. For example we were doing a planting job the other day and a tree needed limbed up. I knew the look I wanted so I went ahead and did it, leaving the boys to the planting.

best pruning saw
Image credit: Workwear Canada

The best pruning saw I’ve used

Last year I was at an arborist’s supply shop here in Culpeper and saw the Silky Pocket Boy 170 (no, it’s actually NOT an affiliate link. I just really like the saw). At fifty bucks it was twice what I usually pay for a basic pruning saw from the box stores, but now I see why. It’s seriously the best pruning saw I’ve ever used. It weighs less than half a pound and is so perfectly balanced that it feels like a sheet of paper in the hand. Cutting? This saw is probably the closest I will ever come to wielding a light saber. Effortless is a decent word for it, although I don’t know if it goes far enough.

lightsaber-590x330

I love that it also comes with a hard plastic case with a belt loop. It’s small enough and light enough that I could see myself easily losing this, and again – it’s the best pruning saw I’ve ever used. I’d be super disappointed if I lost it. Generally I just think this is a brilliant tool and a wonderful example of why paying a little extra for high quality cutting tools makes a world of difference. We’ve all heard that a dull cutting tool is a dangerous cutting tool, and I have the scars to prove it. The way this thing slices through wood is a thing of beauty. MJ and I have talked about starting back to camping and if we do, I’m buying a second one of these for the camping footlocker.

Is this the best pruning saw EVER? Probably not, I’m sure I could spend even more money and be even more amazed. But it’s the best pruning saw I’ve used and I’m in love. Now I’m just trying to resist the urge to cut everything with it, like when I bought my Sawzall…


My WORX Aerocart review

Full disclosure: I blog for WORX, so for one of my posts they sent me an Aerocart for free.

AerocartAndTree

When I got the offer to blog for WORX, I checked out their product lineup. Having used pro grade equipment for my entire adult life I’m not usually too excited by stuff made for the homeowner market. Take my string trimmer, for example. I only use it at my property, and can we be honest? I don’t trim and edge every single time I mow. That said, having used commercial lawn equipment for so long, I get easily frustrated by non-commercial equipment. There’s something about the weight and the power that feels wrong in my big fat hands.

The Aerocart appealed to me, though, because it looks really smartly designed. I may have mentioned that I have two blown lumbar discs and some days even walking is hard. Products that are ergonomically designed are a good bet for me. I was also drawn to the slightly lower capacity of the Aerocart, since the less I’m lugging around the less likely I am to further damage myself. So I was super stoked when I got the call from my receptionist that my package was in.

Setup

I’m pretty handy with tools, finding the jokes about how hard IKEA stuff is to assemble to be pretty pathetic. Still I was expecting it to be something of a hassle to unbox and assemble my shiny new Aerocart. Boy, was I wrong. The handles slid right into place and locked with a spring loaded pin, and the wheels slid on and were held with cotter pins. Done. It took longer to break the box down for recycling than it did to set up the cart. Score one for the designers.

Aerocart-Handles

First use

I have a big steel wheelbarrow and while I’m not the fittest of guys, I have no trouble using it (unlike the woman in the WORX Aerocart infomercial who dumped a wheelbarrow in a classic “for reals?” infomercial move). I was really excited about the dolly capability of the Aerocart because while I own a dolly, the tires always go flat between uses. For that reason the dolly lives in the back of the shed and when I have to choose between digging it out, putting it in the truck, driving to 7-11, filling the tires, and driving back, or just manhandling whatever it is that I need to move… well, I’m not a patient man, which is why I’m a regretful man. The Aerocart’s tires won’t go flat, which means I’ll actually use it.

Wheelbarrow vs AeroCart size comparison

So I flipped the dolly plate down and got to hauling. The trash can full of crap? No issues. The 3’x4′ slab of stone, 6″ thick, that probably weighed north of 400 pounds? Yeah, that was a problem. The Aerocart is rated for up to 300 pounds and I bent the dolly plate a little by exceeding the limit. Let me just say, though, that WORX isn’t lying about the ergonomics. Between the placement of the wheels relative to the load and the size and placement of the handles, it was pretty easy to wheel the stone slab over to where it needed to go. Bottom line: I can’t fault WORX for not accommodating a load way in excess of the stated capacity, but I will totally applaud them for making said load easy to move around.

I also used the Aerocart to move bags of mulch around the yard and I will say, that’s a great use for this tool. Instead of wrestling with a wet, heavy 3 cubic foot bag of mulch to get it up over the sides of the wheelbarrow, the Aerocart let me just slide it across the ground onto the extension arms, and slide it off when I got there.

Second use

This year I finally bought a cherry tree for the backyard. We had it delivered to a client’s site along with his plant order, his guys put it in my truck, and I took it home. The tree was a mini-beast. Nursery standard puts the weight of a 2″ caliper tree at about 400 pounds and this rootball was a sopping wet bag of mud after sitting outside in the rain overnight. I slid the tree off the truck and hooked up the Aerocart. I lowered the extension arms and tried to fit the rock mesh sling that came with the cart to the rootball. Too small. Huh.

So I dug under the seat of the truck and pulled out some ratchet straps, hooked the ends to the wire basket of the tree, and lifted the tree with the Aerocart. Or tried to, anyhow. Turns out that I hadn’t read the manual thoroughly enough to see that while the Aerocart will do 300 pounds in the bin or on the dolly, the extension arms? 80 pounds. I tilted back on the cart and promptly bent the extension arms. Idiot.

Dave says: reading the manual is haaaaaaaard!

Now picture the scene: I’m standing there, annoyed that a) it didn’t work and b) I broke my Aerocart. My wife and I established years ago that we shouldn’t do DIY projects together because that’s one area where we’re oil and water. She’s just finished telling me that she told me the tree was too heavy and now we needed a machine and there’s no way we’re moving the tree by hand, and I’ve just lost it and channeled Unikitty and yelled “why are you being so negative? You need to be more positive!”

Then it hit me that because of the curved shape of the hopper, I could use the Aerocart as a tree dolly! Sure enough I was able to slide the bottom plate under the tree and tilt it back, where the rootball was cradled in the hopper. Because the wheels are in the absolute perfect place to balance a load I glided across the yard with my cherry tree and deposited it right next to its future home.

Conclusion – would I buy the WORX Aerocart?

Right now the Aerocart is $160 on WORX’s site. At that price, if you’re a homeowner who does a bunch of projects around the house and you’re not an idiot with your tools, I think it’s well worth getting. Out of the box it comes with the strap for moving around pots, the mesh for moving around stone, the insert for carrying tanks/bottles, and the attachment for hanging trashbags for leaf pickup (or in my case, picking up all the pods my sweetgum tree drops). The accessory that turns the Aerocart into a wagon with a seat? Don’t much care, I’d probably never use it (plus it only holds up to 300 lbs and I’m… not svelte). However, the 20 gallon water bag that fits in the cart? That’s great, and for twenty bucks I’ll grab one. I just planted a tree (as discussed above) down at the far end of my yard. It’s not that far, but if I can avoid schlepping a hose all the way down there? I’m in.

This cart is a perfect gift, too, for that relative who loves to do stuff around the yard. I would get this for someone like my dad, who would have respected the cart’s limits and also loved that he could store a dolly, a garden cart, and more in a very small footprint in the garage. Bottom line: the Aerocart isn’t for jobsite use but it’s a pretty cool little homeowner tool.