One That Got Away: Challenging Retaining Wall in DC

One of my favorite things to do on this blog is to profile recent projects. It’s a fun opportunity to show what’s possible, and maybe brag a little. Hey, my clients let me create some great landscape designs for them!

DesignerIsIn

As I was thinking about a recent sale I didn’t close I realized I should blog about it as well. After all, what killed the deal were the realities of the site and the budgetary challenges they created. There might be something to learn from this, especially if you’re planning a DC landscape design project of your own.

The site: A rowhouse in DC. It’s in a hilly neighborhood off of Rock Creek Parkway and there is a HUGE amount of elevation change between the street and the front porch.

All the homes in this neighborhood have a 10-12 foot tall stone retaining wall right at the city sidewalk. This client’s wall had deteriorated, so last year he had the wall rebuilt. Such a wall requires a huge cantilevered footing, which meant digging way back into the hill. Because the wall was being built right at the city sidewalk all excavated soil was hauled off site. The new wall was built, including a 4 foot wide set of curved steps, and only some of the removed soil was brought back.

The project for which I was called: Prior to the new wall’s construction, the homeowner had an 8-10 foot wide level piece of lawn in front of his porch. Since the wall builders didn’t bring all that soil back, it now plunged off like a ski slope. The homeowner, therefore, wanted one or two natural stone retaining walls built behind the big wall to level off the yard, new landscaping, and new low voltage landscape lighting.

Wowsers. The client wanted to have a sense of the budget, so my masonry contractor and I sat down, had some coffee, and talked it over.

The challenges:

– Access. Parking in DC is a challenge, and with the sheer wall right at the sidewalk there would be nowhere to stage materials. Everything would have to be hand carried up the steps and staged at the top of the lowest wall. If the steps were a straight shot, we could have laid boards as ramps and wheeled materials up – but that wouldn’t work on the curved steps. Getting concrete up to the wall footers would require a pump truck.

– Work area. The only space to stage materials and mix mortar is a small flat pad at the top of the new retaining wall. That means a lot of shuffling things around every day, reducing efficiency.

– Backfilling our new walls. Again, the material that was here originally never came back. This means that we would need to bring in between 40-60 cubic yards of fill dirt and topsoil. To put that in perspective, a full load in a standard tri-axle dump truck is 12-14 cubic yards.

So how would we get this quantity of soil up to the top of the site? As mentioned above, wheelbarrows were out. Hiring a ridiculous number of laborers and doing a bucket brigade would be just… ridiculous. We settled on having Sislers Stone put the soil in super sacks (sturdy bags that can hold a ton of bulk material), truck them to the site with a flatbed, and lift them into place with a rented crane. Logistics!

– Safety. Any time you have a retaining wall on a slope above another retaining wall, there’s a possibility that it will exert forces on the wall below. I let the client know that as part of the landscape design process I would have a structural engineer look at my drawings, and if he felt it required his involvement that would be an additional cost.

After all this, the landscaping and lighting were a small portion of the project cost, but it all added up. In the final analysis, we figured it would cost a minimum of $30,000 to complete the project. It was more than the homeowner wanted to spend, so we’ll hopefully revisit it later.

The unfortunate thing is that this is a $30,000 landscape installation project that could have been avoided, or at least reduced. The company that rebuilt the wall clearly didn’t work off of detailed plans or specifications. I know this because the client told me they built the steps in the wrong place, and there was clearly no communication up front about the soil hauled off site being brought back. This is yet another case where starting with a landscape designer – someone who could create a detailed set of drawings and a complete scope of work – could have saved thousands of dollars.

I would love to save you thousands of dollars! If you’re looking for a landscape designer for a project in northern Virginia, DC, or Maryland, contact us for a consultation!

What Concrete Paver Goes with My Brick House?

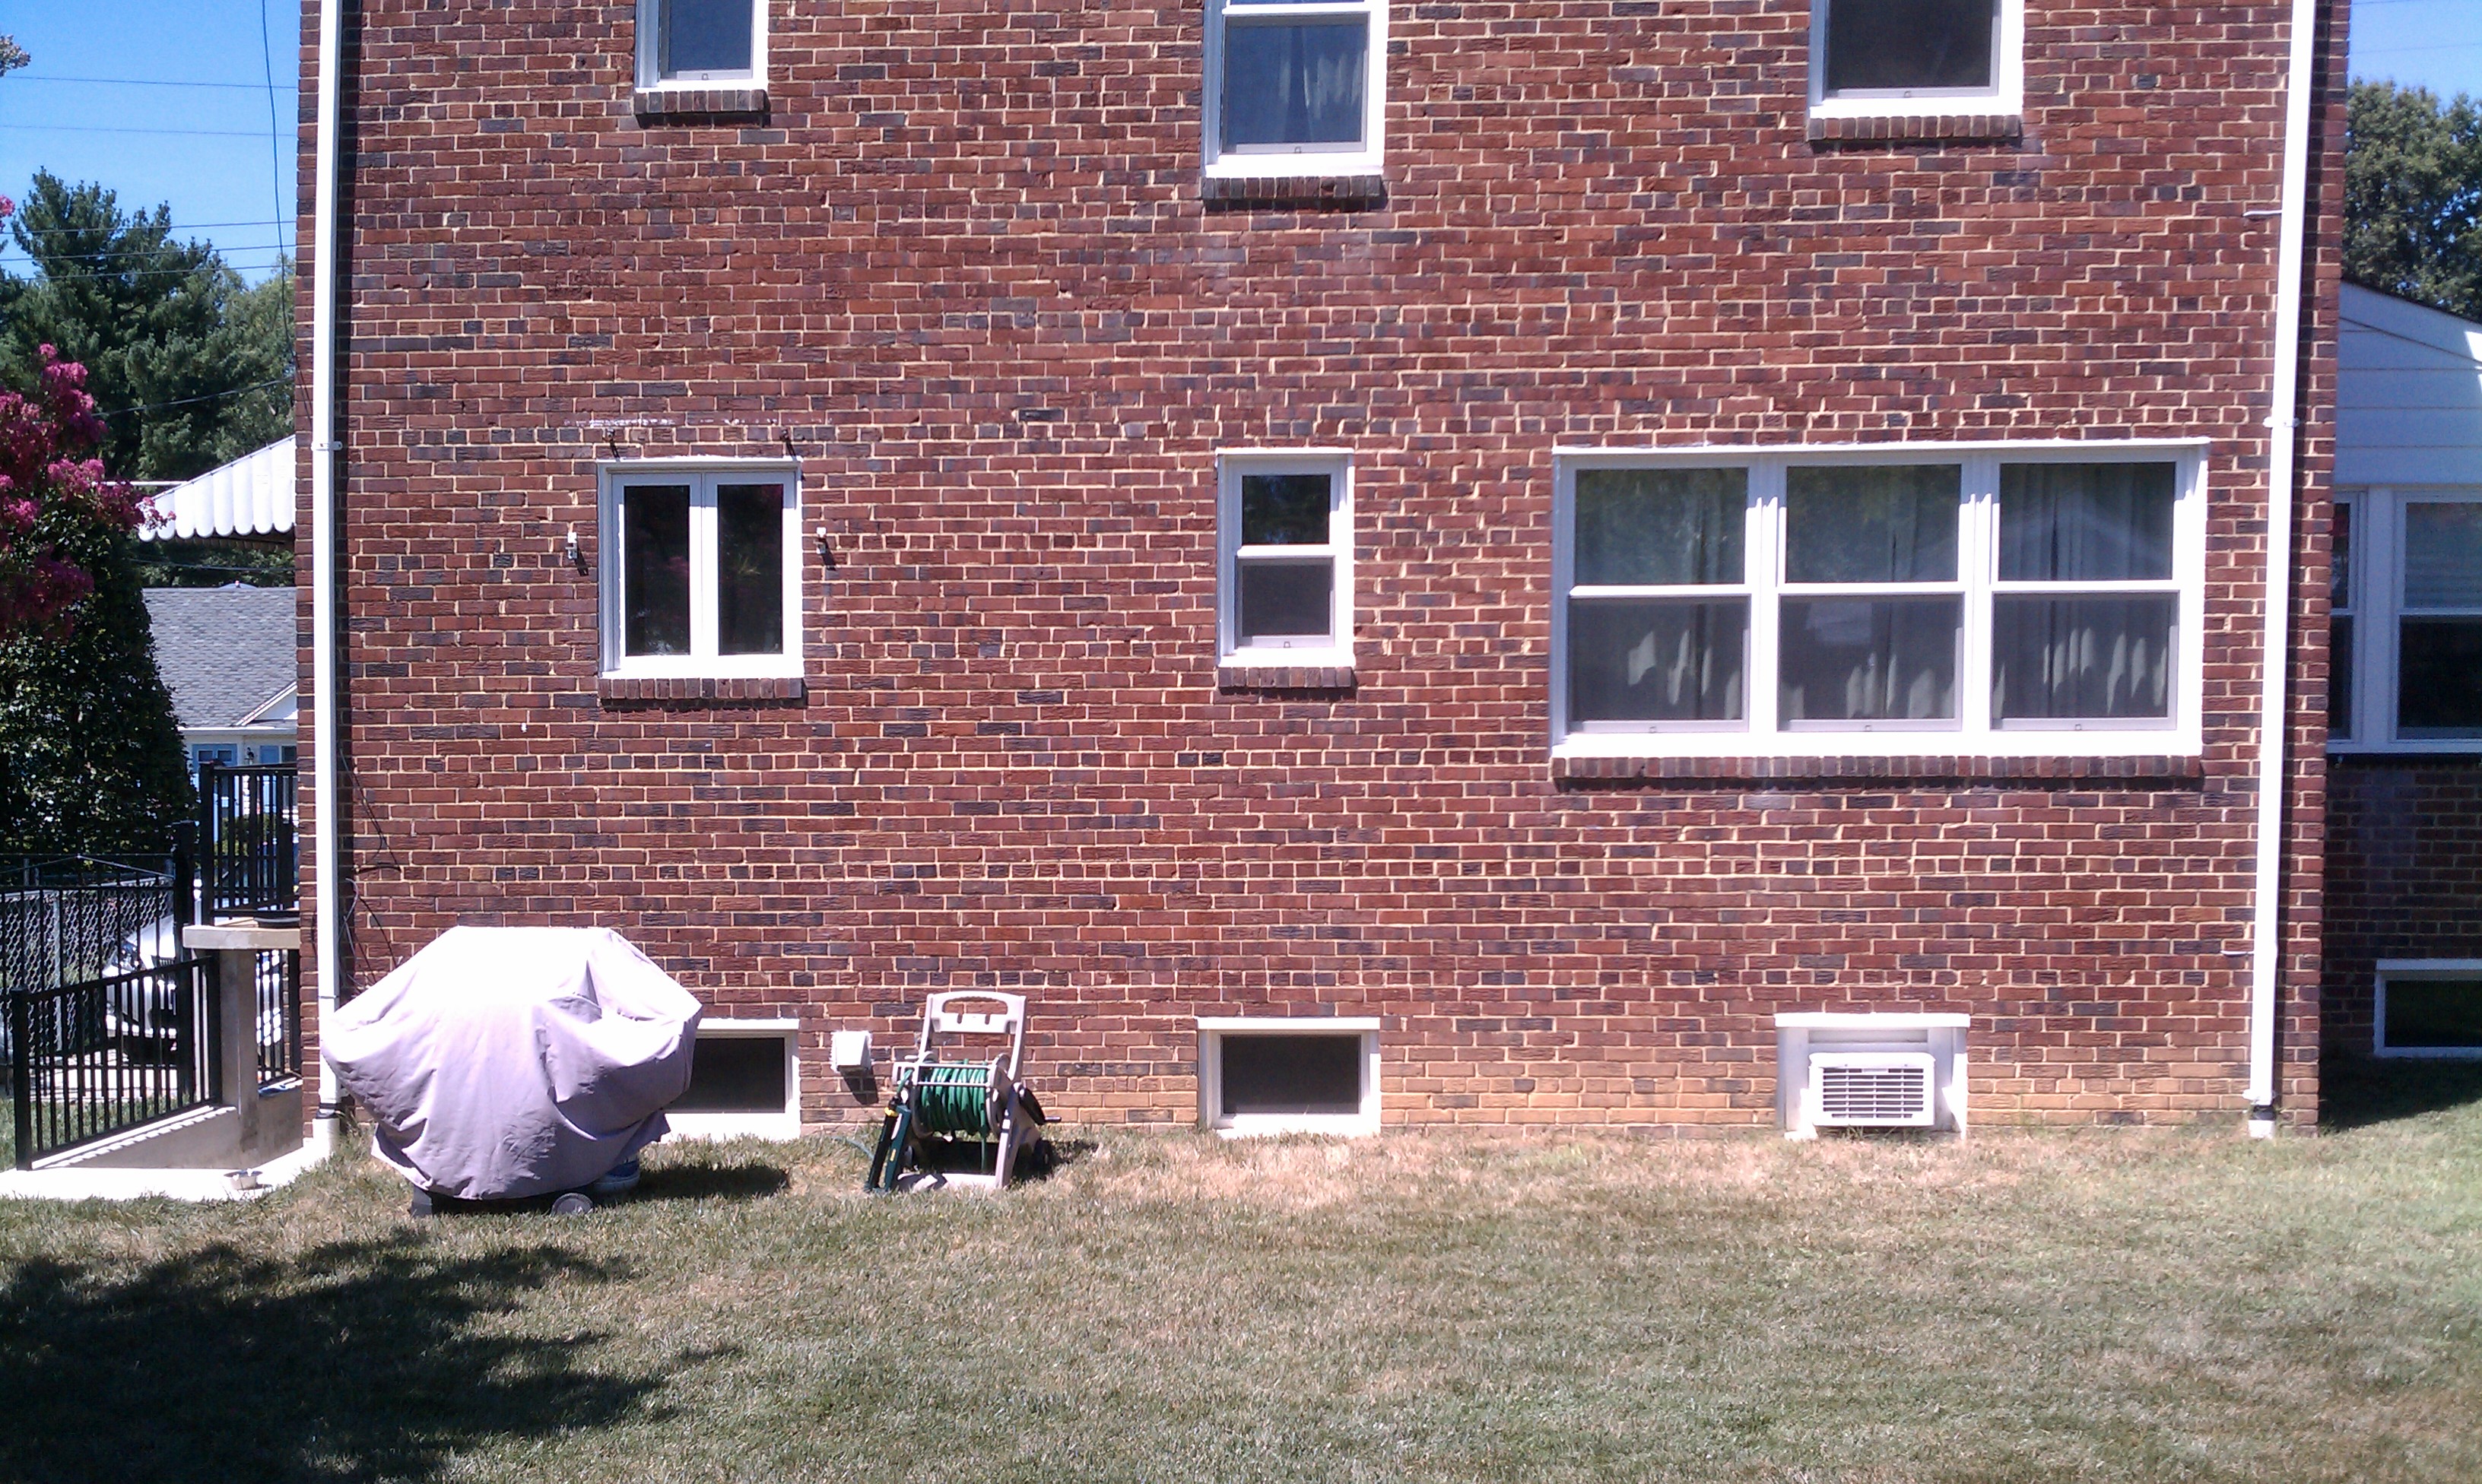
I get asked that question a lot, as you can imagine. After all, Virginians love their brick homes, so I design a lot of patios for brick homes. I always look at two things: color and size/style.

brick house landscape

Color

Color is the easiest to deal with first. If you have a red brick home I will do everything in my power to talk you out of a reddish concrete paver. The reason is simple. You will not get a match. Not gonna happen. Instead, you’ll end up looking like you attempted to match, and failed. That’s why on a house with reddish-brown brick, I recommend using a gray paver. After all, gray flagstone looks beautiful with brick, right?

virginia paver patio design
source: Techo-Bloc

Size/Shape

I will also dissuade you from selecting a brick-sized paver, like the Techo-Bloc Victorien. One reason is the same as my color reason – you’ll look like you tried to match and failed. But also, brick creates a pretty busy pattern. I prefer to use larger pavers because the size creates a pleasing contrast with the brick. If your home uses a traditional brick, the smallest size I’ll want to use is a 6″x6″ or 6″x9″ paver/paver mix.

source: Techo-Bloc
source: Techo-Bloc

I’m not crazy about the pavers that attempt to look like irregular flagstone as I just don’t think they pull it off successfully. When I talk about style I like the look of a tumbled paver, and possibly even a paver with a wet cast finish that looks like natural stone. Again, it’s all about creating a pleasing contrast with the brick.

The Big Exception to Matching

A lot of people don’t realize that clay pavers are an option as well as concrete pavers. They’re tough, durable, and according to the Brick Industry of America, they have a compressive strength equal to or greater than concrete pavers. So if you use a clay paver, I feel that you can match what’s on your house. Again, you just need to design it in such a way that you don’t have a ferociously busy visual that looks like a giant moire pattern from a distance.

Overwhelmed by the options? Filtering through the myriad options and selecting the best one for your home is what we do. Contact us for a consultation!

Building a timber wall – will it last?

I like to play a game I call underrated/overrated. You can play it with bands, actors, foods, anything you want. Example: underrated/overrated = Hudson Hawk is a brilliant and underrated movie/ Sideways is an incredibly overrated movie that makes me want to guzzle Merlot out of spite. See how it’s done? Please leave your own under/over thoughts in the comments.

A part of the landscape that I think is underrated is the timber retaining wall. There are two objections that I see raised about them: aesthetically they aren’t great, and wood will eventually break down and the wall will fail. Both very valid points. However.

Pressure-treated timbers are typically what you use for a timber retaining wall. The fun fact about pressure treated wood is that it is warrantied – but putting it in continuous contact with the ground voids the warranty. Even so, you can reasonably expect to get anywhere from 10-20 years out of a timber wall. We did a job a couple of years ago where we removed a timber retaining wall so we could install a new Techo-Bloc wall. The existing wood wall was fifteen years old and we expected it to come apart like a castle made of wet Kleenex. Instead it took days of work with demo saws and pry bars. Fifteen years later and the wall was still solid. I was impressed.

Retaining Wall Detail
source: Fairfax County Wall Detail Packet

How do you get a wood wall to last so long? It all comes down to proper installation. I refer everyone to the Fairfax County Retaining Wall Detail packet, because it applies to most cases. You want a solid, compacted gravel footer; you want to make sure that every timber is level and true as it’s installed; you want to use 1/2″ galvanized spikes to hold the wall together; you want to use deadmen as shown to tie the wall into the grade behind it; and you want to backfill appropriately, including clean drainage stone, to keep water from causing the wall to fail. It may not be easy to execute (it’s still a lot of work and it takes skill to do well) but the principles are sound.

“But Dave,” you may say, “that doesn’t address the fact that a timber wall looks like a stack of lumber in my backyard.” Well, fair point my imaginary naysayer. This is why I don’t recommend a timber wall in every situation. If the wall is going to be front and center as someone drives into your property, it’s probably not the ideal choice. If you just need a functional wall  and you won’t often see it, though, a timber wall could be a great way to make room in the budget for something else. In this scenario, we had to build the grade up almost six feet to create a waterfall. Rather than spend thousands of dollars to retain the soil at the back of the falls with a gorgeous stone wall that only the deer and squirrels would see, we used a timber wall.

timber wall behind waterfall

Worried about the aesthetics? This is what it looks like from the house. Yep, you don’t see it.

pond waterfall design in northern virginia

There you have it: the humble timber retaining wall. It may not be glamorous and it may not be a forever solution, but if you need to stretch the budget and can conceal the wall, I hope you’ll at least consider it.

Are you making a major change to your landscape and looking for ways to stretch your budget and still make it look great? I can help with that! Contact me to set up a consultation. I’d love to help you fall in love with your property all over again.


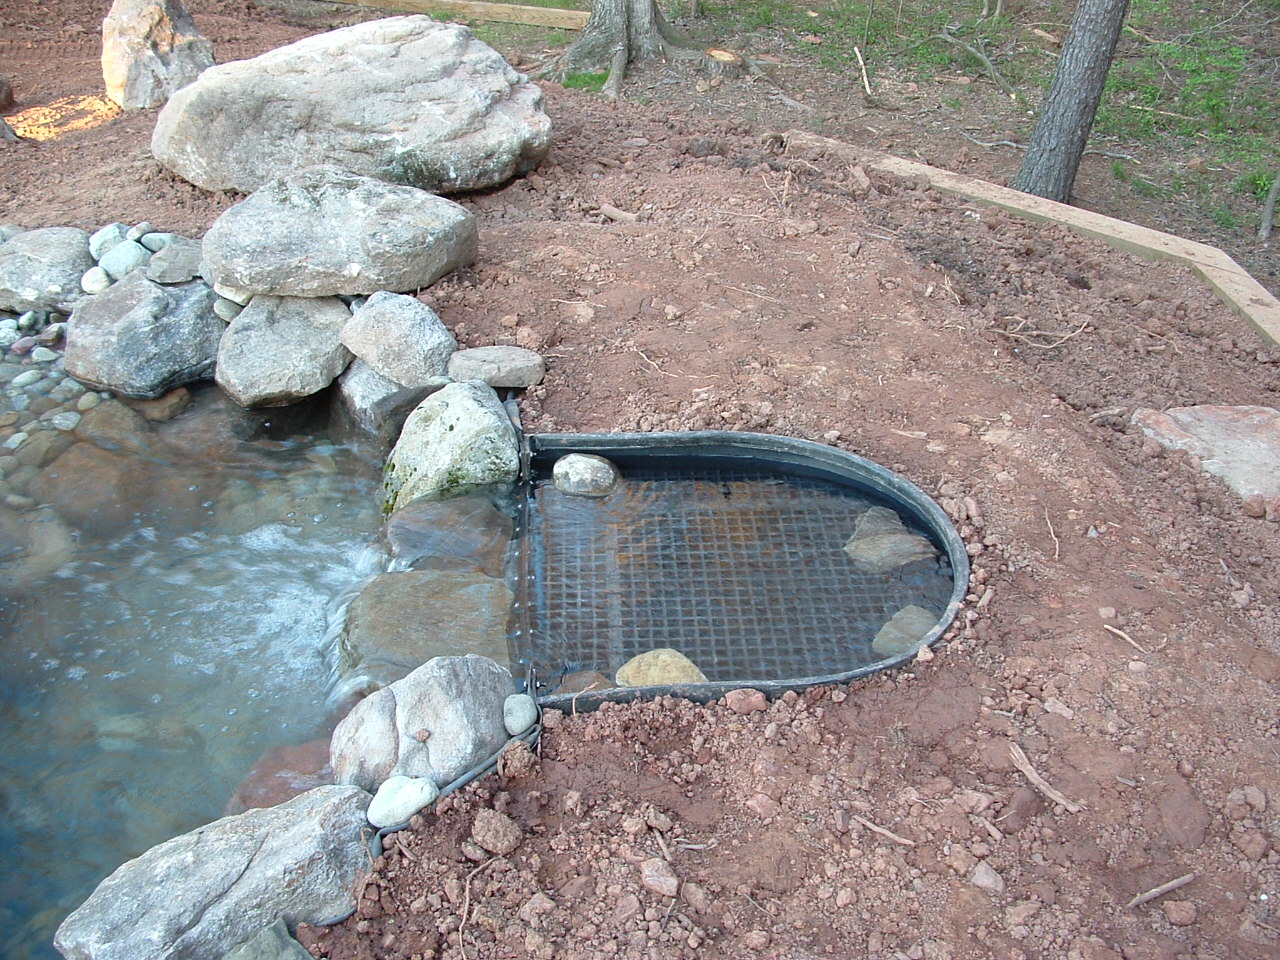
Space Planning to Make a Beautiful Vienna Virginia Backyard Better
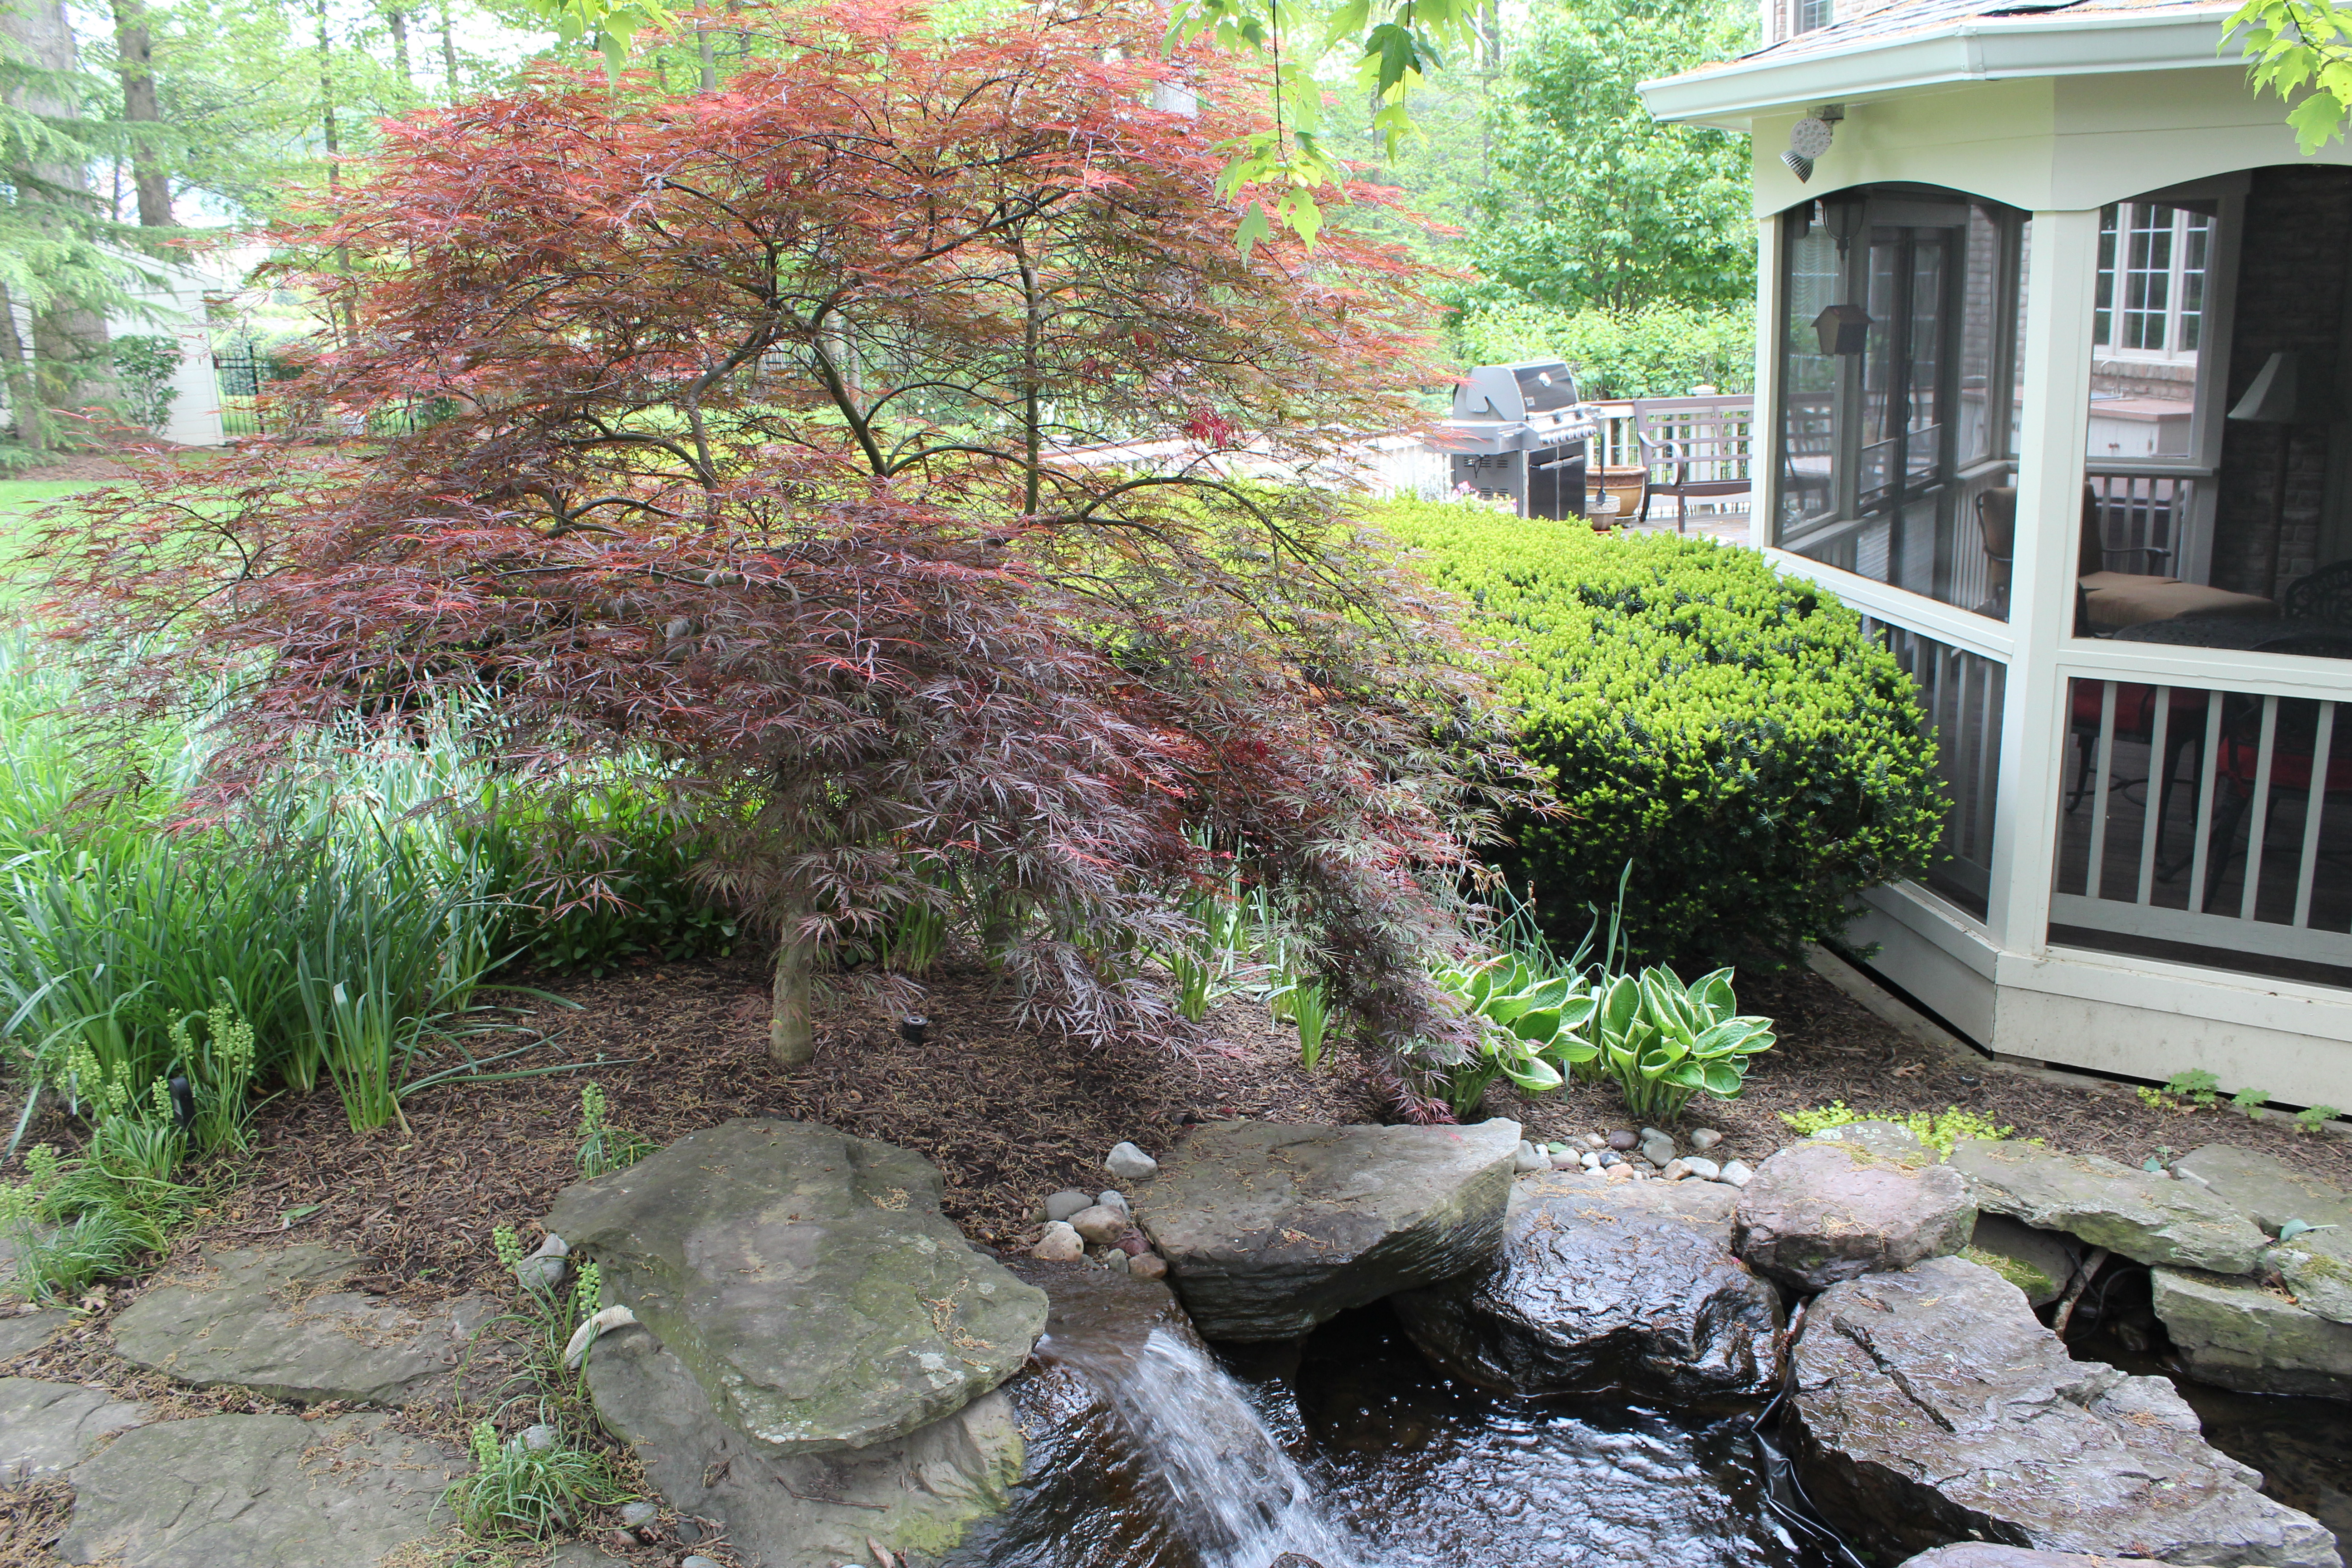
I’m often called in to make an existing landscape function better. The client doesn’t to rip it all out and start from scratch, but they need to fix… something. Usually it’s my job to figure out what that something is.

This project is a great example. You can see in the photo above that they have a cool little water feature, built with big chunky boulders. It’s a great feature but you can only see it well as you come in the back gate and sort of ok from the screen porch. From the deck, this is all you see:

Because of the railing and the massive yews, you’d hardly know there was running water there. As a result, I made the decision to eliminate the railing and yank out the yews and extend a level area closer to the pond.

It’s completely changed the dynamic of the space. Now the water feature is part of the deck space and the small seating area is simultaneously its own space and a means of enlarging the deck. This project is an example of how you don’t need to spend a ton of money to create a large change.

Travertine Paver Patio Installers in Virginia – What to Know

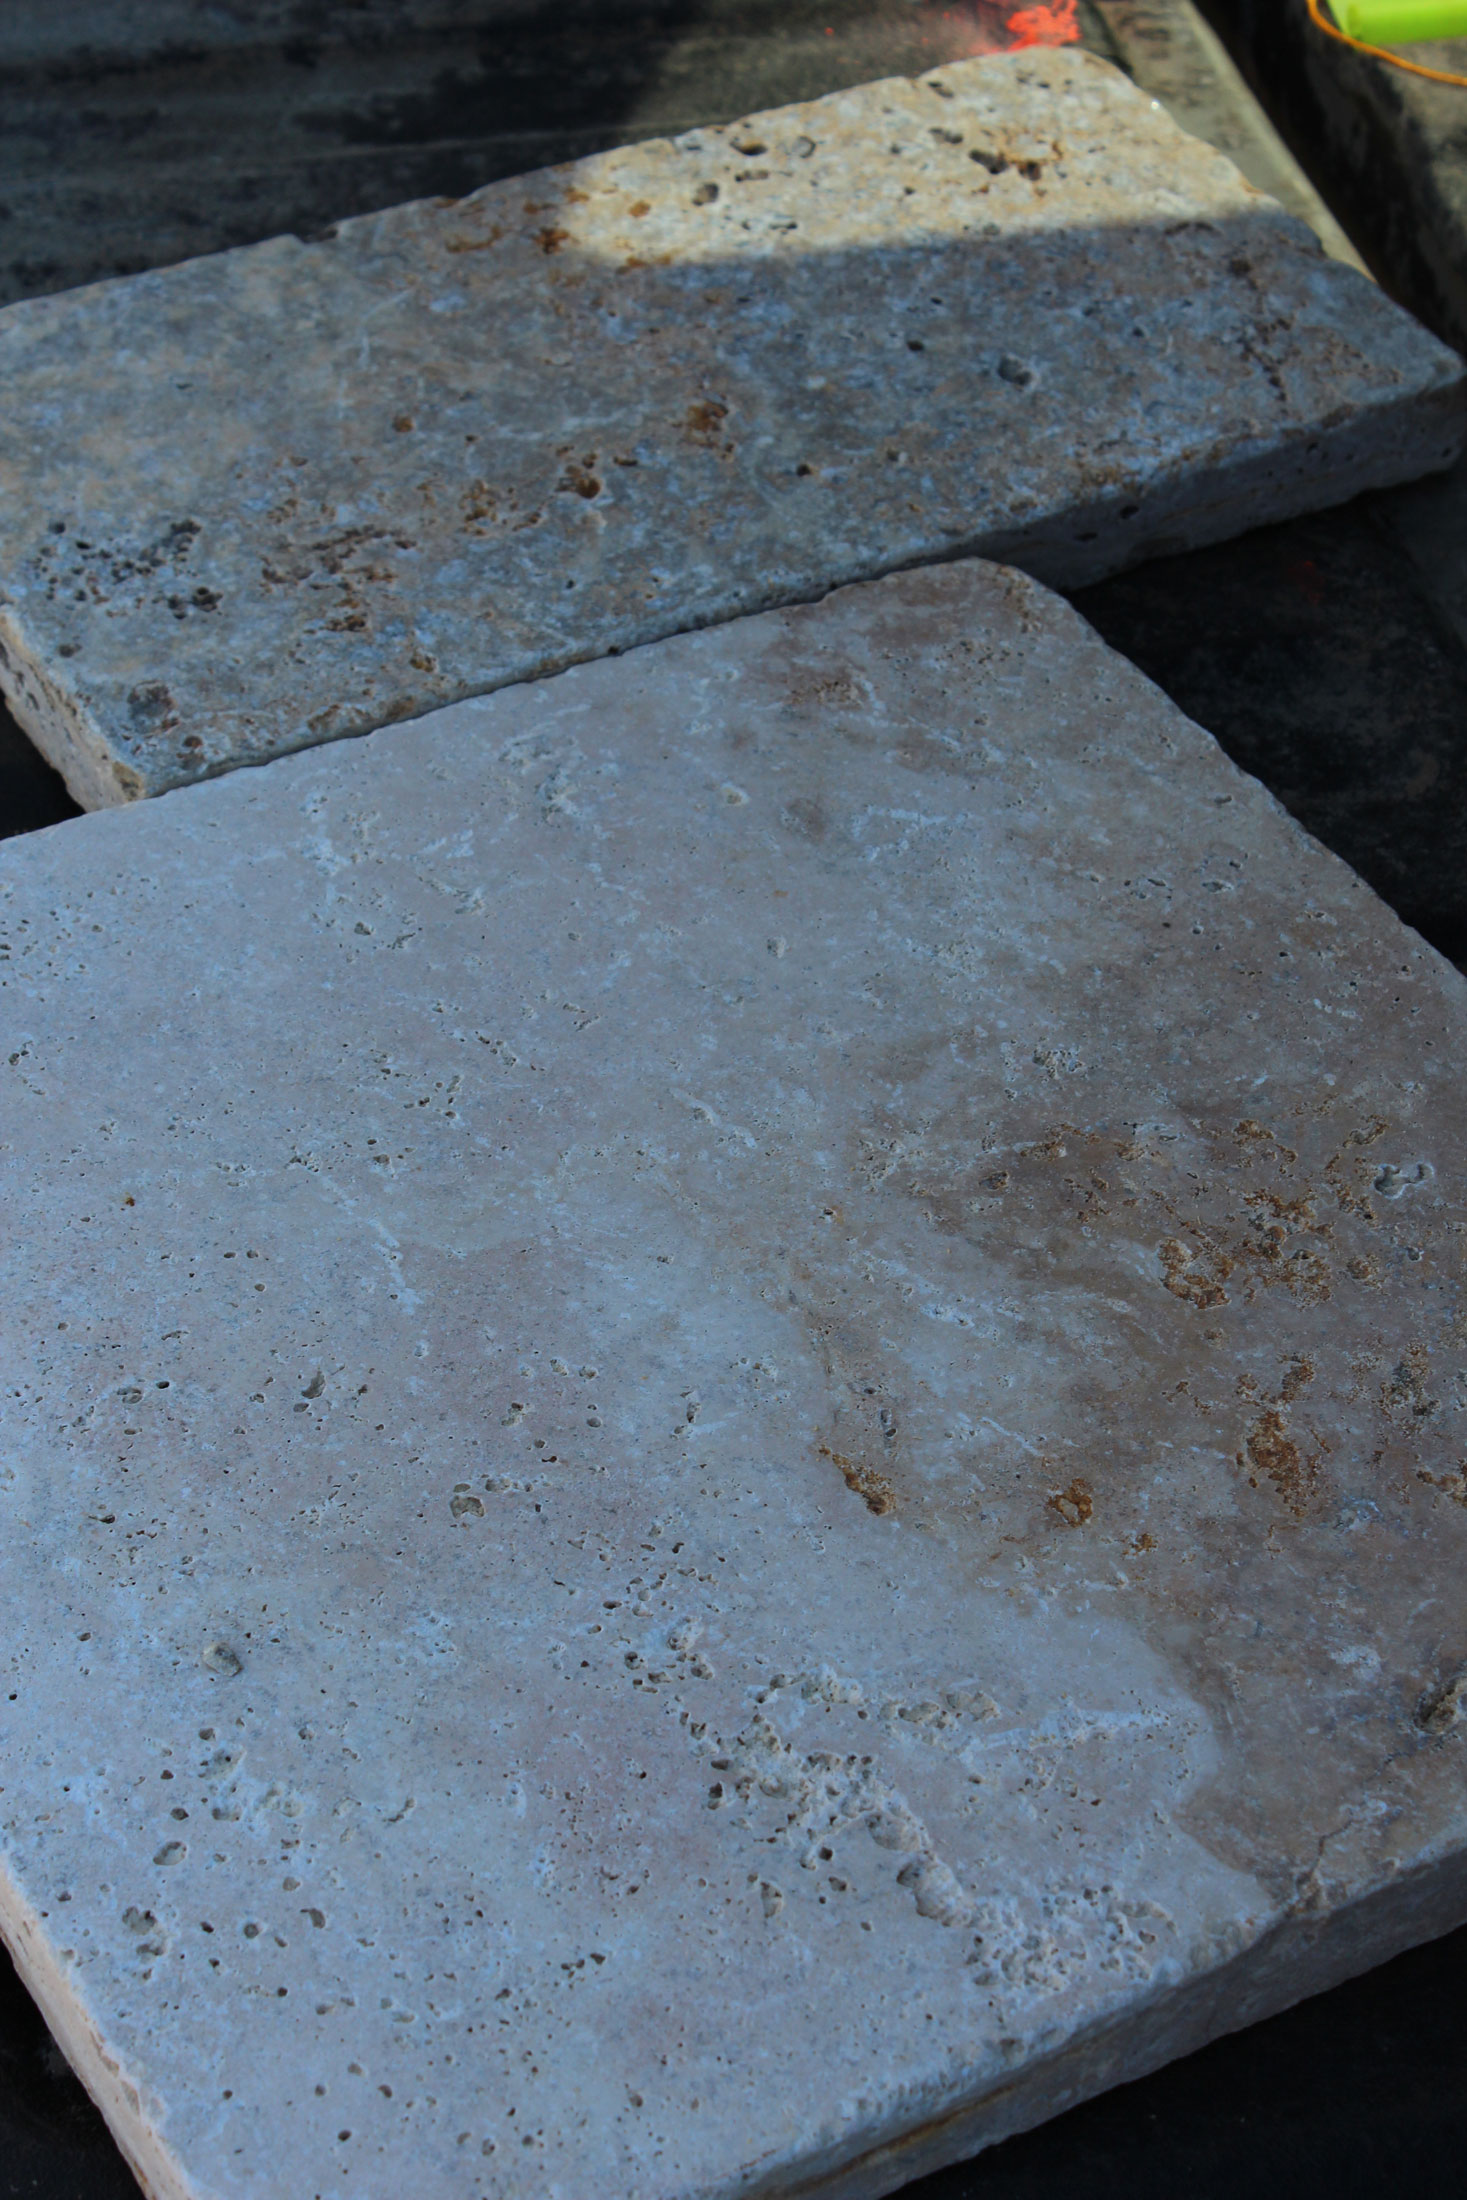
When I was designing landscapes in Arizona, one option we had available to us was travertine marble tile. These were actual tiles – typically 12″x12″ and less than a half inch think – so they had to be laid in a mortar bed on a concrete slab. Shortly after landing in Virginia in 2005, I started seeing travertine pavers make an appearance.

These are really cool because they’re an inch thick and are laid just like a concrete paver. You build up with a base layer of compacted gravel (21A or crusher run), then use a one inch layer of sand as your bedding layer. Once the pavers are in place they’re compacted and polymeric sand is swept into the joints. That’s it. It’s a beautiful finished product that has the ability to flex and move like a traditional concrete paver patio in Virginia. From the test data I’ve seen online, travertine pavers have a compressive strength similar to concrete pavers and can even be used for driveways!

The biggest challenge I’ve found with designing travertine paver patios in Virginia is making the materials make sense. Travertine in California or Arizona doesn’t look out of place. It can look a little foreign here, though. I recently designed a fireplace, seat wall, and travertine paver patio as part of a winery landscape design project. I used a plum-colored flagstone to tie in with the warm tones of the travertine and the rich reddish colors in the fireplace stone, and I’m quite pleased with how it turned out. All those color theory classes have finally paid off.

I’m starting my next travertine paver patio project this week, and I may have one more in the pipeline as part of a swimming pool project. The travertine pavers are a great product that (unlike concrete pavers and flagstone) aren’t in every other backyard. Making it work requires someone who can integrate this new material in the landscape design while blending all the colors harmoniously. In other words, you need a landscape designer. Contact me to set up a consultation if you’re looking to build a travertine paver patio in Virginia, Maryland, or DC and I’ll be happy to talk with you about it!

The Importance of Compaction for Installing a Paver Driveway
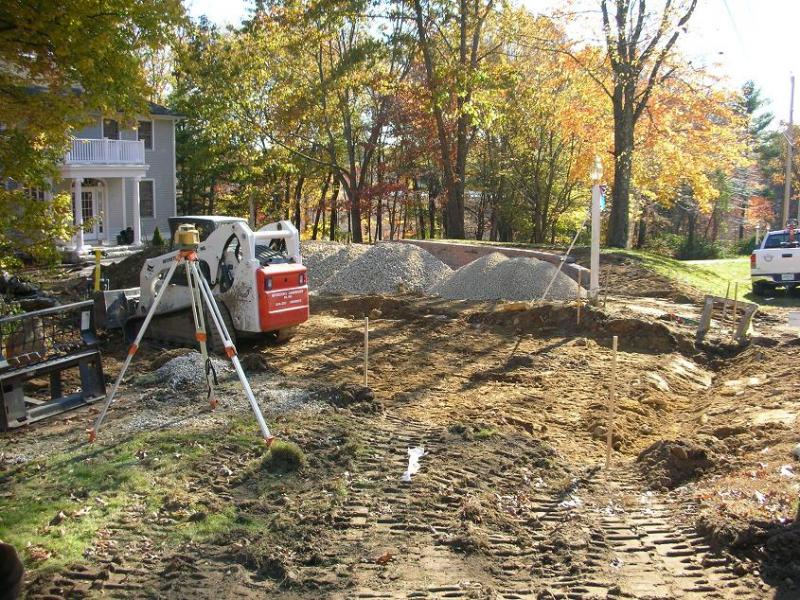
On behalf of a contractor client I’m working with a great couple who are building a new custom home in northern Virginia. As part of the landscape design, they wanted to incorporate a paver front walk and a paver driveway. When they saw the proposal, they were surprised by the cost of the driveway and wanted to know the reason behind the price.

Photo credit: Interstate Landscape of New Hampshire (click to follow)

On any paver installation it’s important to dig out organic soils and any fill to get down to undisturbed soil. For a driveway you want a minimum of 6″ of compacted aggregate base – that’s a minimum number. For these homeowners their home is being built on fill. That’s fine, but all that loose, fluffy fill has to be removed. If we build on it, it will settle over time and the driveway will fail. Therefore we’re going to have to dig down a good bit, which means we’ll then need to add compactable material to get back to the right grade. For this we use an aggregate (gravel) that contains a mix of large, small, and fine pieces of stone. Around here it’s generally called 21A or crusher run. You can’t just dump it and go, either. The correct procedure is to compact in lifts. In straight English that means we spread a 2-4″ layer of gravel, compact it, and repeat until we’re back up at the right height. It’s not a quick process and you can’t rush it.

Obviously most folks outside the industry will read that last paragraph and hear the voice of Charlie Brown’s teacher. That’s ok, because I found a video that illustrates how far down we may have to go and the type of equipment used:

What happens if we try to take a shortcut and skip compaction? The driveway will fail. A minor failure would mean that the pavers settle and you see ruts form where you drive in and out of the garage, or low spots develop and hold water. That’s a best case scenario, and the only way to correctly repair the problem is to pull up the pavers across the entire affected area and correct the base aggregate. Anything else is a short term Band-Aid fix.

So what did my homeowners do? They’re still mulling it over but it’s my job to learn what my clients are comfortable spending and help them get there. I took a hard look at the project and there’s really nothing I can value engineer out of the installation process that won’t result in a flawed build. So, we’re looking at a more traditional concrete or asphalt driveway for now, and if we go that route we’ll revisit the pavers down the road. After all, it’s better to use the materials and methods that fit your budget than it is to try and cheat the costs – and get an inferior product that won’t last.

Being a landscape designer isn’t just drawing pretty pictures, it’s understanding the construction process well enough to be an advocate for my clients (all of whom are awesome, by the way). If you’re looking for someone to create a gorgeous landscape and someone who can guide you through the entire process, give me a call at 703-679-8550 or click the big blue Contact button. I’d love to talk with you about your project.

Understanding Flagstone: Sawcut, Thermaled, and Chiseled Edges
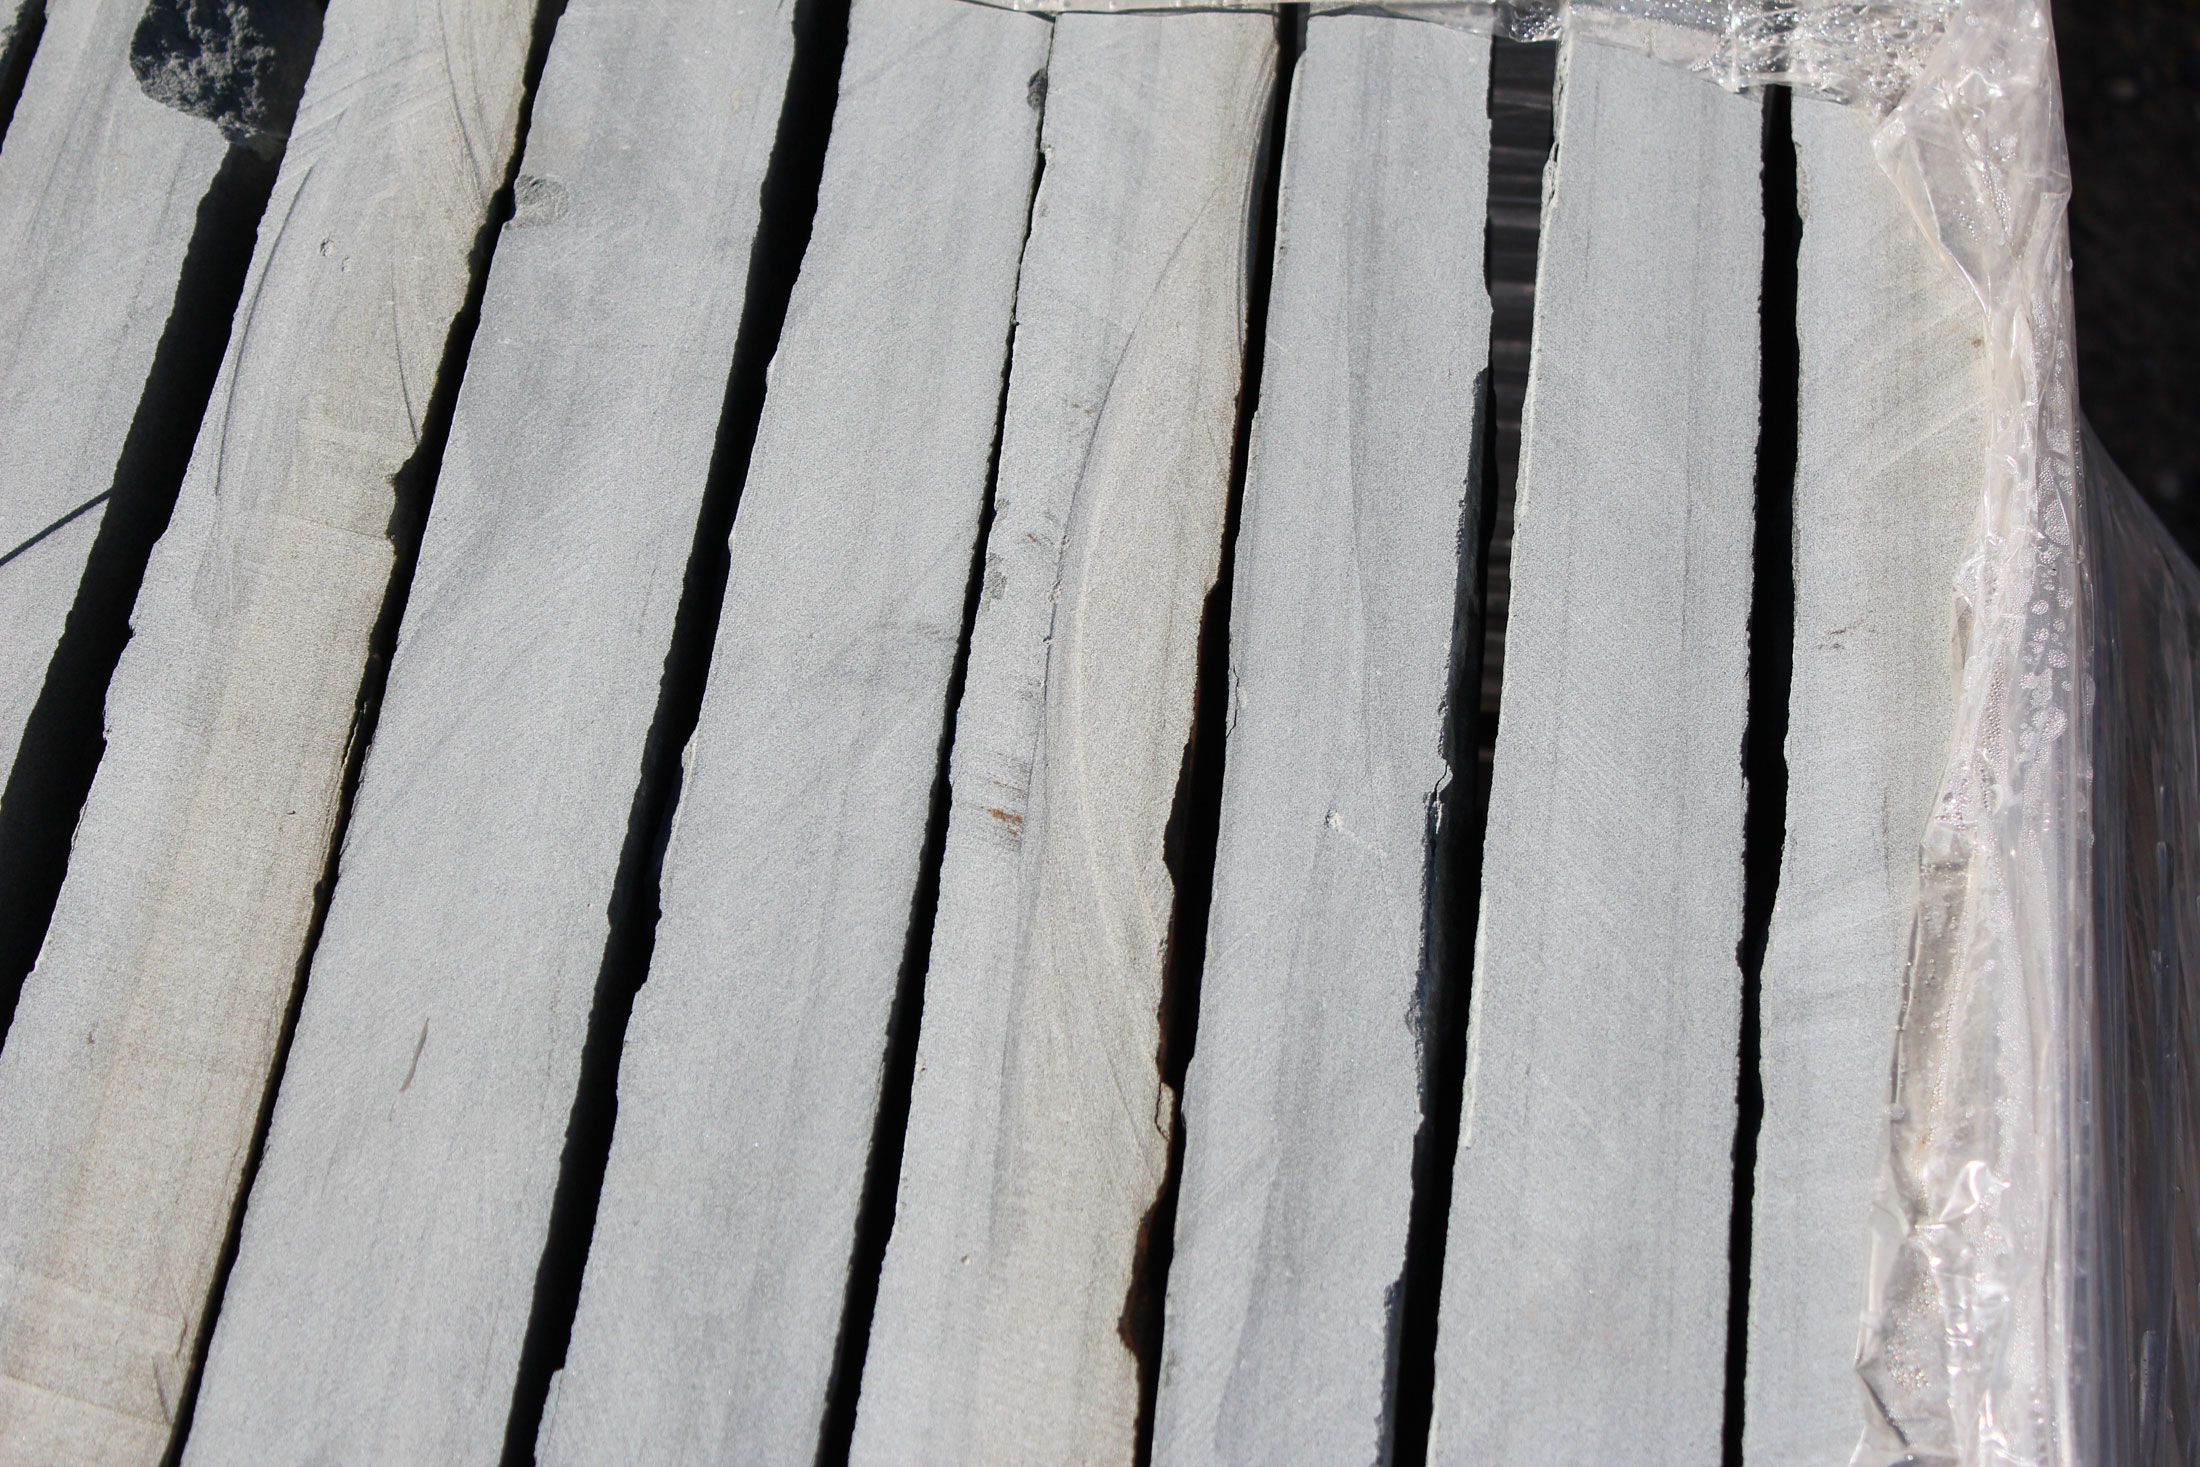
You’ve decided to use flagstone in the landscape. Good call! You may not be done making decisions, however. If the stone will be used in an application where you see the edge of the piece (step treads, wall caps, etc) you’ll have to think about the finished look.

Thickness

The first thing to consider is the thickness of the stone. The typical stone we use for a wet-lay patio can vary in thickness, from a hair under an inch to over two inches. When building steps or a cap, you want to see a consistent thickness of stone all the way across.

Something else to consider is that often a thicker stone will look better. That 1″ thick flagstone can look wimpy. A 2″ piece has a lot more heft to it. In some cases you may want to go even thicker, but just be aware that now you’re looking at significant additional costs.

The Edge – Sawcut Flagstone

The most common edge “treatment” isn’t really even a treatment. The rectangular slabs of flagstone are cut with a giant saw, and you can often see the marks from the blade on the stone. It’s fine, but it’s certainly not an aesthetically exciting finish.

The Edge – Thermaled Flagstone

One of the most common edge treatments (and one that I think looks great) is thermal-treated. This is accomplished by taking a piece of sawcut flagstone, wetting down the edge, and heating it with a torch. Done correctly the water turns to steam and pops off small pieces of the stone, resulting in a smoothly textured and very consistent surface. Done incorrectly, the piece overheats and splits. This is why most stone yards offer to provide thermaled stone.

The Edge – Chiseled Flagstone

Another way of treating the edges of flagstone is to give them a chiseled appearance. It’s another technique that’s simple to describe and more difficult to do: the mason uses a chisel to remove small, evenly sized pieces of material from the edge of the stone until it has a very cool, consistent rock-faced look across the edge. Some companies do this on site, but most get the stone from the stoneyard like this.

When designing with stone there are so many variables to consider. While it seems inconsequential at first, the right edge treatment can make the difference between a good result and a great result. If you’re looking for help achieving that great result, contact me for a design consultation!


Virginia Deck Design Explained, Part 2: Posts, Beams and Joists

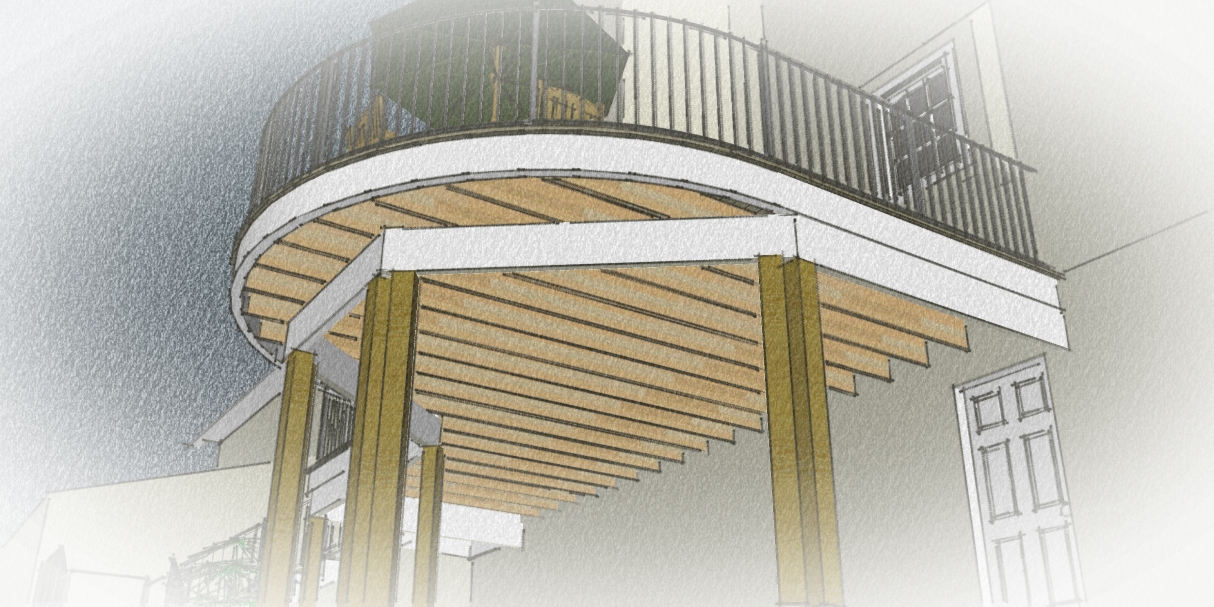
Last week I talked about the ledger board and the footers, the first steps in building your deck. Today I’ll cover the next steps.

Posts

The standard spec for a deck is for it to be supported by 6″x6″ pressure-treated posts. Not only are these sturdier than 4″x4″ posts (the old standard), they’re big enough that you can notch the top of the post to carry the beam.

Beams

On your deck, the posts and the beams are doing much of the work. For this reason, the attachment of the beam to the post is a very important detail.

Source: Spotsylvania County Typical Deck Details

While you can get 4″ or 6″ thick beams, the more common approach is to build up to the required thickness with multiple pieces of 2x lumber fastened together. For example, a typical callout for a beam might be (2) 2x10s or (2) 2x12s. Deck beams can either run under the joists or in line with the joists. An advantage to running the beam under the joists is that if you’re following the Typical Deck Details packet, you can cantilever your joists (let them hang over) up to two feet past the edge of the beam. I’ll do that if we’re doing a curved deck, for example.


An in-line beam can help you out if you’re building a deck that is very low to the ground, where you wouldn’t have enough height to place a beam under the joists. On a taller deck, an in-line beam creates a cleaner look and can make it easier to use the space under the deck for storage or additional patio space.

Joists

The joists carry the deck boards, and therefore act just the like floor joists in your home. The key is to size your joists correctly so the deck feels solid. On a really long span, 2×10 joists might be approved but they could make the deck feel springy in the middle. Joist spacing is also important. While a 16″ on center spacing might work for pressure-treated decking laid perpendicular to the joists, what if you want to set the boards at a 45 degree angle? Composite decking is also a variable to consider, because it can give a little. Set your joists too far apart and you’ll feel the decking give a little underfoot. Even if you’re in no danger of falling through, it’s an unsettling feeling.

The important rule of deck design is that there is no one size fits all approach to building a deck. Not sure where to start? Contact a professional deck designer in your area!

Virginia Deck Design Explained, Part 1: Footers and Ledger Attachment

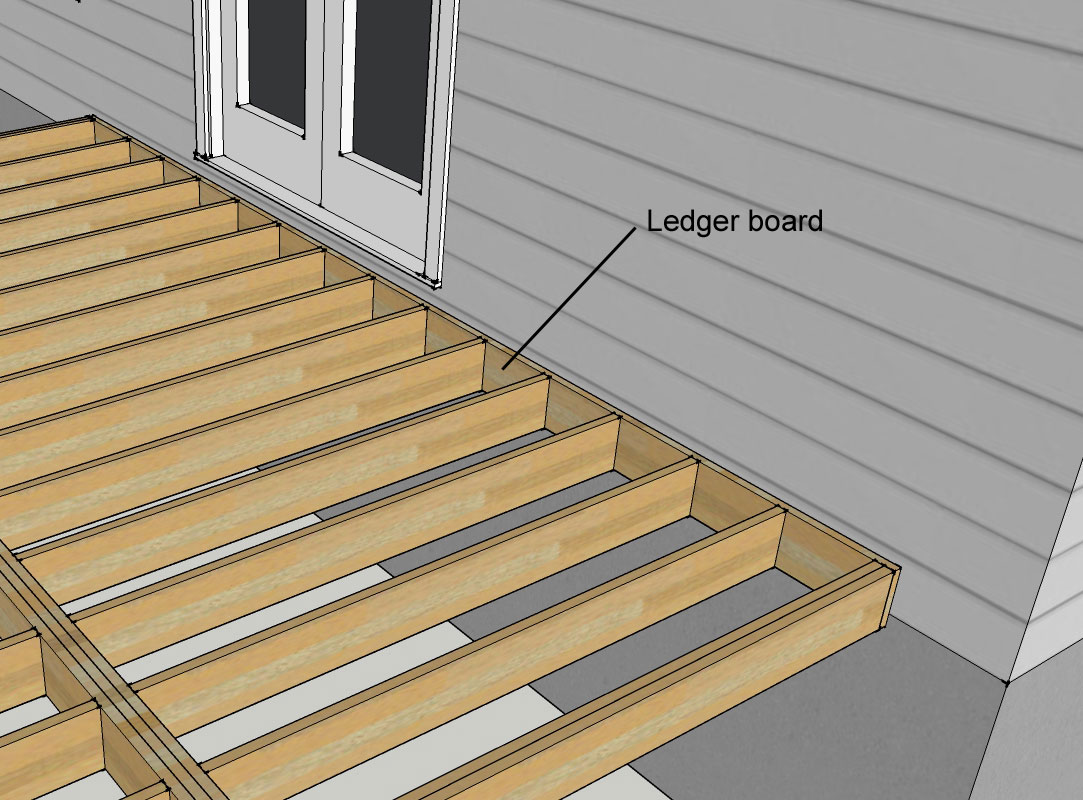
My name is Dave Marciniak, landscape designer and owner of Revolutionary Gardens, and I use jargon.

I’m deeply sorry.

However, the fact is that when it comes to building everything has a name. It’s easier to use the technical term than a long-winded explanation. A great example is the French phrase “l’esprit de l’escalier.” It’s literally translated as spirit of the stairs, but the meaning is “thinking of the right comeback in an argument after it’s too late (and you’re walking down the stairs).” So in the interest of making myself easier to understand, I’m going to do a multi-part guide to understanding the key parts of deck construction, starting with the first step of construction: the footers and ledger. If these parts of the deck aren’t right, your deck could fail pretty spectacularly.

source: fairfaxcounty.gov

Before we get started, a disclaimer is in order. This is not intended to be a how-to guide for designing or building a deck, just an explanation of terms. I recommend working with professionals to design and install your deck, and at a minimum you should ALWAYS pull permits and have your plans and construction reviewed by the municipality in which you live. Got it? Good.

Footers

Unless you’re cantilevering your deck (which is another post), you need posts. Those posts need to be anchored firmly in the ground, and your county probably sets out the minimum requirements in a Typical Deck Details packet. The current standard is to use a 6″x 6″  pressure-treated post. The size of your footers is dictated by the framing they’re supporting, but minimum requirement is 16″x16″ square, up to 24″x24″ square. As for the depth, you need to dig down to the locally accepted frost depth. In most of Northern Virginia, that is 24″ down. If you live farther north, you may be digging down three or four feet. All of your footers need to be anchored in concrete.

Ledger

In most counties you’ll need to have the ledger board in place when you call for a footer inspection. The ledger board is the framing lumber (usually a 2X? piece of lumber) that is attached to the structure of the house when building an attached deck. I prefer building a deck this way, because it means I don’t have posts right up next to the house.

The ledger attachment is critical to the success of your deck project. After all, if you do it wrong your deck can fall off. Therefore, there are detailed specifications on how to install the ledger. If you’re attached to the home’s band board (it’s the board along the perimeter of the home that’s in line with that level’s floor joists) you’ll need to remove the siding, install flashing, and attach directly to the board. Sandwiching the siding between the house and the ledger is bad.If your home has a brick veneer over the wood, the county may require you to remove that brick. I don’t recall ever being allowed to simply drill through the brick if it’s not structural.

If you’re attaching to masonry (poured concrete walls or block walls), you’ll use either expansion anchors or epoxy anchors to hold the ledger board in place. The great thing about working with approved details is that they even tell you exactly how many anchors to use and how to space them out. You don’t need to be a master baker to make brownies, you just have to follow the directions on the box. Just be sure you get good directions. Hiring a landscape designer who designs decks for homeowners in Virginia, Maryland, and DC could be a good place to start. Click my contact page and we’ll talk.

Alternately if you’re just looking for an off-the-shelf solution, to check out my friend Joe’s deck plan packages Click Here!

Next week we’ll talk framing: beams, joists, and how they connect to the ledger and the posts. The ankle bone’s connected to the leg bone, and all that good stuff!

Drainage and Infrastructure Are Not Like Milk Duds

I’m still recovering from Halloween – 538 trick-or-treaters is a LOT Of kids – and it’s still framing how I look at things. Of the nearly $200 we spent on candy we have a bowlful left, and as I was pawing through the bowl for a mid-morning snack I kept encountering Milk Duds. Boxes and boxes of Milk Duds. They’re ok, I suppose, but I’ve never met anyone who got excited about them. It takes some amazing skill to be able to combine chocolate and caramel, two awesome flavors, in a way no one loves.

A lot of people look at the essential foundations of the landscape as if they were Milk Duds, something that you can’t avoid but don’t love. It doesn’t have to be that way! I’ve already gone on and on about dry streambeds as an attractive way to move water through the landscape. It’s also possible to move stormwater in a more formal way, using it as a water feature. When I took care of the grounds at the Salk Institute in La Jolla, California, I got to see a really neat way of handling rainwater. Here’s the wide-angle view of the buildings:

Every floor has a balcony overlooking the central courtyard, but what architect Louis I. Kahn did was he stepped each balcony back as they got higher, so that the rainwater flowed off the flat roof onto the edge of the balcony, through the scuppers, and onto the balcony below that, and on and on for the six floors of the building.

Source: tourguidetim.com

The idea was to create a series of cascading waterfalls, and it was a really cool idea. Now, ideas do come down to execution. If you worked at the Salk and wonder why you never really saw this, sadly, the reality check is that clearly the concrete company who poured the floors didn’t get the memo. In a heavy rain, water pooled on the balconies and flowed the wrong way, right into the labs. Rainy days meant all of us – landscapers, carpenters, plumbers – grabbed long-handled squeegees and saved Science from Nature. Hm. Is there an allegory in there?

Regardless, Louis I. Kahn’s design intent shows that drainage and infrastructure can be handled artfully. Where a lesser architect may have channeled the water into drains and hidden plumbing runs that daylighted in the scrub above the cliffs, he made them a feature. That’s a testament to what design can do. Thus inspired, I’m off to see if maybe microwaving Milk Duds makes them better.