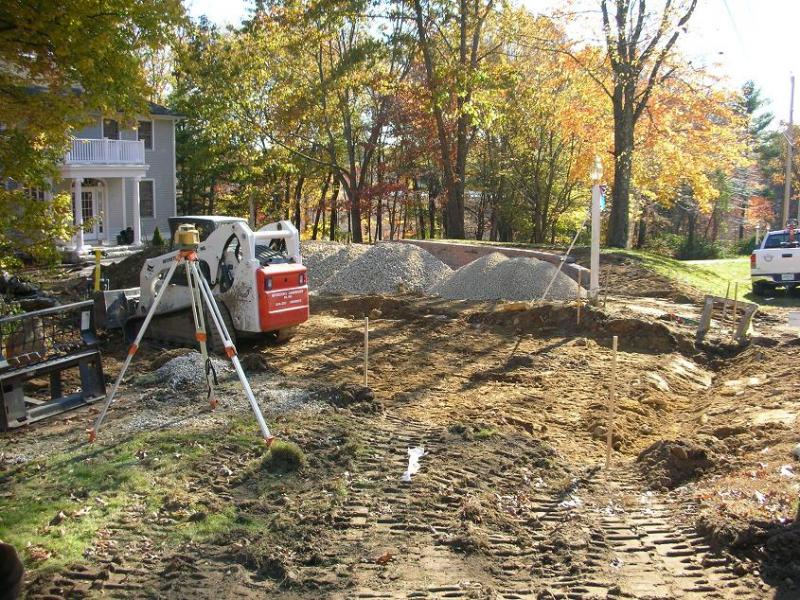
On behalf of a contractor client I’m working with a great couple who are building a new custom home in northern Virginia. As part of the landscape design, they wanted to incorporate a paver front walk and a paver driveway. When they saw the proposal, they were surprised by the cost of the driveway and wanted to know the reason behind the price.

On any paver installation it’s important to dig out organic soils and any fill to get down to undisturbed soil. For a driveway you want a minimum of 6″ of compacted aggregate base – that’s a minimum number. For these homeowners their home is being built on fill. That’s fine, but all that loose, fluffy fill has to be removed. If we build on it, it will settle over time and the driveway will fail. Therefore we’re going to have to dig down a good bit, which means we’ll then need to add compactable material to get back to the right grade. For this we use an aggregate (gravel) that contains a mix of large, small, and fine pieces of stone. Around here it’s generally called 21A or crusher run. You can’t just dump it and go, either. The correct procedure is to compact in lifts. In straight English that means we spread a 2-4″ layer of gravel, compact it, and repeat until we’re back up at the right height. It’s not a quick process and you can’t rush it.
Obviously most folks outside the industry will read that last paragraph and hear the voice of Charlie Brown’s teacher. That’s ok, because I found a video that illustrates how far down we may have to go and the type of equipment used:
What happens if we try to take a shortcut and skip compaction? The driveway will fail. A minor failure would mean that the pavers settle and you see ruts form where you drive in and out of the garage, or low spots develop and hold water. That’s a best case scenario, and the only way to correctly repair the problem is to pull up the pavers across the entire affected area and correct the base aggregate. Anything else is a short term Band-Aid fix.
So what did my homeowners do? They’re still mulling it over but it’s my job to learn what my clients are comfortable spending and help them get there. I took a hard look at the project and there’s really nothing I can value engineer out of the installation process that won’t result in a flawed build. So, we’re looking at a more traditional concrete or asphalt driveway for now, and if we go that route we’ll revisit the pavers down the road. After all, it’s better to use the materials and methods that fit your budget than it is to try and cheat the costs – and get an inferior product that won’t last.
Being a landscape designer isn’t just drawing pretty pictures, it’s understanding the construction process well enough to be an advocate for my clients (all of whom are awesome, by the way). If you’re looking for someone to create a gorgeous landscape and someone who can guide you through the entire process, give me a call at 703-679-8550 or click the big blue Contact button. I’d love to talk with you about your project.
Great tips! Undertaking a project with a friend as spring starts and really appreciated the detailed references!
Jason Lee