One That Got Away: Challenging Retaining Wall in DC

One of my favorite things to do on this blog is to profile recent projects. It’s a fun opportunity to show what’s possible, and maybe brag a little. Hey, my clients let me create some great landscape designs for them!

DesignerIsIn

As I was thinking about a recent sale I didn’t close I realized I should blog about it as well. After all, what killed the deal were the realities of the site and the budgetary challenges they created. There might be something to learn from this, especially if you’re planning a DC landscape design project of your own.

The site: A rowhouse in DC. It’s in a hilly neighborhood off of Rock Creek Parkway and there is a HUGE amount of elevation change between the street and the front porch.

All the homes in this neighborhood have a 10-12 foot tall stone retaining wall right at the city sidewalk. This client’s wall had deteriorated, so last year he had the wall rebuilt. Such a wall requires a huge cantilevered footing, which meant digging way back into the hill. Because the wall was being built right at the city sidewalk all excavated soil was hauled off site. The new wall was built, including a 4 foot wide set of curved steps, and only some of the removed soil was brought back.

The project for which I was called: Prior to the new wall’s construction, the homeowner had an 8-10 foot wide level piece of lawn in front of his porch. Since the wall builders didn’t bring all that soil back, it now plunged off like a ski slope. The homeowner, therefore, wanted one or two natural stone retaining walls built behind the big wall to level off the yard, new landscaping, and new low voltage landscape lighting.

Wowsers. The client wanted to have a sense of the budget, so my masonry contractor and I sat down, had some coffee, and talked it over.

The challenges:

– Access. Parking in DC is a challenge, and with the sheer wall right at the sidewalk there would be nowhere to stage materials. Everything would have to be hand carried up the steps and staged at the top of the lowest wall. If the steps were a straight shot, we could have laid boards as ramps and wheeled materials up – but that wouldn’t work on the curved steps. Getting concrete up to the wall footers would require a pump truck.

– Work area. The only space to stage materials and mix mortar is a small flat pad at the top of the new retaining wall. That means a lot of shuffling things around every day, reducing efficiency.

– Backfilling our new walls. Again, the material that was here originally never came back. This means that we would need to bring in between 40-60 cubic yards of fill dirt and topsoil. To put that in perspective, a full load in a standard tri-axle dump truck is 12-14 cubic yards.

So how would we get this quantity of soil up to the top of the site? As mentioned above, wheelbarrows were out. Hiring a ridiculous number of laborers and doing a bucket brigade would be just… ridiculous. We settled on having Sislers Stone put the soil in super sacks (sturdy bags that can hold a ton of bulk material), truck them to the site with a flatbed, and lift them into place with a rented crane. Logistics!

– Safety. Any time you have a retaining wall on a slope above another retaining wall, there’s a possibility that it will exert forces on the wall below. I let the client know that as part of the landscape design process I would have a structural engineer look at my drawings, and if he felt it required his involvement that would be an additional cost.

After all this, the landscaping and lighting were a small portion of the project cost, but it all added up. In the final analysis, we figured it would cost a minimum of $30,000 to complete the project. It was more than the homeowner wanted to spend, so we’ll hopefully revisit it later.

The unfortunate thing is that this is a $30,000 landscape installation project that could have been avoided, or at least reduced. The company that rebuilt the wall clearly didn’t work off of detailed plans or specifications. I know this because the client told me they built the steps in the wrong place, and there was clearly no communication up front about the soil hauled off site being brought back. This is yet another case where starting with a landscape designer – someone who could create a detailed set of drawings and a complete scope of work – could have saved thousands of dollars.

I would love to save you thousands of dollars! If you’re looking for a landscape designer for a project in northern Virginia, DC, or Maryland, contact us for a consultation!

What’s behind door # 1? Helping guests find your front door

MomsHouse

I grew up in a 1950s ranch house in Rhode Island. It’s the one in the photo above. You can see that there are two doors on the front of the house: the front door, which is in the center of the main structure, and the family room door (between the main structure and the garage). We could always tell when someone was coming to sell something because they’d walk right past the family room door, down the front walk, and they’d knock on the front door. No one ever used the front door; just the sound of footfalls on the front walk was enough to wring an exasperated sigh from my dad because he knew the next ten minutes would be filled with lots of “I said no”.

I still see a lot of that, even meeting with Virginia landscape design clients who live in newer homes. Have architects learned nothing? Apparently not.

Ok, I’ll grant you that it’s not a huge issue. But as a first time guest it can be frustrating when you don’t know which door to use. It’s a little embarrassing (at least for me) when it becomes obvious you chose the wrong one and from the other side of the door you hear cursing, heavy objects being slid out of the way, and the screech of protesting locks being used for the first time in years. A good architect can make this scenario a lot less likely. Look at this home, designed and built in McLean VA by AV Architects:

AV_Arch

The family entrance/mud room door is what you come to first, but it’s also tucked back in an alcove and sort of behind the corner. The difference in scale and presentation makes it obvious which is the front entry. Of course, there’s still a little ambiguity. That’s where we came in. This close-up photo shows how we eliminated that ambiguity:

AV_Night

The main walk is travertine marble pavers set on a new concrete base. The soft curve leads you to a larger gathering space at the front steps; it’s obvious where we want you to go. The path to the family entry is much simpler, just a straight run of flagstone slabs. Any first time guest will step out of her car and know exactly where to go.

Landscape design – it’s not just about making a space pretty, it’s about making a space WORK.

Do your guests get lost looking for your front door? Do you want to improve the way your outdoor spaces work? Call us at 703-679-8550 to learn about setting up a consultation today!

Note: If you’re looking for a new home in McLean, Virginia you should consider the one we’ve pictured. You can learn more about it here. If you do buy it, I already have some ideas for the landscape that I’d love to discuss with you!

Can I paint or put stone over an old concrete porch?

Erchiniak1210_2005-003


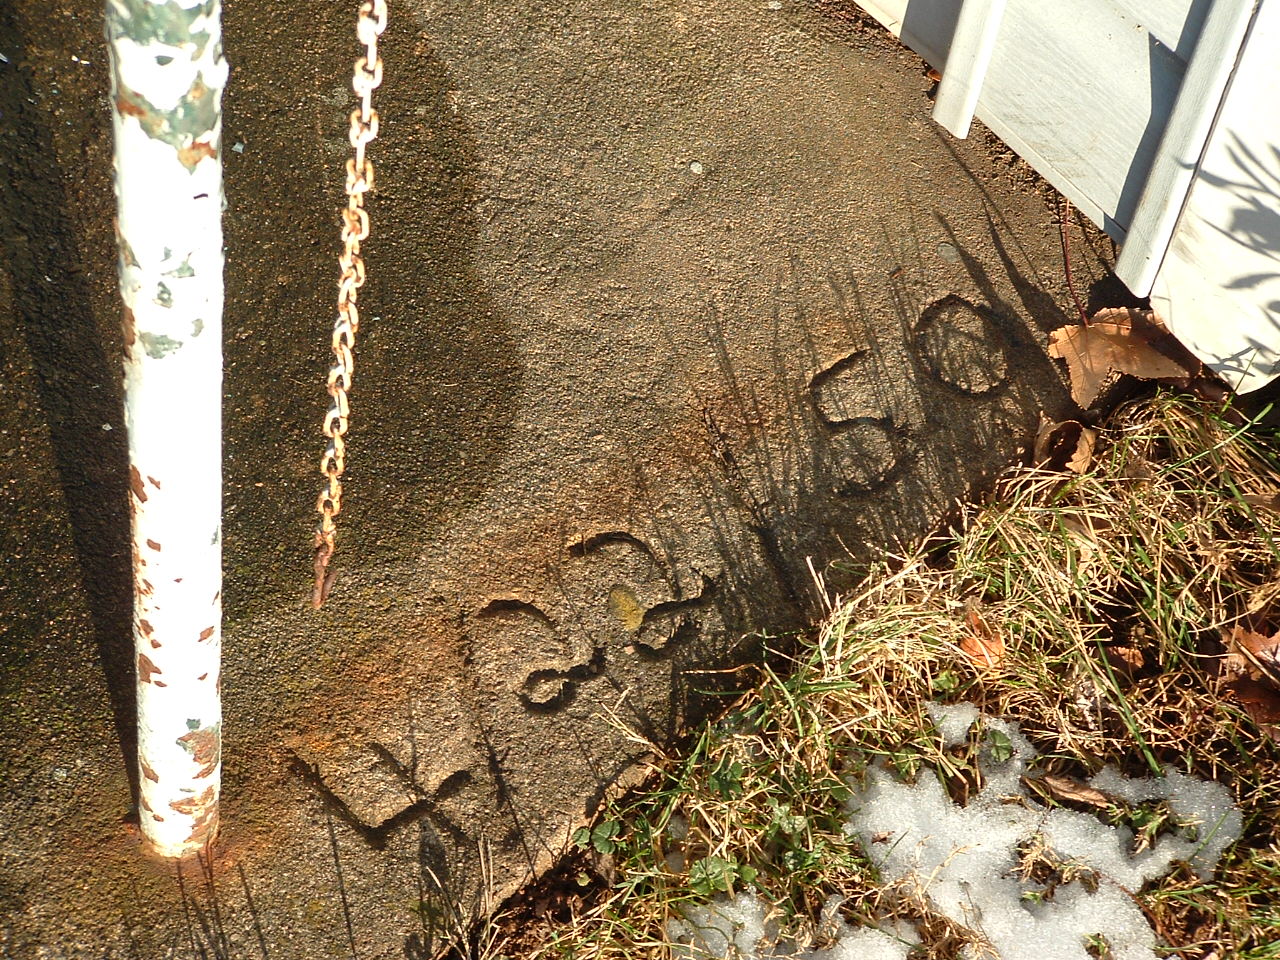
We see a lot of concrete porches, especially on older homes (1950s-1970s for sure). If I had to guess, that’s about the time the prior owners poured our front porch. The thing is, no one likes the look of a concrete porch, so I’m often getting asked “how do we make it look better?” Here are some approaches and what I see as the pros and cons of each:

Painting the concrete porch

Cheap and easy, right? Well maybe, if it’s clean and dry, but good luck getting the paint to stick. Where people walk is going to wear the quickest, but the paint is bound to bubble and flake all over. When I was growing up, our 1950s ranch had a painted stoop. It was my job to sit there with a wire brush and get all the loose paint off so my dad could repaint it. Miserable.

PROS: cheap, doesn’t require much skill

CONS: you better like scraping and painting because you’ll be doing it every year or two

Putting stone or tile or brick over the concrete porch

Adding a veneer over the porch can look great, but you need a mason who’s good. Someone who is willing to really look at the existing conditions and will tell you if it’s a bad idea. Here’s what I look for when someone asks me if they can veneer a front porch or stoop:

  1. Is the concrete in good condition? If the edges are crumbling, the face is spalling or flaking off, or there are significant cracks and signs of settlement, your porch is a bad candidate for a veneer. Any issues like these will telegraph up through the mortar bed and you’ll end up with loose stones, failed joints, and sometimes even stones (or tiles) that are cracked right across the middle.
  2. Is the concrete pitched away from the house? You’d think you’d want the porch floor dead level, but keep in mind that concrete doesn’t let water drain through the way a deck does. If the porch is poured flat, the mason can usually make that up with a thicker mortar bed closer to the house, but if the porch is pitched towards the house – that’s a problem.
  3. Do we have enough room for stone under the door threshold? This is the one that no one seems to think about before they ask me. Flagstone is at least 1″ thick, and the mortar bed is at least 1/2″. If the threshold sits right on the porch, veneering the current porch is not an option.
  4. What does stone veneer do to the heights of the steps down from the porch? Let’s say you have three 6″ steps from your front walk to your porch. We add flagstone on a mortar bed, and now as you walk up to your porch, your steps are 6″, 6″, 7.5+”. Can’t do it. Code requires the steps be within 3/8″ of each other. So we add stone to each of the steps, right? Now they’re all 6″ steps again EXCEPT for the first step (which is 7.5″). Know that you may need to redo your steps or modify your front walk to make veneer work.
  5. What do the sides of the porch look like? If you keep the sides concrete, you’ll see concrete all the way up, then an ugly mortar joint, and then the stonework. For your “new” porch to look its best, you need to consider veneering the sides as well.

PROS: looks amazing, can hide some sins in the concrete pour

CONS: expensive, requires skilled labor, base has to be right

These are two of the most common approaches we take. I hope that helps steer your decision. If the porch is something you’re exploring as part of a project to make the rest of your landscape mah-velous, give us a call at 703-679-8550 today to schedule a consultation!

Pros and Cons of Building a Pergola in Northern Virginia

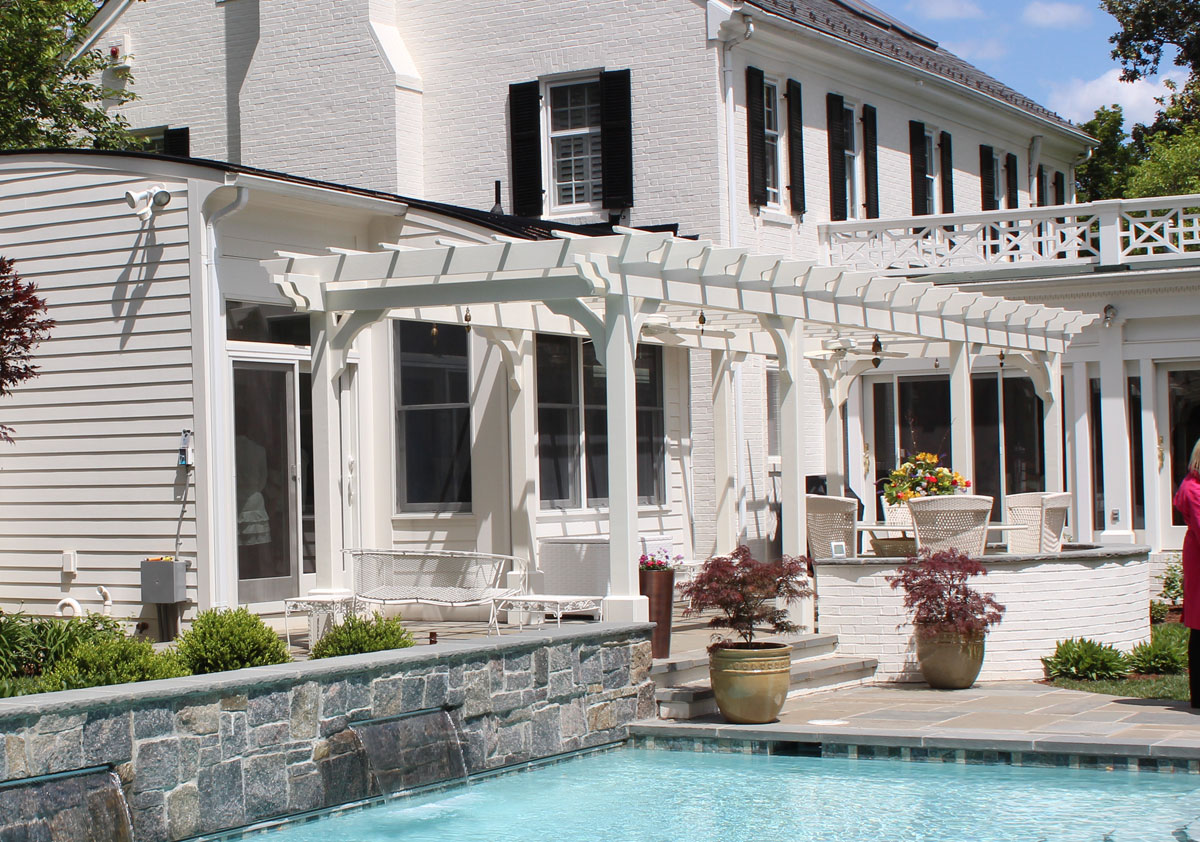
I get a lot of requests from people interested in adding a pergola to their landscape. They’re cool to begin with and they’ve been made all the more popular by HGTV, etc. over the years. Is a pergola right for you, though? Here are some pros and cons to consider.

Pergola-and-Pool

THE PROS OF BUILDING A PERGOLA

First, so we’re on the same page, let’s talk terminology. A pergola is an overhead structure without a solid, fixed roof cover. Make sense? Good. Here are some pros:

  • a pergola is generally less expensive than a roofed structure. You’d be amazed how much cost AND weight plywood and shingles add to a structure, and that structure needs to be beefy enough to withstand those loads. A pergola can be built a bit “lighter” because it’s carrying a lighter roof load. Because it’s an open-topped structure, it also doesn’t have to support a couple feet of snow. A roofed structure is also more subject to “uplift”, which is what it’s called when winds blow underneath and want to lift the roof like an umbrella.
  • Your pergola is available in a wide range of material choices. There’s basic pressure treated wood, and then there’s cedar. There’s fiberglass. There’s aluminum. We can look at your budget and your maintenance requirements and pick something that will fit those.
  • With systems like Shade FX, you can still get solid, retractable shade with your open-topped pergola.
  • A pergola helps define an outdoor “room” and as such makes your yard way cooler than your lame-o neighbors.

Pergola-Completed

THE CONS OF BUILDING A PERGOLA

  • A pergola doesn’t provide the same practical cover as a pavilion or other roofed structure. You can overcome the shade issue by using a product like Shade FX as mentioned above, but you’re still going to get damp if it rains.
  • There’s no ceiling in which to hide stuff. We’re wrapping up a pavilion that has recessed lights, ceiling fans, outlets, surround sound speakers, and home automation wiring hidden behind the ceiling and soffit panels. There’s nowhere to hide in a pergola (well, unless you do a fiberglass pergola and hide stuff in the hollow beams and rafters).
  • There are kits out there, but buyer beware. Some are great quality and will last a long time. Others are a step above a $99 screened box from Target. Know what you’re getting, and know that nothing in life is free.
  • A pergola won’t love  you like a dog will. (sorry, pergolas are awesome. I ran out of cons)

Naturally I think your first stop when considering a pergola should be a landscape design firm. In fact, how about a landscape design firm serving McLean and the rest of Northern Virginia? But that’s one (great) option.

CedarKitPergolaMcLeanVirginia


There are also the Amish-built outdoor stuff dealers you pass on the road. They have some nice products. The one issue I ran into is my clients wanted to use them for the pergola I designed. Because of the size of the span, they wanted to stick a post right in front of the fireplace. After some back and forth they agreed to explore engineered lumber. I get that the Amish are going to move at a different pace, but – six weeks to return a proposal that involved swapping out one beam? And in the end, my local carpenter was only $300 more (on a $12,000 project). So their kits = awesome, but outside the box = problem.

And of course there are lots of internet vendors. I’ve worked with some who are great, some who are ok, and one who was a horrible experience such that I hope every parking meter they use from now till eternity is defective and gets them lots of tickets. When considering one of these, ask for some local customers who have bought and installed their product.

So there you go! Pros and cons of building a pergola in Northern Virginia. If you’re ready to plunge ahead but you want your pergola to be more beautiful and more functional than anyone on your block has ever seen – call us for a consultation at 703-679-8550.

What Makes Danver Stainless Steel Cabinetry So Great?

In the past year I decided to become a dealer for Danver stainless steel cabinets. I get approached many times a year by companies who want me to hawk their products, so what made me decide to take this opportunity?

outdoor kitchen cabinetry
Source: www.danver.com

First and foremost, these cabinets appeal to me as a designer. I built my first outdoor kitchen in 1997 or 1998. It was your “standard” outdoor kitchen of the time, which means we poured a footer and then built a huge vault out of concrete block, set the grill in the countertop, and stuck two stainless steel doors in the front so the client could swap out the propane cylinder. There was no room for storing plates or utensils, and honestly the space behind those access doors was a hot, dirty cavern just made for black widow spiders. I always felt like something was lacking. I’ve done a few kitchens where we’ve built cabinets out of cedar or ipe and they’re fine, but it’s still wood. It’s also crazy expensive to custom build every cabinet and every door.

Danver stainless steel cabinets are just like buying regular indoor kitchen cabinets. You get to select the width (in 3″ increments), the type of cabinet (sink cabinet, drawers, trash pullout), and you can even select extra deep or extra tall cabinets. The standard finish is a flat panel stainless steel cabinet door, but that can be upgraded:

  • a five-panel door with a recessed panel
  • powdercoating in any one of several standard colors
  • a paint treatment that very convincingly replicates one of several wood grains
  • clearcoating (for locations in tough environments like salt air)
  • a special line of colors and door finishes licensed by upscale furniture makers Brown and Jordan

You can also buy wall cabinets, so you get the same amount of storage opportunity you’d have inside. The drawers have the same soft-close feature as your indoor cabinets. The appliance cabinets are custom built to the exact specifications of whatever appliance you’re using, so it’s a perfect fit. Seriously, I’m love. These are awesome, awesome products.

How about an outdoor media cabinet? Source: www.danver.com
How about an outdoor media cabinet?
Source: www.danver.com

They also appeal to me as a small business owner. These cabinets are made in a small factory just outside Hartford, Connecticut. I went up for a factory tour last October and it was a blast. Mitch, the owner, is clearly passionate and enthusiastic about what he does. He also cares about his staff, which is important to me (I don’t like to work with jerks). They’re always striving to be better, and they provide a rock solid support system for dealers. Can you tell I’m a fan?

YOUR OUTDOOR KITCHEN

So that’s great, you say, but how does that help me get a better outdoor kitchen? The bottom line is that outdoor kitchens are a challenge to design. We walk a fine line – we want to keep the kitchen from being so large it eats your backyard and costs a small fortune, but we want to pack as much function in there as possible. You get more bang for your buck with Danver kitchens.

When we design a masonry kitchen, we usually have to separate appliances and cabinets or drawers with 6″ block, to carry the countertops or any masonry above the opening. So if you want to include a 24″ fridge, a 36″ cabinet, a set of 18″ drawers, and an 18″ icemaker (8 linear feet of stuff), you also have five 6″ blocks surrounding these. That’s 2-1/2 feet of… nothing. Plus it’s around 6 square feet of countertop you may not otherwise need! Any time I lay out appliances for a contractor using a masonry kitchen base I’m appalled at the wasted space.

I'm proud of this one, but look at all that unusable space!!!
I’m proud of this one, but look at all that unusable space!!!

When we design your Danver cabinetry layout, I ask you questions like:

  • what appliances are you looking for?
  • do you want to have a place for trash and recycling?
  • will you have a sink?
  • Are you keeping plates and utensils outside? What about napkins, condiments, or other grilling staples?
  • what will you have that needs plugged in?

These are the same questions as with any kitchen, but we can fit so much more in a smaller space! If you decide you want a really large kitchen, you can fit loads of appliances and storage. It’s pretty amazing.

Are you intrigued? Ready to learn more? Contact us for a kitchen consultation and let’s get started!

Can a Built-In Charcoal Grill Be Installed in an Outdoor Kitchen?

I’m a charcoal snob. It’s one of the reasons why I really only deal with the higher end gas grills, because an infra-red sear burner is the only way to get the same sort of awesome heat that comes pre-loaded with a bag of charcoal. It begs the question, why don’t we see more outdoor kitchens with built-in charcoal grills?

FMduo

When designing an outdoor kitchen, the challenge with the superiority of charcoal over other forms of heat is that there aren’t a lot of budget built-in charcoal grills out there. Whereas the entry point for what I would consider an ok-quality gas built-in grill is $1800-2200, stainless steel charcoal built-ins are a bit more.  I carry a Fire Magic Aurora A830i Gas and Charcoal Combo Grill. It’s pretty great, and the charcoal is lit by the gas burner for ease of lighting, but at a list price of $4,690 it can be a chunk of the budget.

Saffire

If you’re less concerned about the stainless steel look you have more options. Any of the “ceramic egg” smoker/cookers can also be used as a charcoal grill in the open position. It may seem a little big for that purpose but it certainly gets the job done. I want one of these in the worst possible way, because not only have I discovered smoked meats and cheeses – I’ve discovered smoked cocktails and infusions. mmmm. One that I offer is by Saffire, and the price point is pretty great. A freestanding Saffire smoker starts at about $1100, and one designed to sit in a kitchen island is a bit less.

(One of my former neighbors had a Big Green Egg and someone swiped it from his backyard. Nothing is sadder than seeing someone standing in his driveway, screaming “who would take a man’s egg? WHO?!?!? I WILL FIND YOUUUUUUUUUUU!!!”)

You can also click here to read my post on how to build an outdoor kitchen around a freestanding grill – we did it with a gas grill, but charcoal could also work.

It’s a pretty well known fact that I fall victim to the rabbit hole of the internet pretty easily. There’s a bright side to this, though. It means I discovered the Concrete Exchange, an online shop for products by Fu-Tung Cheng. He’s a pretty amazing designer with a contemporary bent to his styling, and he designed a lightweight concrete surround for your basic, everyday $100 Weber kettle grill. Aesthetically, maybe it’s not your cup of tea, but if you like modern  and concrete it’s pretty neat. And functional, too.

So can a built-in charcoal grill be installed in an outdoor kitchen? Sure, but they can be a little tougher to find and may demand a little modification of your cabinetry. In my opinion, though, it’s totally worth it.

If you’re planning your outdoor kitchen or any other landscape project, I’d love to help you. Contact me to discuss next steps!


Why did this paver walk fail? The value of edge restraint

failed edge paver walk

I was walking into a meeting at a hotel last week when I saw what my path looked like. Here’s a hint: your paver walk should NEVER look like a half-unzipped Members Only jacket. How did this happen? Improper edge restraint. To explain, let’s step back and look at how a paver walkway should be installed.

Paver-Edge-Sketch

Keeping it quick and dirty, you excavate to undisturbed soil and build back up with a base of compacted 21A (3/4″ minus gravel). As in the sketch I did, you extend the base past the edge of where the walk will go. You then use a paver edge restraint spiked into the compacted base. Two things caused the walkway in the photo to fail: they clearly did not extend the base far enough, and they did not use proper edge restraint. It’s a shame because otherwise it’s not a bad looking walkway.

If you’re looking for help planning your landscape project and you want to be sure that the crews know what needs done, contact us for a consultation. We’d love to help your front walk look gorgeous – and not like a zipper.


Do I Have Color Options for Flagstone Walks and Patios?

If you live in Virginia, Maryland, or DC and someone says “flagstone patio”, what comes to mind? Something that looks like this, maybe?

PA variegated flagstone

I’d wager at least 90% of the flagstone patios installed in the DC metro area use this type of stone, generally referred to as Pennsylvania variegated flagstone. There are two reasons for this:

  • It comes from Pennsylvania (thus the clever moniker) and it’s widely used, two factors that cause this to be a very economically priced stone.
  • While it’s primarily made up of cooler tones (blues, grays, and silvers) there are always a few golds and rusts so this stone plays well with a lot of different house colors.

I love the look, and because I can get it in so many sizes I can have a lot of fun with details like patterns and borders and such, like the flagstone patio in Bethesda Maryland, below:

bethesda flagstone patio

Not everyone wants the same flagstone everyone else has, though. Are there other options in our area? Sure thing. For example, with this project I wanted to use a stone that ran a little darker and was more consistent stone to stone. This flagstone, known as Westmoreland Stone, fit the bill.

westmoreland stone walk

On another project, I worked with some folks who wanted to work in browns and tans – no cool colors. We used an irregular stone for the field (Tennessee Crab Orchard) and a pretty wild, psychedelic stone (Canyon View) for the borders and step treads. I love that it’s that little bit different.

tennessee crab flagstone patio

If you’re planning to have a patio installed, how do you find out what your options are? One way is to check out your local stoneyards. Here are a few Virginia stoneyards where you can see the product in person:

  • Charles Luck
  • Sislers Stone
  • The Stone Center

The other way, of course, is to work with a landscape designer who knows his (or her) locally available stone. If you want a patio or walkway that doesn’t look just like what all the neighbors have, contact me to discuss your project and see if Revolutionary Gardens is right for you!


What Concrete Paver Goes with My Brick House?

I get asked that question a lot, as you can imagine. After all, Virginians love their brick homes, so I design a lot of patios for brick homes. I always look at two things: color and size/style.

brick house landscape

Color

Color is the easiest to deal with first. If you have a red brick home I will do everything in my power to talk you out of a reddish concrete paver. The reason is simple. You will not get a match. Not gonna happen. Instead, you’ll end up looking like you attempted to match, and failed. That’s why on a house with reddish-brown brick, I recommend using a gray paver. After all, gray flagstone looks beautiful with brick, right?

virginia paver patio design
source: Techo-Bloc

Size/Shape

I will also dissuade you from selecting a brick-sized paver, like the Techo-Bloc Victorien. One reason is the same as my color reason – you’ll look like you tried to match and failed. But also, brick creates a pretty busy pattern. I prefer to use larger pavers because the size creates a pleasing contrast with the brick. If your home uses a traditional brick, the smallest size I’ll want to use is a 6″x6″ or 6″x9″ paver/paver mix.

source: Techo-Bloc
source: Techo-Bloc

I’m not crazy about the pavers that attempt to look like irregular flagstone as I just don’t think they pull it off successfully. When I talk about style I like the look of a tumbled paver, and possibly even a paver with a wet cast finish that looks like natural stone. Again, it’s all about creating a pleasing contrast with the brick.

The Big Exception to Matching

A lot of people don’t realize that clay pavers are an option as well as concrete pavers. They’re tough, durable, and according to the Brick Industry of America, they have a compressive strength equal to or greater than concrete pavers. So if you use a clay paver, I feel that you can match what’s on your house. Again, you just need to design it in such a way that you don’t have a ferociously busy visual that looks like a giant moire pattern from a distance.

Overwhelmed by the options? Filtering through the myriad options and selecting the best one for your home is what we do. Contact us for a consultation!

Building a timber wall – will it last?

I like to play a game I call underrated/overrated. You can play it with bands, actors, foods, anything you want. Example: underrated/overrated = Hudson Hawk is a brilliant and underrated movie/ Sideways is an incredibly overrated movie that makes me want to guzzle Merlot out of spite. See how it’s done? Please leave your own under/over thoughts in the comments.

A part of the landscape that I think is underrated is the timber retaining wall. There are two objections that I see raised about them: aesthetically they aren’t great, and wood will eventually break down and the wall will fail. Both very valid points. However.

Pressure-treated timbers are typically what you use for a timber retaining wall. The fun fact about pressure treated wood is that it is warrantied – but putting it in continuous contact with the ground voids the warranty. Even so, you can reasonably expect to get anywhere from 10-20 years out of a timber wall. We did a job a couple of years ago where we removed a timber retaining wall so we could install a new Techo-Bloc wall. The existing wood wall was fifteen years old and we expected it to come apart like a castle made of wet Kleenex. Instead it took days of work with demo saws and pry bars. Fifteen years later and the wall was still solid. I was impressed.

Retaining Wall Detail
source: Fairfax County Wall Detail Packet

How do you get a wood wall to last so long? It all comes down to proper installation. I refer everyone to the Fairfax County Retaining Wall Detail packet, because it applies to most cases. You want a solid, compacted gravel footer; you want to make sure that every timber is level and true as it’s installed; you want to use 1/2″ galvanized spikes to hold the wall together; you want to use deadmen as shown to tie the wall into the grade behind it; and you want to backfill appropriately, including clean drainage stone, to keep water from causing the wall to fail. It may not be easy to execute (it’s still a lot of work and it takes skill to do well) but the principles are sound.

“But Dave,” you may say, “that doesn’t address the fact that a timber wall looks like a stack of lumber in my backyard.” Well, fair point my imaginary naysayer. This is why I don’t recommend a timber wall in every situation. If the wall is going to be front and center as someone drives into your property, it’s probably not the ideal choice. If you just need a functional wall  and you won’t often see it, though, a timber wall could be a great way to make room in the budget for something else. In this scenario, we had to build the grade up almost six feet to create a waterfall. Rather than spend thousands of dollars to retain the soil at the back of the falls with a gorgeous stone wall that only the deer and squirrels would see, we used a timber wall.

timber wall behind waterfall

Worried about the aesthetics? This is what it looks like from the house. Yep, you don’t see it.

pond waterfall design in northern virginia

There you have it: the humble timber retaining wall. It may not be glamorous and it may not be a forever solution, but if you need to stretch the budget and can conceal the wall, I hope you’ll at least consider it.

Are you making a major change to your landscape and looking for ways to stretch your budget and still make it look great? I can help with that! Contact me to set up a consultation. I’d love to help you fall in love with your property all over again.