Why did this paver walk fail? The value of edge restraint

failed edge paver walk

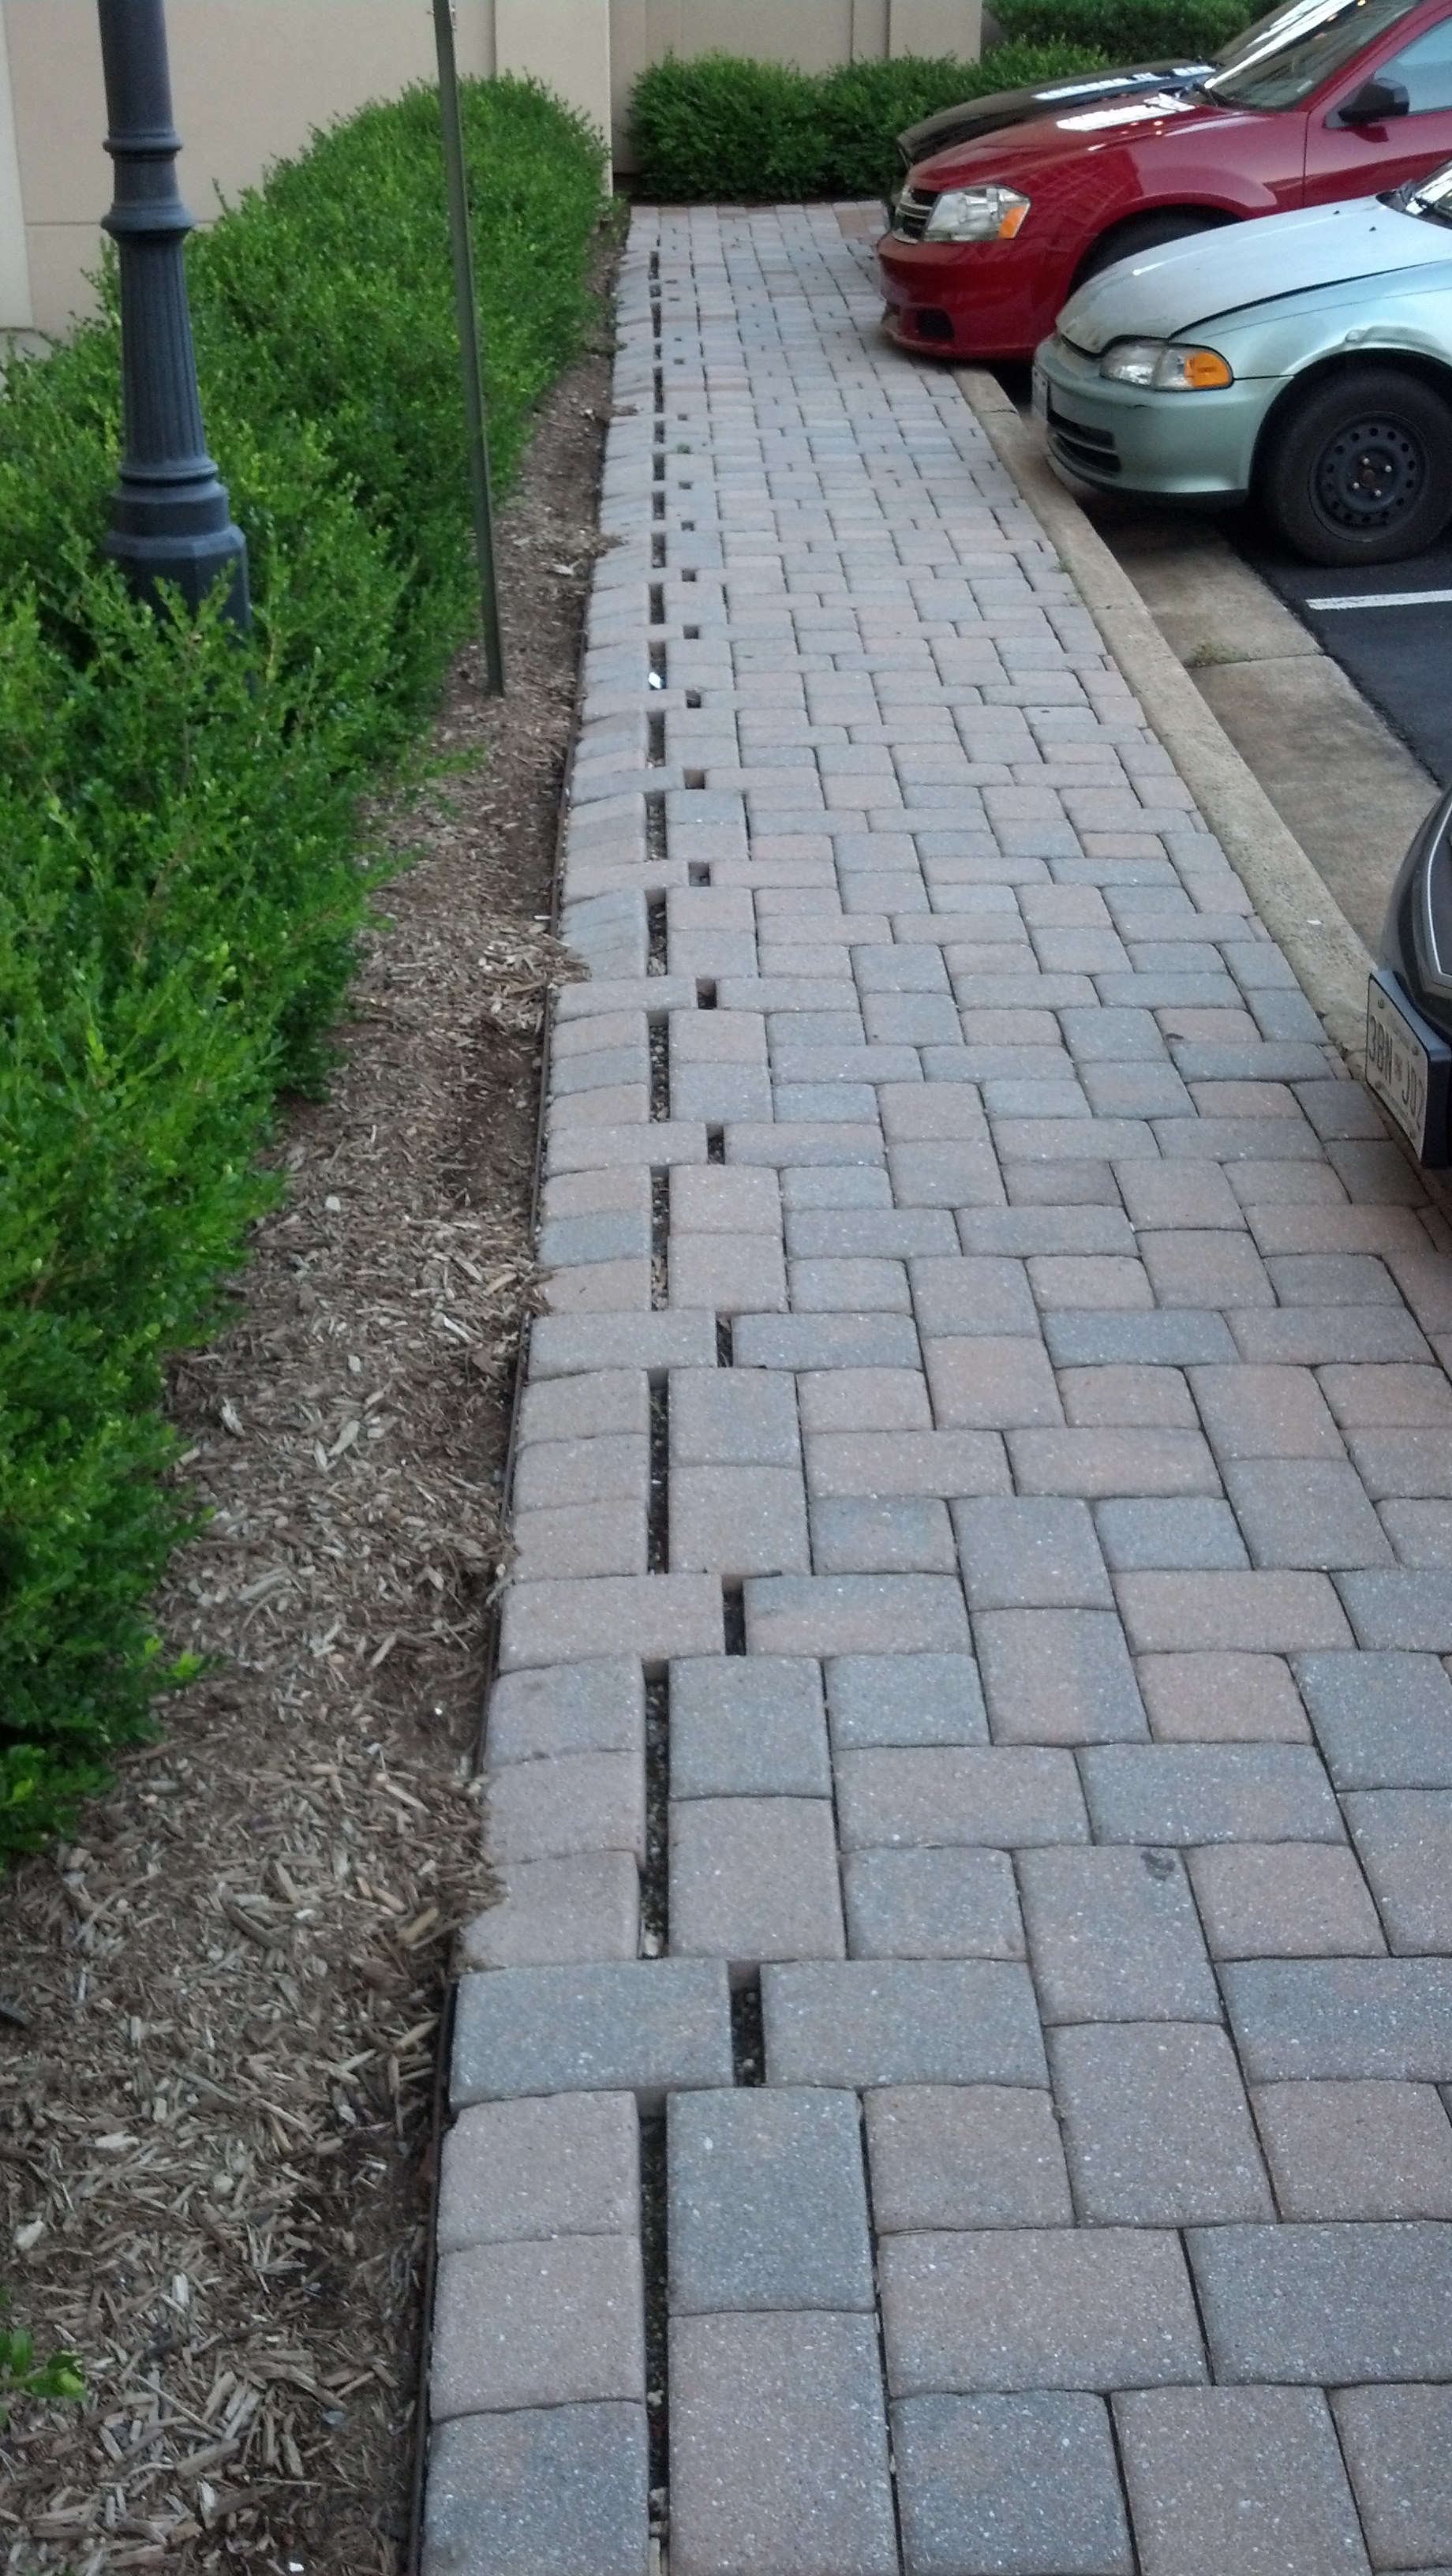
I was walking into a meeting at a hotel last week when I saw what my path looked like. Here’s a hint: your paver walk should NEVER look like a half-unzipped Members Only jacket. How did this happen? Improper edge restraint. To explain, let’s step back and look at how a paver walkway should be installed.

Paver-Edge-Sketch

Keeping it quick and dirty, you excavate to undisturbed soil and build back up with a base of compacted 21A (3/4″ minus gravel). As in the sketch I did, you extend the base past the edge of where the walk will go. You then use a paver edge restraint spiked into the compacted base. Two things caused the walkway in the photo to fail: they clearly did not extend the base far enough, and they did not use proper edge restraint. It’s a shame because otherwise it’s not a bad looking walkway.

If you’re looking for help planning your landscape project and you want to be sure that the crews know what needs done, contact us for a consultation. We’d love to help your front walk look gorgeous – and not like a zipper.


Travertine Paver Patio Installers in Virginia – What to Know

When I was designing landscapes in Arizona, one option we had available to us was travertine marble tile. These were actual tiles – typically 12″x12″ and less than a half inch think – so they had to be laid in a mortar bed on a concrete slab. Shortly after landing in Virginia in 2005, I started seeing travertine pavers make an appearance.

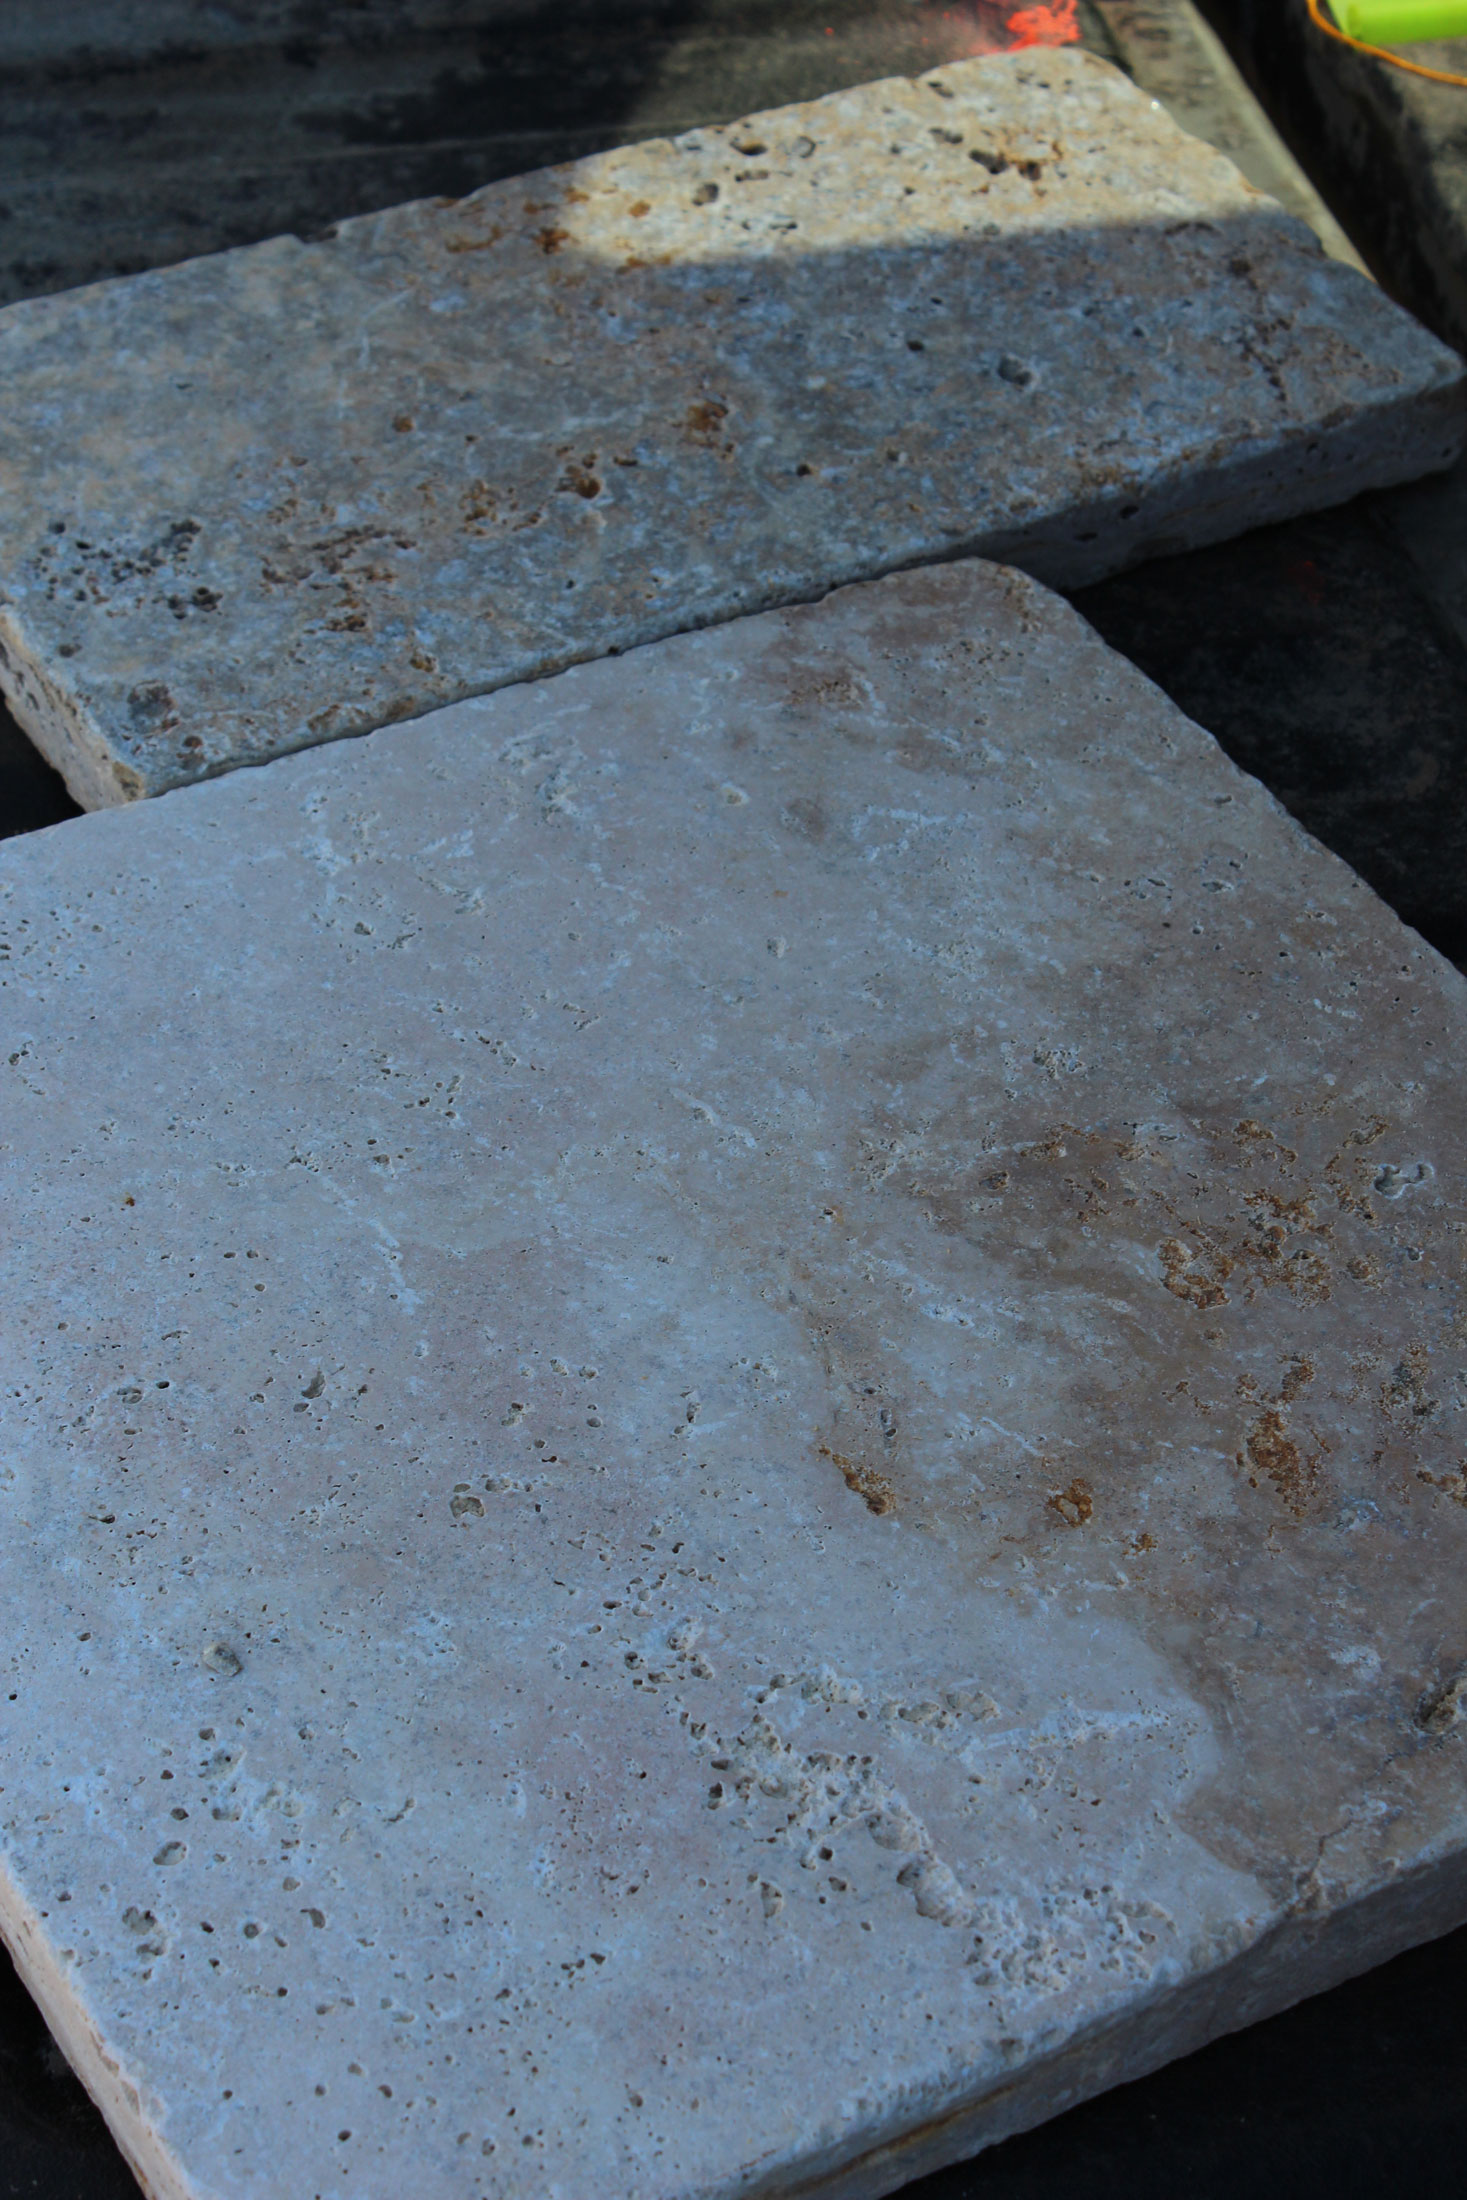
These are really cool because they’re an inch thick and are laid just like a concrete paver. You build up with a base layer of compacted gravel (21A or crusher run), then use a one inch layer of sand as your bedding layer. Once the pavers are in place they’re compacted and polymeric sand is swept into the joints. That’s it. It’s a beautiful finished product that has the ability to flex and move like a traditional concrete paver patio in Virginia. From the test data I’ve seen online, travertine pavers have a compressive strength similar to concrete pavers and can even be used for driveways!

The biggest challenge I’ve found with designing travertine paver patios in Virginia is making the materials make sense. Travertine in California or Arizona doesn’t look out of place. It can look a little foreign here, though. I recently designed a fireplace, seat wall, and travertine paver patio as part of a winery landscape design project. I used a plum-colored flagstone to tie in with the warm tones of the travertine and the rich reddish colors in the fireplace stone, and I’m quite pleased with how it turned out. All those color theory classes have finally paid off.

I’m starting my next travertine paver patio project this week, and I may have one more in the pipeline as part of a swimming pool project. The travertine pavers are a great product that (unlike concrete pavers and flagstone) aren’t in every other backyard. Making it work requires someone who can integrate this new material in the landscape design while blending all the colors harmoniously. In other words, you need a landscape designer. Contact me to set up a consultation if you’re looking to build a travertine paver patio in Virginia, Maryland, or DC and I’ll be happy to talk with you about it!

The Importance of Compaction for Installing a Paver Driveway

On behalf of a contractor client I’m working with a great couple who are building a new custom home in northern Virginia. As part of the landscape design, they wanted to incorporate a paver front walk and a paver driveway. When they saw the proposal, they were surprised by the cost of the driveway and wanted to know the reason behind the price.

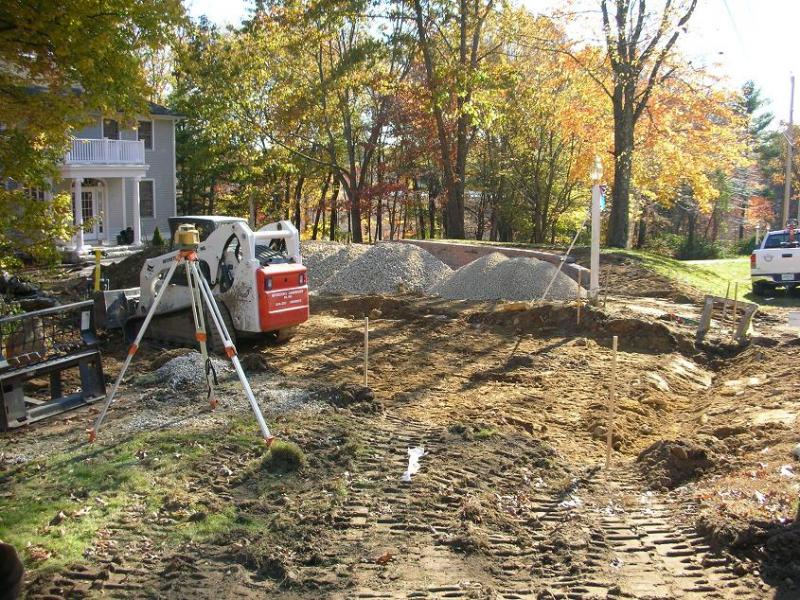
Photo credit: Interstate Landscape of New Hampshire (click to follow)

On any paver installation it’s important to dig out organic soils and any fill to get down to undisturbed soil. For a driveway you want a minimum of 6″ of compacted aggregate base – that’s a minimum number. For these homeowners their home is being built on fill. That’s fine, but all that loose, fluffy fill has to be removed. If we build on it, it will settle over time and the driveway will fail. Therefore we’re going to have to dig down a good bit, which means we’ll then need to add compactable material to get back to the right grade. For this we use an aggregate (gravel) that contains a mix of large, small, and fine pieces of stone. Around here it’s generally called 21A or crusher run. You can’t just dump it and go, either. The correct procedure is to compact in lifts. In straight English that means we spread a 2-4″ layer of gravel, compact it, and repeat until we’re back up at the right height. It’s not a quick process and you can’t rush it.

Obviously most folks outside the industry will read that last paragraph and hear the voice of Charlie Brown’s teacher. That’s ok, because I found a video that illustrates how far down we may have to go and the type of equipment used:

What happens if we try to take a shortcut and skip compaction? The driveway will fail. A minor failure would mean that the pavers settle and you see ruts form where you drive in and out of the garage, or low spots develop and hold water. That’s a best case scenario, and the only way to correctly repair the problem is to pull up the pavers across the entire affected area and correct the base aggregate. Anything else is a short term Band-Aid fix.

So what did my homeowners do? They’re still mulling it over but it’s my job to learn what my clients are comfortable spending and help them get there. I took a hard look at the project and there’s really nothing I can value engineer out of the installation process that won’t result in a flawed build. So, we’re looking at a more traditional concrete or asphalt driveway for now, and if we go that route we’ll revisit the pavers down the road. After all, it’s better to use the materials and methods that fit your budget than it is to try and cheat the costs – and get an inferior product that won’t last.

Being a landscape designer isn’t just drawing pretty pictures, it’s understanding the construction process well enough to be an advocate for my clients (all of whom are awesome, by the way). If you’re looking for someone to create a gorgeous landscape and someone who can guide you through the entire process, give me a call at 703-679-8550 or click the big blue Contact button. I’d love to talk with you about your project.

What Landscape Work Can Be Done in Fall and Winter?

I get this question a lot this time of year. I get my fall rush once the kids are back in school, it takes a few weeks to get through the design process, and suddenly we’re just past Halloween. Is it too late? It depends on what you’re doing.

Plants

Woody trees and shrubs can be planted almost year-round in Virginia. With the exception of last winter, I’ve had plants go in – and do well – all winter long. As long as the ground isn’t too hard for us to get a pick and shovel in, we can plant woody trees and shrubs. Perennials are another matter. They are generally too delicate to plant after about November 1st, because we’re pretty certain to get a hard frost after that point. I did a post a while back that talks about safe frost dates for northern Virginia.

Asphalt

Most asphalt companies in Virginia shut down sometime in December, and open up again in April. If we’re redesigning a driveway, we need to keep this in mind.

Concrete & Mortar

Concrete is going to be the happiest when the nighttime temperatures stay above freezing. That’s not to say that concrete work shuts down for the winter. On cold days, my masons have set up tents with propane heaters and laid stone all day long in t-shirts. At night, thermal blankets can be placed on flatwork to keep the temperatures high enough. Pointing up and cleaning can get slowed down a bit because the concrete stays “green” longer, but that’s not a problem as long as the mason knows what s/he is doing.

Pavers

Pavers (and segmental retaining walls) can be tricky in the winter. The problem happens when you have a significant amount of rain, sleet, or snow on the base or sub-base. If this moisture is allowed to freeze, you can have long-term settling problems. The solution is to keep the area as dry as possible, and use thermal blankets or other means to keep the base material from freezing. Again, the work can be accomplished in the winter, it just requires a knowledgeable contractor.

Ponds and Waterfalls

These can certainly be installed in the winter, but temperatures below freezing can make working with water less fun than on a sunny, 70 degree afternoon.

Decks, Porches, Pergolas

As long as snow’s not a problem, these can be built all year long

And what if you’re just starting to think about the design process? Winter is a great time to start the design process. I’m currently booking December and January projects. If you have a project you’d like to start planning, send me an email and let’s get started!

How Do Permeable Pavers Work?

Permeable pavers are becoming a popular choice, especially in Northern Virginia. As local governments have become more concerned about stormwater management, they’ve clamped down on the amount of runoff that leaves your property. If your total square footage of impervious surfaces exceeds the percentage allowed (they typically include homes, garages, sheds, pools, patios, and driveways), you either have to scale back your project, install a rain garden, or utilize permeable pavers.

Calling them permeable pavers, however, isn’t 100% accurate, as the water does not penetrate the paver itself. Rather, the pavers are designed to have gaps between them that allow water to pass through into the soil. An effective installation is all about the base.

Installation methods vary by manufacturer, and you should always follow their directions or those of a local soil engineer. This is what Techo-Bloc recommends in their installation instructions for the Permea paver:

  • Excavate to the required depth (base + bedding layer + paver thickness)
  • Place a layer of geotextile fabric on the soil to prevent soil particles from migrating into the base stone
  • Install a minimum 6″ deep layer of 3/4″ clean aggregate (in VA, it’s sold as 57 stone) and compact
  • Place another layer of geotextile fabric atop this aggregate base
  • Install a 2″ layer of 1/4″ clean stone (sold here as #8 stone) and compact
  • Lay the pavers per the manufacturers instructions, setting them hand tight (lugs will act as spacers)
  • Install border pavers
  • Install curbing or edging blocks
  • Install 3/8″ stone between the joints
  • Compact the entire patio

So what’s the big deal if you go off script and lay permeable pavers like you would standard pavers? Well, for starters, you’re likely to get some uneven settling from improper compaction (remember my post about problems with paver patios?). You’ll also get a patio that won’t allow water to flow through it. A standard patio base is 21A or crusher run- an aggregate mix with a variety of particle sizes all the way down to “fines.” When compacted, all these particles lock together, and good luck getting water to drain.

The good news is that the paver manufacturers see the direction the market is headed, and have provided thorough documentation for how to use their pavers. If you’re installing the pavers yourself, just do what they say. If you’re hiring someone, ask them what materials they’re using. If they mention 21A or sand, it’s time to find a different installer.

Where to Buy Pavers in Northern Virginia

Since we’re talking about pavers lately, I figured it may be useful to point out where they’re available to look at and purchase. I’m a big fan of display yards, where they’ve taken the time to lay a variety of paver styles and colors so you can see not only what the paver looks like in pattern, but also get a true sense of the color. Trust me, you never want to make your color selection based solely on a photo in a catalog.

One place that’s on my way into Manassas is the Stone Center (warning to at-work web surfers: their website has a video that starts playing as soon as the site loads. Don’t get fired). I stopped on my way home the other day to shoot some video of the EP Henry and Techo-Bloc display areas. Just FYI, the Stone Center also has a display area for Eagle Bay, which is a lower-priced line of pavers and segmental walls. And as the name implies, you can also buy a variety of stone products there- but that’s another post.

Problems with Paver Installations

So you’re looking for a contractor to install a paver patio or walkway for you, and you’re doing your due diligence. You’re interviewing contractors, looking at portfolios, and maybe even going out to look at a few jobs. Just in case you’re not totally sure what to look for, I’ve pulled together a few photos from my travels. These are all projects where I’ve been called out to do a a redesign because issues have popped up. Let’s get started:

1- Incorrect pattern/ layout

The full technical term for pavers is “interlocking concrete pavers.” This is because the way we make sure your patio stands the test of time is by laying the pavers so they interlock. Think of a brick wall. When you’re building with brick (or even Legos), overlapping joints are stronger than a seam extending all the way up a wall. Flip it horizontally, and it’s just as important for a paver patio. Look at this one:

photo illustrating poor joint layout on paver patio

This patio is fundamentally flawed, because there’s a weak joint running almost the whole length. There’s a similar long joint just to the left of it too. Why is this a problem? Pavers work as a system: you use a pattern with a strong interlock, use a polymeric sand in the joints, and it holds itself together. Even if you get movement from frost, the patio remains a strong unit. With enough movement, these long joints provide a place where you could get heaving and gaps. There’s no excuse, either. Pay attention, look behind you as you lay, and swap out your stones if you see you’re making a big joint like that. It’s Patios 101.

2- Improper Base

I can’t hammer this home enough. If your base is wrong, it doesn’t matter how pretty your patio is. It will not stand the test of time. Let’s look at an example:

patio failing due to improper compaction

This is the same job as the first photo. You can see that the contractor used a retaining wall to bring the outside edge of the patio up to deal with the grade change. Ignoring the issues with the wall, you can see that the patio has settled and dropped unevenly in a number of spots along the wall. There are two likely scenarios for why this happened. First, the contractor may have built up the raised area with untested soil and did not compact properly. Soil should not be used as fill unless an engineer has tested it and given compaction instructions. The other possibility is that the contractor built up with an aggregate base as he was supposed to, but did not compact it properly. Unfortunately there is not a quick fix. The only way to fix the patio would be to pull up all the paver in this section, redo the base, and re-lay everything. It probably wasn’t worth going with the lowest bidder after all.

3- Improper Grading

It’s standard practice to pitch your hardscapes away from the house, to minimize the likelihood of water intrusion. It’s a no-brainer. Unfortunately some people can’t grasp this simple concept.

4- Poor Design

You had to know this would come up! Some design issues are minor, like picking the wrong color paver and clashing with the house. For example, it can be hard to pair a paver with a brick house (I usually don’t try- stone is great). Other design issues are a bigger deal.

dangerous steps

Behold the steps of death! There’s no handrail- you should have a rail if you have more than two risers in a row- and thanks to a poor design by the builder, there’s no sensible place to put one. So you walk out the back door onto a skinny little landing and immediately have to negotiate steep, narrow steps. There’s also a pretty sizable step-down from the patio and nothing to reinforce where the edge is. I always design for that fourth glass of wine- no broken ankles on my patios, please. Here’s an even scarier set of steps:

Source unknown- please let me know if you know

I hate “wedding cake steps” with a passion. You have eight steps, which is probably around 4 feet in elevation change, with no handrail. There’s also no guardrail at the edge of the upper patio (code says over 20 inches high requires one), and look at how tiny that first step is! If you misjudge where that first step is, you’re going for a ride. Looking at the workmanship, the job looks very well put together- but the design is terrifying.

The other design issue that bugs me is poor space planning. I studied interior design for two years, and I loved space planning class. It was tough, though, because you learn how hard it is to move people from point A to point B efficiently, without wasting hundreds of square feet on “hallways”. I’ve seen some enormous patios that are only big because the person building it couldn’t figure out any other way to give the client the function he or she desired. Every square foot wasted is wasted money. Work with a good designer, and have money left over for plants, lighting, and a big patio-warming party.

I don’t want to end on a down note; there are also a lot of really talented, professional contractors out there. Let me leave you with a photo of a beautifully built patio that you could land a plane on:

Well built paver patio

The Cost of Pavers vs. Flagstone in Virginia

When working on a landscape design, we always try to select the material that best complements the architecture of the home, the look and feel of the space, and the goals of the people using that space. All these are important considerations, but we all have budgets; people want to know, “what’s it going to cost?”

There’s a perception that pavers are less expensive than natural stone, and that is true in most circumstances. There are a wide range of paver choices and that is the biggest variable in pricing a project. On the super low end are the pavers sold at the big box stores, but I won’t even consider specifying these. Among the “real” paver choices, the least expensive choice is usually the paver that looks most like a brick in size and shape. Techo-Bloc sells these as Atlantis and Victorien, EP Henry calls them Brick Stone and Historic Brick Stone, and many other manufacturers sell them as Holland Stone. From there, the pricing is extremely variable, with Techo-Bloc’s Monticello paver being one of the more expensive I’ve seen (but a really cool product). In general, a normal-sized patio or walkway runs from $15 to $22 per square foot installed. If you’re doing a larger area like a driveway or very large, open patio, the price per square foot may end up a good bit lower because the base preparation can be done with larger machines in less time.

It’s worth mentioning that not all installers follow the same procedures when installing pavers. If you’ve ever seen a paver project where depressions have formed over time, that occurred because of poor base prep. I won’t go into the details of proper prep here, because the Interlocking Concrete Paving Institute is considered the authority on the subject. If you’ve gotten wildly differing quotes for a project, ask them about their base prep. Everyone’s material costs will be roughly the same, so the base is often the difference.

What about stone? I’ve surprised some of my clients by presenting stone as a realistic option for their budget, when they’ve assumed it was out of reach. There are two styles of flagstone for typical installations. You have rectangular, pattern flagstone and then there’s irregular (aka broken) flagstone. The cleanest, most maintenance-free installation method is to pour a new concrete slab with the flagstone wet-laid with mortar. For rectangular patterned flagstone, the installed price ranges from $18 to $33 per square foot. Irregular flagstone is a more time-intensive installation process as the goal is to fit pieces with uniform, tight joints. For this reason, the installed price for irregular flagstone typically runs from $28 to $40 per square foot.

If you love the look of stone but want to be a bit less costly, you can opt for a flagstone patio in stone dust. The base is a compacted aggregate stone base, with stone dust for a bedding layer and stone dust between the joints of the dry-laid flagstone. I only recommend rectangular patterned flagstone for this application, as the smaller pieces from irregular flagstone can move around too easily. Flagstone in dust, as it’s often called, can run from $17 to $23 per square foot.

Big disclaimer time: these prices are based on historical averages of jobs in which I’ve participated. These prices are also for a patio or walkway that is going on mostly level, even ground, without a lot of excavation or additional base material needed. Demolition of an existing walk or patio will cost more, as will adding steps, retaining walls, or other features. If you have a newer home, you will have a lot of disturbed soil around your foundation. If the patio is very close to the house, your installer may recommend digging down to undisturbed soil for best results. This is expensive, but well worth it.

Hopefully these ranges will help you at least begin to determine a realistic budget for your project. If you have questions or comments, use the comments box or shoot me an email.