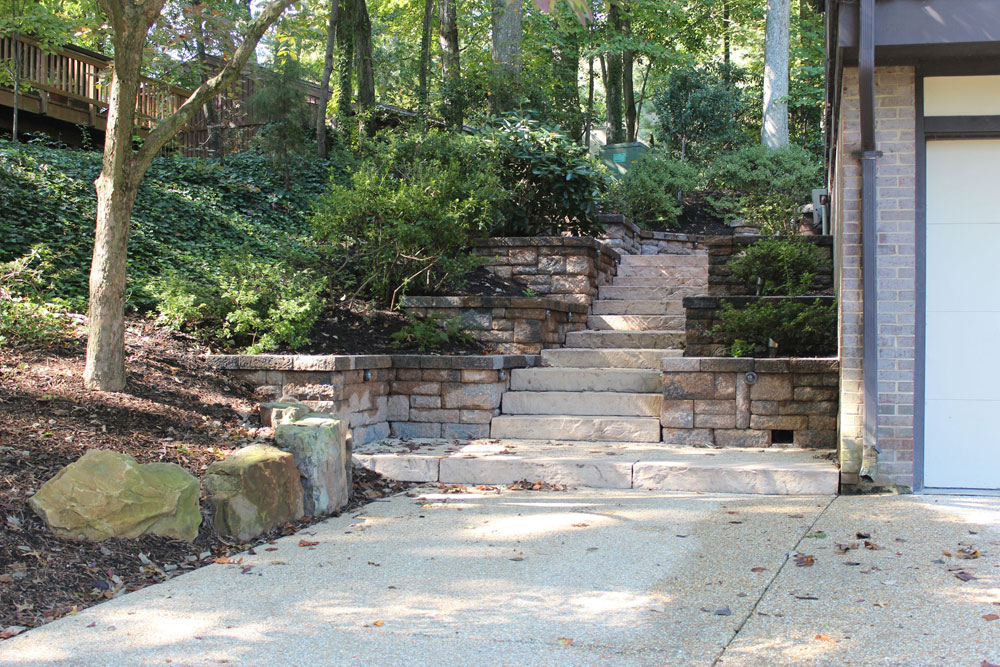
I try to avoid walls where possible, but sometimes you just don’t have a choice. Segmental retaining walls can be a great choice because they don’t require a footer all the way to frost depth, they don’t require mortar, and even if access is tight you can carry the blocks one or two at a time into the site. I would know – we did a job like that in California where we literally spent an entire day carrying an 80 lb block in each hand from the driveway, along the garage, and through the gate and up the stairs past the pool. Who needs the gym?
Segmental Retaining Wall Construction
Segmental walls are simple in theory but demand planning and precision to do them right. They require that the appropriate amount of wall is buried, the footer is the correct size, and getting the first course level is critical to a successful wall. Always follow the manufacturer’s installation instructions; these are just general guidelines to help you get started. This post is not intended to serve as installation instructions.
1. The footer
To begin your wall, you’ll need to dig down for your footer. For the purposes of explanation let’s say you’re building a 24″ tall wall. The leveling pad (essentially your flexible footer) should be at least 6″ thick. Typical manufacturer instructions say to bury at least 10% of the height of your wall, or no less than 6″ of your wall. So 10% of 24″ is 2.4″, meaning a minimum of 6″ of the wall needs to be below grade. Therefore you’ll dig your footer 12″ down.
What if you’re building on sloped ground? You always want your wall to be perfectly level. Do not follow the grade with your wall! To accommodate a slope, this will likely mean stepping your footer down with grade. In other words, in this example with a 24″ wall, your footer should always be no less than 12″ below grade. Any time it would be less than that, you dig down the height of one course of block. See the example.
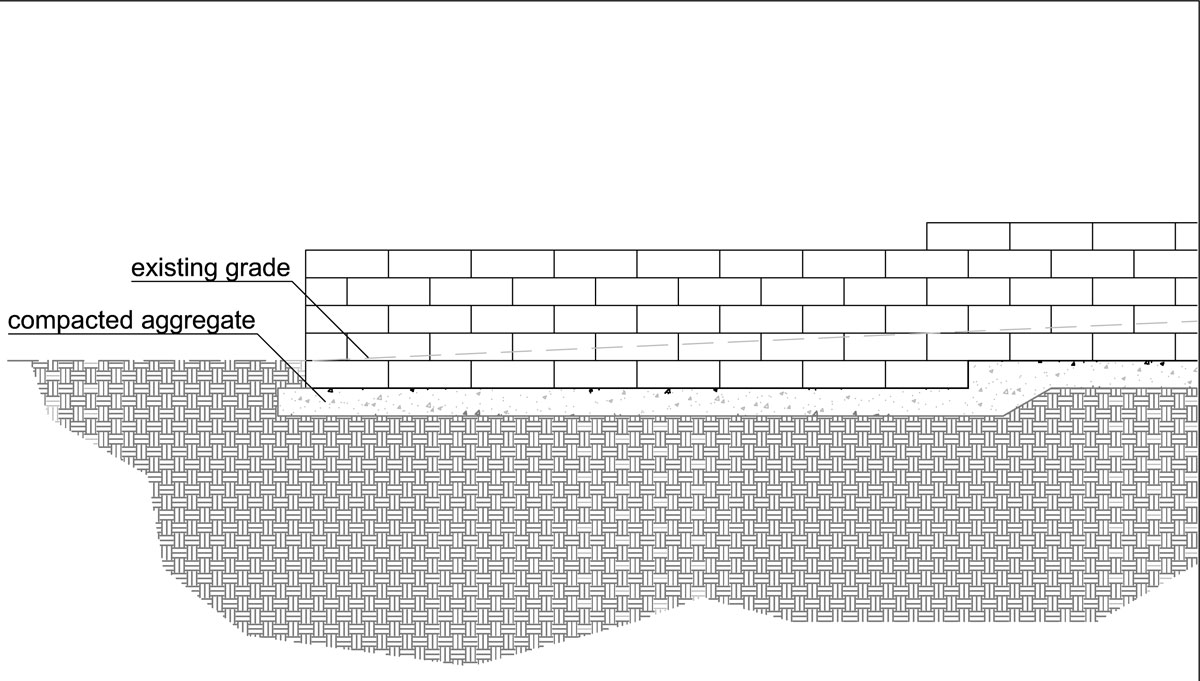
To determine the width of your trench, it should be no less than the depth of the block (front to back) + 6″ to the front + 12″ to the back. Isn’t that a lot of digging? Sure is, but it’s less effort than skimping while building the wall and having to redo it.
Once everything is properly excavated, you’re ready to start adding stone for the footer. First follow your manufacturer’s recommendations for laying in geotextile fabric, typically along the bottom and back of your excavation. Then add your 21A stone, also called crusher run, ABC stone, or 3/4″ minus. What you want is a stone that’s a mix of particles ranging from fines up to 3/4″ in size. Compact your stone with either a jumping jack or a vibratory plate compacter. The more smooth and level you can make the bedding layer the easier the next step.
2. The first course
The first course is critical. It has to be perfect or you’ll be fighting corrections the whole rest of the wall. Set your blocks, making sure that each block is level front to back and side to side. As you add adjacent block, use a string line or any other means of ensuring your first course is level. Once the whole first course is in, follow the manufacturer’s instructions to add the 4″ drainage pipe behind the wall. Backfill over and around this pipe with #57 stone (3/4″ clean stone). Any cavities in the block also get filled with #57s.
3. Subsequent courses
Clean any stone, dirt, or debris from the top of the blocks in place. Install pins or connectors as determined by the manufacturer and set your next course. Repeat to bring the wall to the appropriate height, backfilling with #57s (3/4″ clean gravel) as you go.
4. Install the caps
Wall caps can make all the difference between a wall that’s just ok and one that has a clean, finished appearance. Set your caps in place with the construction adhesive recommended by the manufacturer or your local supplier where you bought the block. Liquid Nails and other general construction adhesives will not hold up long term.
What about geo-grid?
Your wall installation may require geogrid at intervals to help create a strong, solid wall. Follow the manufacturer’s instructions very closely as geogrid can be critical to preventing wall failure.
It takes a lot of planning to build a segmental retaining wall that lasts but it can be a very DIY-friendly project. Looking for help on the planning? Download my FREE segmental retaining wall planning worksheet. It lists out what materials you need and how to perform these vital calculations. Fill out your information below to get your worksheet today, and to sign up for my email newsletter.