When designing a patio, there are times that only one type of material will do. Either the architecture of the home is so dominating that it dictates the patio, or maybe the client already knew what he or she wanted. Other times it’s not so clear-cut, and we have to weigh several different factors to decide on the “right” course of action. It’s just reality that we have to balance looks, longevity and budget. So what are our choices?
Concrete– It’s the old standby, and what most people are starting with. A basic, natural colored broom-finished concrete slab will be your least expensive way to go. Too plain? You can go with colored concrete, where pigment is added to the load in the mixer. This results in a uniform color all the way through. Or, if you’re looking for something even more decorative you can go with stamped concrete. The slab is poured, and pigment is applied to the surface and a stamp is used to create the appearance of stone or tile. The build process is the same for all: excavate the area, build forms, put down gravel and reinforcement, and pour the concrete.
______________________________________________________________________________________________
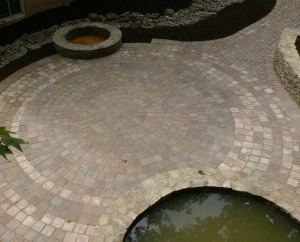
Pavers– For me, these sort of bridge the gap between concrete and natural stone. You can go with a fairly inexpensive paver, but those tend to look cheap. On the other hand, there are some really top-quality pavers. When people talk about pavers, they’re usually talking about concrete pavers. To give the paver a more natural look, the manufacturer will often tumble the paver to distress the edges. You certainly have options; I know that here in VA, I can think of a half dozen manufacturers of pavers available to me.
With a few exceptions, pavers are not mortared in place; rather, the installation process involves a compacted base layer of at least 4-6″, a 1″ layer of bedding sand, with the pavers set in the sand. Sand is then swept in between the joints of the pavers, helping to lock them in place. Manufacturers now use a product called polymeric sand, which sets up almost like a glue- no more worrying about heavy rains washing out the joints between pavers. Pavers are a great solution for driveways, because they’ll withstand heavy vehicle traffic if the base is prepared correctly. There are also some great pervious pavers that allow stormwater to percolate back into the ground instead of running off the patio or driveway and into a stormdrain.
_____________________________________________________________________________________________
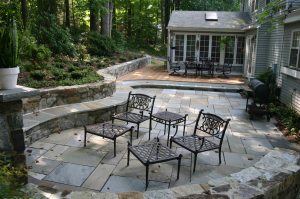
Natural Stone- This is by far my preferred choice. It looks great from the second it goes in, and as it weathers it only looks better. There are two methods of installation: mortared on a concrete slab, and dry-laid on stone dust. The first method is the more expensive; a 4″ thick concrete slab is poured, and the flagstone (or whatever type of stone you’re using) is mortared to the slab, and the joints between stones are mortared. It produces a very permanent, easily maintained patio. Irregularly shaped flagstones and rectangular-cut stones are both appropriate for this method.
The less expensive installation method is dry-laid on stone dust. There is a 4-6″ base layer of stone dust, or stone dust on top of road base, and the stones are set and levelled with a rubber mallet. Stone dust is then swept between the joints, wetted down, and more is then swept in to keep the stones from shifting. This is a great way of doing a patio with a rectangular-cut flagstone. If using irregularly shaped stone, you need to be careful not to use small pieces. Because there’s nothing holding them down, a small piece could create a trip hazard.
Of course, there are many other options available for your patio or walk- tumbled marble, travertine, cobblestone, urbanite, even compacted gravel. What we can do is limited only by our imaginations. Call or email for a consultation if you want to get started on planning your patio!


Leave a Reply