8 Simple Tricks to Get More From Your Landscape in 2021

Estimated reading time: 5 minutes

It seems odd to write something about outdoor enjoyment on a day when temps have been in the single digits, but let’s go with it! Obviously there’s no end to the major changes that can make a huge difference in the landscape, but what if there were small ones that could make a difference? Would you do them?

1. Consider your space planning

Space planning is at the core of everything I do when designing a space. It has the biggest impact on not just how you use the space, but whether or not you’ll even choose to spend time out there. Before spring hits, take a look at the spaces you used the most and the ones you used the least. What’s great about each? What’s bad about each? It’s crazy but sometimes a miniscule change can make a world of difference. If you’re always squeezing around your grill, maybe a 3 ft x 6 ft bumpout will get the grill out of your way. Think hard and you can get the most out of what you have!

2. Address hardscape maintenance

There’s no such thing as a maintenance-free landscape. Even concrete cracks. I don’t care how beautiful your patio or wall or deck was on install, after a few years it needs spiffed up. Consider the following:

  • pavers – pressure wash, top off polymeric sand, and seal (when temperatures permit)
  • decks – pressure wash and seal wood, oil exotic hardwoods like ipe and garapa, or give composite decks a good scrub
  • masonry – remove any loose mortar and repoint the joints

If you own a house there’s always something you could be doing!

3. Take a hard look at your plants and play botanical Hunger Games

Hakonechloa macra

Am I a treehugger and plant fanatic? Well, duh. Yes! But I’m not a sucker. That plant has a job to do in my landscape, if it’s not doing it, it needs to go. Maybe I can transplant it somewhere else on my property, perhaps someone else wants it, or sometimes it just needs to go. Here’s what I ask when looking at plants:

  • is it growing the way it should? If not, is it growing in a cool way that won’t cause problems down the road?
  • is it happy where it is? (right sun exposure, right water)
  • is it causing problems? For example, I’m 6′-4″ tall. Any trees growing over the grass are pruned up to 7 feet. If it was the type of plant that I couldn’t successfully prune like that, either it would have to go, or I’d have to redesign my lawn area.
  • am I bored? A gazillion peonies came with the house. Every few years I divide them and give them away, because while I love peonies they’re pretty lame from about, oh, May through March.

4. Be really, really good to the plants remaining

Prune broken and errant branches, address pest or disease issues, and if something doesn’t look right, call in a pro. I don’t really get into plant health issues but I have a fantastic arborist who does. He gets calls from me throughout the year.

5. Extend your season

basic virginia firepit

I fell in love with design as a career when I lived in the southwest and my aesthetic reflects that. The fact that I grew up in New England but view cold weather as a personal affront is what led me to choose a grill recipe for Christmas dinner this year. In summer, shade can make a huge difference when making a space more liveable, especially if you have the dreaded southwestern exposure. In winter it’s all about the heat. Patio heaters, firepits, and fireplaces, properly situated, can make a world of difference.

6. Extend each day

One of my clients was grilling and using his iPhone’s flashlight app to check the meat when he dropped the phone IN the grill. Whoops. Landscape lighting is a great way to make your yard seem bigger at night, get more hours of enjoyment from your yard… and not suffer the humiliation of your significant other seeing grill marks melted into your phone.

I count lighting as a simple, small fix because if you know what the end goal is, a landscape lighting system is totally modular and you can start with a very few lights.

7. Figure out the worst aspect of your yard and fix it – even if it’s a “for now” fix

GSP Bonnie

This is Bonnie. We adopted her this year and I love her, but she’s making the path between the back steps and the gate a muddy mess, which of course leads to mud in the house as well. That’s the area I’m focusing on this winter. Whether it’s doggie damage or a place to stash the trashcans, I’m guessing there’s something small you can do that will make you incredibly happy. Focus on that for the win.

8. Take a photo a day

It sounds stupid, I know, but what better way to force you to get out and get to know your yard better? The more you explore the yard the more likely you are to love it!

Here’s to a great new year in the garden! If your goal is to get a lot more from your landscape in 2014, a consultation with a landscape designer is a great first step. Learn how the process works, or just contact me to discuss!

Who cares for your landscape? That’s the last step in the design!

If I had a penny for every client who included “I want a low/no maintenance design” as part of their wish list, well… 170 pennies are in a pound, so I’d have a stack that weighs more than my biggest cat. I get it. We’re all busy, whether it’s work or kids or church or all of that, and we want something that will look as good in two years as it does today. But wait, landscapes don’t work that way.

culpeper landscape design

If you have an interior designed for you, maintaining that space comes down to keeping it clean and tidy (and maybe the occasional fresh coat of paint). If your landscape was well designed, it doesn’t look its best the day we pull off. It looks its best a few years down the road when the plants have all started to fill in and mature and create that beautiful, layered, effortless look. However, the wrong person caring for that landscape can inadvertently keep it from ever reaching its potential. As landscape architect Michael Van Valenburgh stated,

If you leave plant management decisions entirely to horticulturists who remain on the site after you, you are surrendering too much of your design. On the other hand, your design will be ill fated if you don’t collaborate with people who know horticulture. Collaboration—this is the unheralded key to management.

I came up through maintenance, then construction, before coming into design. I feel pretty comfortable designing with the long term in mind and I personally handle the pruning for a few clients because it allows me to guide the landscape in the direction I want it to go. I can’t do it for everyone in the nation, though, which is why I think it’s important to talk about what you’re looking for when seeking someone to care for a designed landscape. It’s not complicated:

  • Knowledge – can they identify what you have?
  • Skill – Do they know proper pruning techniques?
  • Vision – can they tell (by looking at the plans, looking at the landscape, or talking with you) what the goal is and how to get you there?
  • Professionalism – proper plant care is going to take more time than a mow and blow approach. Do you feel confident that they’ll use your time wisely? Can they provide you with a synopsis of what they did after each visit?

Whoever you select will play a large role in shaping your garden now and in the future, so I recommend selecting someone with whom you’re comfortable and with whom you can communicate well. Do that and you should have an easy relationship and a beautiful landscape.

Is your landscape still a great design away from needing a guiding hand to maintain it? Contact me to set up a consultation! I’d love to learn more about your project.


Does great landscape design make us happier?

Ever since starting my landscape design firm I’ve had an opportunity to meet with a lot of people, look at a lot of yards, and have a lot of conversations about how they want to get more enjoyment from their landscapes. There are recurring themes, no matter where my clients are (geographically or economically): they often want a space that they can live in and share with others.

happy family

It was with interest that I learned of a study of the positivity of the English language. Using computer analyses the researchers scored over 10,000 commonly used English words and assessed the perceived positivity of the words. In other words, what are the happiest words in the English language?

If you scroll down through the article, you can click on the link to Table S1 to download a list of the 50 most positive words. Here are some words I wanted to highlight:

  • laughter was #1
  • love was #3
  • celebration was #20
  • music was #23
  • weekend was #26
  • friendship was #34
  • holidays was #36
  • sunshine was #43
  • beautiful was #44
  • paradise was #49

Some of these words, or permutations of these words, come up in my client consultations. Many of these, even if they’re not actually spoken, are a part of how we envision spending time in a space. Celebrating, laughing with loved ones and friends, listening to music in the sunshine in our beautiful backyard paradise… according to how I’m interpreting this study, a beautiful backyard can lead to happy times!

It may sound sappy but what I love about what I do is we’re actually helping people live their dreams. Whether or not your favorite word made the list, I’d like to help you and your family create a space that will make you happy every time you see it. Call me or drop me an email and let’s get started.


Building a timber wall – will it last?

I like to play a game I call underrated/overrated. You can play it with bands, actors, foods, anything you want. Example: underrated/overrated = Hudson Hawk is a brilliant and underrated movie/ Sideways is
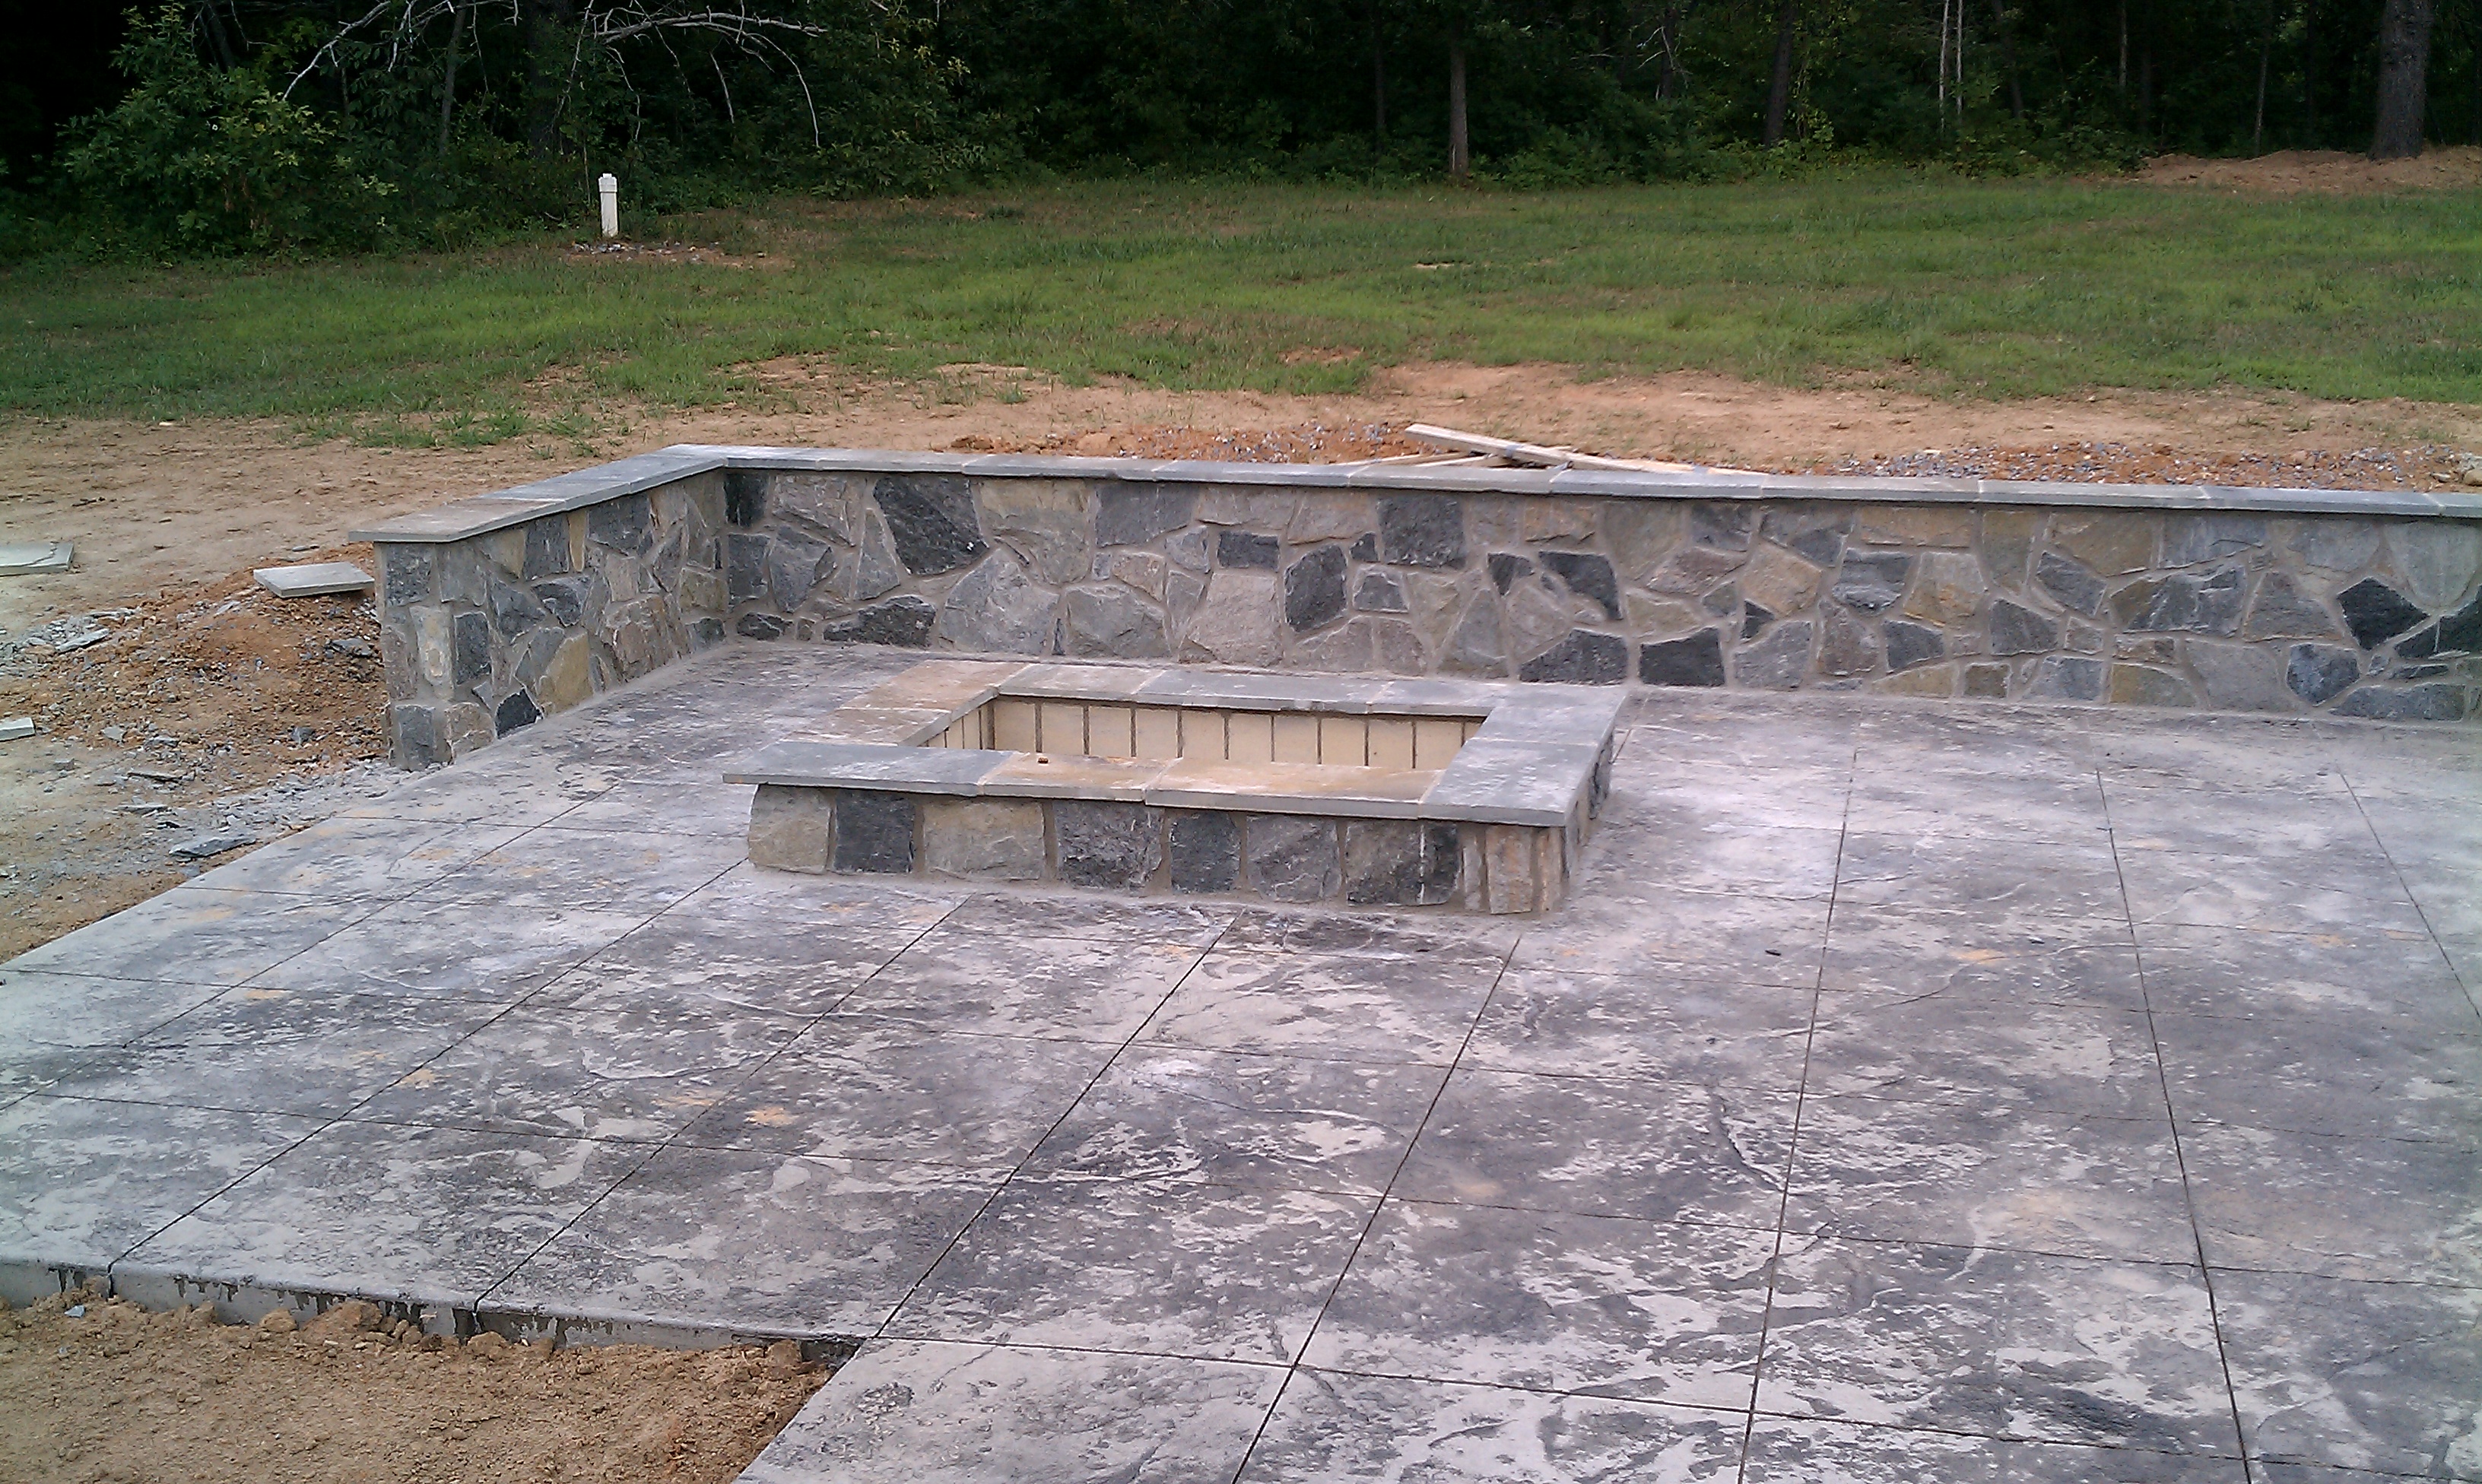
 an incredibly overrated movie that makes me want to guzzle Merlot out of spite. See how it’s done? Please leave your own under/over thoughts in the comments.

A part of the landscape that I think is underrated is the timber retaining wall. There are two objections that I see raised about them: aesthetically they aren’t great, and wood will eventually break down and the wall will fail. Both very valid points. However.

Pressure-treated timbers are typically what you use for a timber retaining wall. The fun fact about pressure treated wood is that it is warrantied – but putting it in continuous contact with the ground voids the warranty. Even so, you can reasonably expect to get anywhere from 10-20 years out of a timber wall. We did a job a couple of years ago where we removed a timber retaining wall so we could install a new Techo-Bloc wall. The existing wood wall was fifteen years old and we expected it to come apart like a castle made of wet Kleenex. Instead it took days of work with demo saws and pry bars. Fifteen years later and the wall was still solid. I was impressed.

Retaining Wall Detail
source: Fairfax County Wall Detail Packet

How do you get a wood wall to last so long? It all comes down to proper installation. I refer everyone to the Fairfax County Retaining Wall Detail packet, because it applies to most cases. You want a solid, compacted gravel footer; you want to make sure that every timber is level and true as it’s installed; you want to use 1/2″ galvanized spikes to hold the wall together; you want to use deadmen as shown to tie the wall into the grade behind it; and you want to backfill appropriately, including clean drainage stone, to keep water from causing the wall to fail. It may not be easy to execute (it’s still a lot of work and it takes skill to do well) but the principles are sound.

“But Dave,” you may say, “that doesn’t address the fact that a timber wall looks like a stack of lumber in my backyard.” Well, fair point my imaginary naysayer. This is why I don’t recommend a timber wall in every situation. If the wall is going to be front and center as someone drives into your property, it’s probably not the ideal choice. If you just need a functional wall  and you won’t often see it, though, a timber wall could be a great way to make room in the budget for something else. In this scenario, we had to build the grade up almost six feet to create a waterfall. Rather than spend thousands of dollars to retain the soil at the back of the falls with a gorgeous stone wall that only the deer and squirrels would see, we used a timber wall.

timber wall behind waterfall

Worried about the aesthetics? This is what it looks like from the house. Yep, you don’t see it.

pond waterfall design in northern virginia

There you have it: the humble timber retaining wall. It may not be glamorous and it may not be a forever solution, but if you need to stretch the budget and can conceal the wall, I hope you’ll at least consider it.

Are you making a major change to your landscape and looking for ways to stretch your budget and still make it look great? I can help with that! Contact me to set up a consultation. I’d love to help you fall in love with your property all over again.


Travertine Paver Patio Installers in Virginia – What to Know

When I was designing landscapes in Arizona, one option we had available to us was travertine marble tile. These were actual tiles – typically 12″x12″ and less than a half inch think – so they had to be laid in a mortar bed on a concrete slab. Shortly after landing in Virginia in 2005, I started seeing travertine pavers make an appearance.

These are really cool because they’re an inch thick and are laid just like a concrete paver. You build up with a base layer of compacted gravel (21A or crusher run), then use a one inch layer of sand as your bedding layer. Once the pavers are in place they’re compacted and polymeric sand is swept into the joints. That’s it. It’s a beautiful finished product that has the ability to flex and move like a traditional concrete paver patio in Virginia. From the test data I’ve seen online, travertine pavers have a compressive strength similar to concrete pavers and can even be used for driveways!

The biggest challenge I’ve found with designing travertine paver patios in Virginia is making the materials make sense. Travertine in California or Arizona doesn’t look out of place. It can look a little foreign here, though. I recently designed a fireplace, seat wall, and travertine paver patio as part of a winery landscape design project. I used a plum-colored flagstone to tie in with the warm tones of the travertine and the rich reddish colors in the fireplace stone, and I’m quite pleased with how it turned out. All those color theory classes have finally paid off.

I’m starting my next travertine paver patio project this week, and I may have one more in the pipeline as part of a swimming pool project. The travertine pavers are a great product that (unlike concrete pavers and flagstone) aren’t in every other backyard. Making it work requires someone who can integrate this new material in the landscape design while blending all the colors harmoniously. In other words, you need a landscape designer. Contact me to set up a consultation if you’re looking to build a travertine paver patio in Virginia, Maryland, or DC and I’ll be happy to talk with you about it!

Accessibility and Universal Design in the Landscape

When I was studying interior design I was fascinated by universal design. While I don’t trust Wikipedia for everything, their definition nails it:

Universal design refers to broad-spectrum ideas meant to produce buildings, products, and environments that are inherently accessible to both people without disabilities and people with disabilities.

I think universal design is brilliant. Well-done universal design functions well for everyone, and in many cases it’s accessible to everyone without looking institutional. Examples of this inside the home would be showers that look like any other high-end bathroom but can accommodate a wheelchair, or grab bars that match the home’s decor. We can carry these same ideas to the outside.

Keeping paths as level or as gently inclined as possible is one way of making them accessible to as many people as possible. The Americans with Disabilities Act has some good guidelines for this sort of thing, as it’s based on lots of research into what people can comfortably navigate. We can also make these surfaces ADA compliant, allowing wheelchairs to easily roll across them. Asphalt is good, gravel is bad. But what if asphalt isn’t the look we want?

Source: Cell-Tek's company site

There are products out there that can bind gravel to keep it looking natural while still allowing wheelchairs to use the path. Two of these are Gravel-Lok and Klingstone Path. If you’re here in Virginia, you can go to James Madison’s Montpelier (in Orange County) to see what Klingstone Paths look like in person. It’s pretty exciting.

For most other design considerations, universal design outside has many of the same considerations as the inside. Outdoor kitchens can be made usable for anyone, and lighting design becomes even more important for safety and wayfinding at night. If you’re looking to age in place, or you know someone who is, give me a call. I’d be happy to talk with you about design steps we can take to keep the outdoors accessible for years to come.

Understanding Flagstone: Sawcut, Thermaled, and Chiseled Edges

You’ve decided to use flagstone in the landscape. Good call! You may not be done making decisions, however. If the stone will be used in an application where you see the edge of the piece (step treads, wall caps, etc) you’ll have to think about the finished look.

Thickness

The first thing to consider is the thickness of the stone. The typical stone we use for a wet-lay patio can vary in thickness, from a hair under an inch to over two inches. When building steps or a cap, you want to see a consistent thickness of stone all the way across.

Something else to consider is that often a thicker stone will look better. That 1″ thick flagstone can look wimpy. A 2″ piece has a lot more heft to it. In some cases you may want to go even thicker, but just be aware that now you’re looking at significant additional costs.

The Edge – Sawcut Flagstone

The most common edge “treatment” isn’t really even a treatment. The rectangular slabs of flagstone are cut with a giant saw, and you can often see the marks from the blade on the stone. It’s fine, but it’s certainly not an aesthetically exciting finish.

The Edge – Thermaled Flagstone

One of the most common edge treatments (and one that I think looks great) is thermal-treated. This is accomplished by taking a piece of sawcut flagstone, wetting down the edge, and heating it with a torch. Done correctly the water turns to steam and pops off small pieces of the stone, resulting in a smoothly textured and very consistent surface. Done incorrectly, the piece overheats and splits. This is why most stone yards offer to provide thermaled stone.

The Edge – Chiseled Flagstone

Another way of treating the edges of flagstone is to give them a chiseled appearance. It’s another technique that’s simple to describe and more difficult to do: the mason uses a chisel to remove small, evenly sized pieces of material from the edge of the stone until it has a very cool, consistent rock-faced look across the edge. Some companies do this on site, but most get the stone from the stoneyard like this.

When designing with stone there are so many variables to consider. While it seems inconsequential at first, the right edge treatment can make the difference between a good result and a great result. If you’re looking for help achieving that great result, contact me for a design consultation!


Why I Don’t Use Sweetgum Trees

Every once in a while I’ll look over a drawing from another designer and see sweetgum trees in the plant legend. If they’re near the house or in a commercial setting, I usually recommend a substitution.

Sweetgums (Liquidambar styraciflua) are quick growing shade trees that provide both food and cover for all sorts of animals. I have a big one outside the window of my home office and I have to admit, those big five-pointed leaves do a great job of blocking the summer sun. That’s the only reason I haven’t had it taken down and replaced with a different species of tree. Why do I feel so strongly? Because of these:

My phone* is there for scale. Mature sweetgum trees produce gazillions of these pods, and just to stick it to us silly humans these pods drop long after leaf season ends. I finished raking leaves the first week in December, and it wasn’t until the last week of the year that my yard was carpeted with these things.

Walking across a yard full of these with shoes on is like walking across a field full of spiky ball bearings. If you’re barefoot, they’re like Legos – they will find your foot, and they hurt. The final blow is that sweetgums are pioneer trees, excellent at colonizing fields and speeding the transition from meadow to forest. That’s great in the wild, but what that means in the home landscape is that come spring, your beds will be littered with sweetgum seedlings.

credit: fcps.edu (click to visit source page)

Now anyone who knows me knows that I’m the consummate treehugger, and with a few notable exceptions (poison ivy is a big one) I believe that every plant has its place. If you’re landscaping a large estate property in Fauquier or Loudoun County, this could be a great tree for out in the fields. The critters will love everything about it and the pods won’t bother the field mower at all. But anywhere that people walk, or in a bed with open space – there are better trees. If you need help finding the right tree for your home, give me a call!

*= yes, I’m fully aware that the damage to my phone looks terrible. However, it still works and I’m one of those people who researches his electronics before purchase. I’ll get there, I promise!

Virginia Deck Design Explained, Part 1: Footers and Ledger Attachment

My name is Dave Marciniak, landscape designer and owner of Revolutionary Gardens, and I use jargon.

I’m deeply sorry.

However, the fact is that when it comes to building everything has a name. It’s easier to use the technical term than a long-winded explanation. A great example is the French phrase “l’esprit de l’escalier.” It’s literally translated as spirit of the stairs, but the meaning is “thinking of the right comeback in an argument after it’s too late (and you’re walking down the stairs).” So in the interest of making myself easier to understand, I’m going to do a multi-part guide to understanding the key parts of deck construction, starting with the first step of construction: the footers and ledger. If these parts of the deck aren’t right, your deck could fail pretty spectacularly.

source: fairfaxcounty.gov

Before we get started, a disclaimer is in order. This is not intended to be a how-to guide for designing or building a deck, just an explanation of terms. I recommend working with professionals to design and install your deck, and at a minimum you should ALWAYS pull permits and have your plans and construction reviewed by the municipality in which you live. Got it? Good.

Footers

Unless you’re cantilevering your deck (which is another post), you need posts. Those posts need to be anchored firmly in the ground, and your county probably sets out the minimum requirements in a Typical Deck Details packet. The current standard is to use a 6″x 6″  pressure-treated post. The size of your footers is dictated by the framing they’re supporting, but minimum requirement is 16″x16″ square, up to 24″x24″ square. As for the depth, you need to dig down to the locally accepted frost depth. In most of Northern Virginia, that is 24″ down. If you live farther north, you may be digging down three or four feet. All of your footers need to be anchored in concrete.

Ledger

In most counties you’ll need to have the ledger board in place when you call for a footer inspection. The ledger board is the framing lumber (usually a 2X? piece of lumber) that is attached to the structure of the house when building an attached deck. I prefer building a deck this way, because it means I don’t have posts right up next to the house.

The ledger attachment is critical to the success of your deck project. After all, if you do it wrong your deck can fall off. Therefore, there are detailed specifications on how to install the ledger. If you’re attached to the home’s band board (it’s the board along the perimeter of the home that’s in line with that level’s floor joists) you’ll need to remove the siding, install flashing, and attach directly to the board. Sandwiching the siding between the house and the ledger is bad.If your home has a brick veneer over the wood, the county may require you to remove that brick. I don’t recall ever being allowed to simply drill through the brick if it’s not structural.

If you’re attaching to masonry (poured concrete walls or block walls), you’ll use either expansion anchors or epoxy anchors to hold the ledger board in place. The great thing about working with approved details is that they even tell you exactly how many anchors to use and how to space them out. You don’t need to be a master baker to make brownies, you just have to follow the directions on the box. Just be sure you get good directions. Hiring a landscape designer who designs decks for homeowners in Virginia, Maryland, and DC could be a good place to start. Click my contact page and we’ll talk.

Alternately if you’re just looking for an off-the-shelf solution, to check out my friend Joe’s deck plan packages Click Here!

Next week we’ll talk framing: beams, joists, and how they connect to the ledger and the posts. The ankle bone’s connected to the leg bone, and all that good stuff!